There are so many easy and low cost methods to dehydrate food.
Let’s learn about the wild ways to dry food at home without a food dehydrator (or electricity!).
Why Dehydrate Food? What are the Benefits to Dehydrating Food?
There are so many excellent benefits for dehydrating your own food. You save money, prevent food waste from going to the landfill and avoid preservatives found in dried store bought foods. Whether you have a hungry family at home to feed or are planning a long backpacking trip into the wilderness, having a pantry stocked full of dehydrated ingredients will make your life easier at meal times.
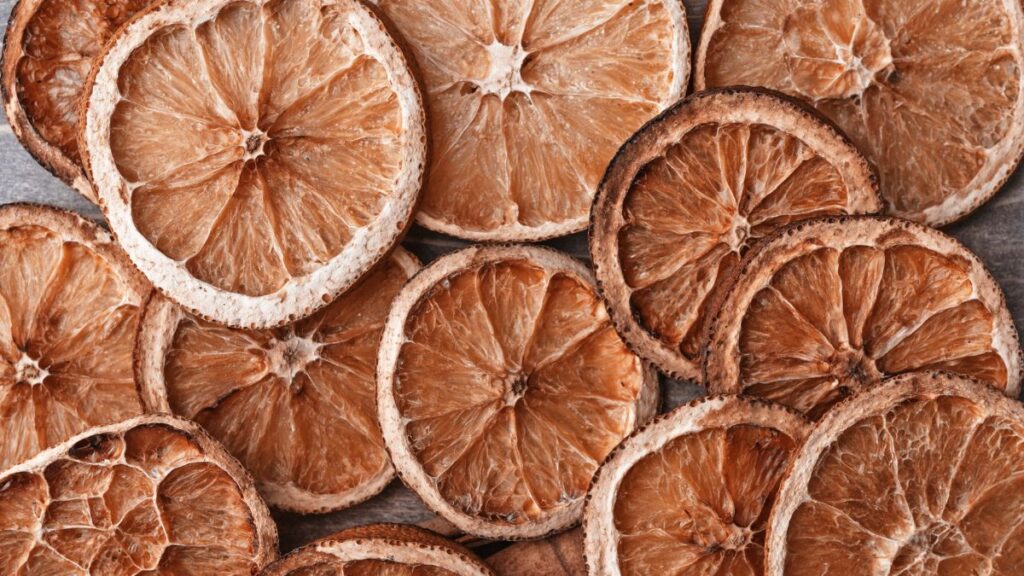
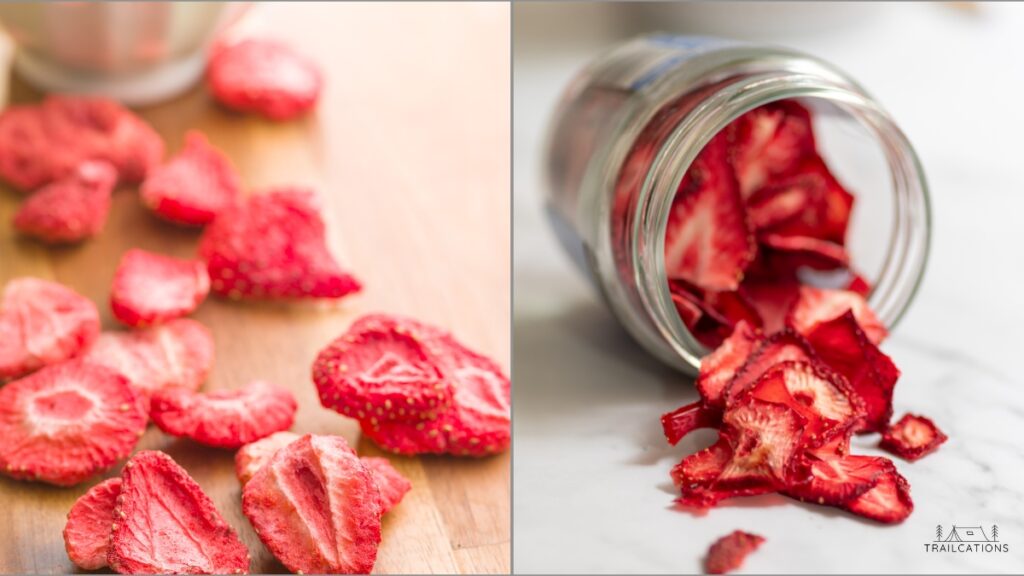
Sun-dried tomatoes add a splash of summertime to basic pasta sauces. Dried mango chunks transform a bland trail mix into a bit of hiking heaven. Even the pickiest eaters will have difficulty turning down snacks like delicious home dried fruit leathers!
You probably already use dehydrated foods when you cook (ex: garlic powder, herbs, etc.). But there’s a big difference in flavor and nutrient content between commercially prepared dried foods and home dried foods. For example, homemade raisins are much juicier and tastier than store bought raisins and packed with vitamins and minerals. Many commercially dried fruits are juiced first at the factories to make as much money as possible off the produce. The juice is then sold off and the nutrient-depleted shell of the fruit is dried and marketed to consumers as “dried fruit.” Talk about a rip off!
Some of the best benefits of dehydrating your own food is how easy it is and how long you can store the food. Unlike other methods of food preservation like canning, you don’t need to spend hours boiling foods and sterilizing jars. You prep the food, place it in the dehydrator, turn it on and walk away. Properly prepared dehydrated food lasts a year or longer. If placed in vacuum sealed jars or bags with an oxygen absorber in a cool, dark environment, some dried foods can last over 20 years!
How does dehydration work to preserve food?
Food dehydration, or drying, is a natural preservation process that removes the moisture from a food in order to prevent it from spoiling. Dehydration uses a heat source to draw out water and air circulation to carry the moisture off via evaporation.
Without water, harmful bacteria and mold can’t grow and enzymes that cause food to ripen and spoil are deactivated. Drying a food allows you to store fresh fruits, vegetables, meats, nuts or grains for many months or years without refrigeration.
How did they dehydrate food in the old days?
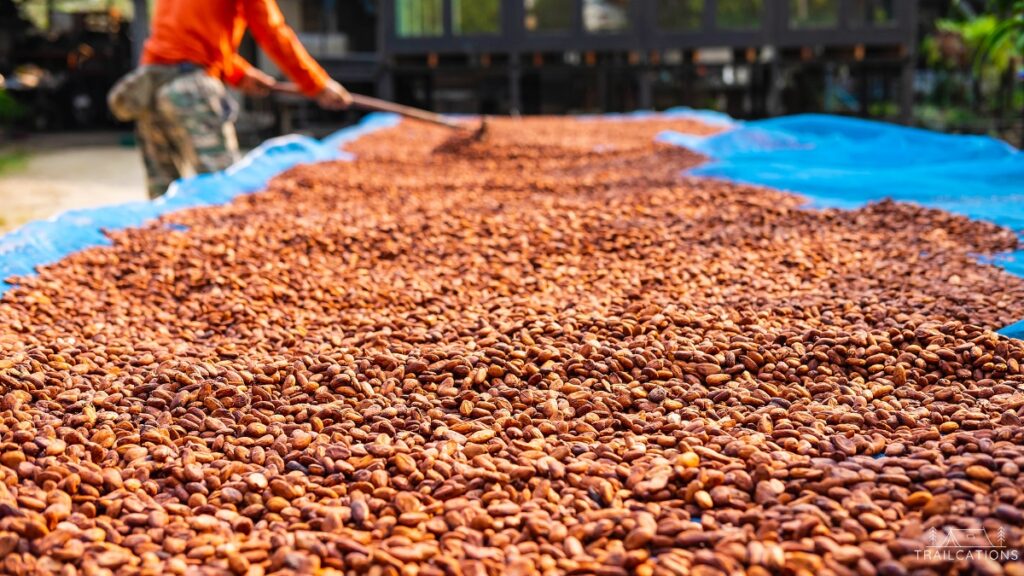
Dehydrating food is one of the earliest forms of food preservation dating back more than 14,000 years ago to remnants of sun dried fish and wild game meat found in what is now the Middle East. Before dehydrators, people dried food using the power of the sun and the wind to preserve their harvests and hunts.
Over thousands of years, ancient people across the globe improved on ways to preserve food in times of abundance. Food drying techniques became more complex as cultures combined dehydration with other preservation processes like salting fish, wood smoking meats and burying and fermenting grains, cheese, eggs, fruits and vegetables.
However, relying on nature isn’t always the most dependable way to dry food and there was no guarantee that dried food wouldn’t spoil. Temperature, humidity and cloud cover play a big part in the moisture level left in the sun dried food. Insects and animals could eat away a good portion of stored dehydrated food that was meant to sustain a family for the winter. Back in the day, people sometimes had to make hard choices on whether to eat moldy, semi-dried food or to starve.
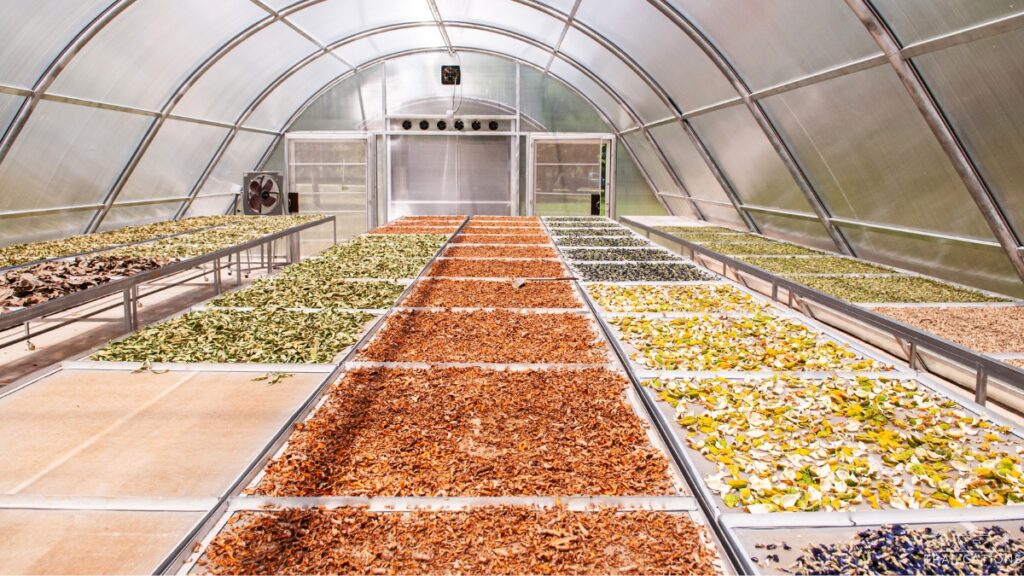
Luckily over time, generations of humans used their knowledge and experience to improve upon food drying methods. People started using heat from fires to speed up the drying process. Special drying houses were built preserve mass quantities of dried produce and meat for families, tribes and villages. This advancement in dried food allowed cultures to travel farther than ever before, exploring unknown lands and establishing hunting and trade routes across the world using dried ingredients to power their journeys.
The first automated food dehydrators started mass producing dried food in the late 1700s using massive wood and coal fires. Early electric dehydrators were basic machines that fed sliced produce through a temperature controlled hot chamber where the food was then dried and packaged in aluminum foil for shipping. Other food preservation methods like canning and freezing made significant advances during the Industrial Revolution but dehydrating stagnated somewhat.
It wasn’t until World War II that food dehydration processes were modernized for mass production. Nations needed to transport huge amounts of lightweight, shelf stable food to support their militaries across the globe and dehydrating was their answer. Following suit, backpackers and camping enthusiasts took advantage of these advances in dried food to support their outdoor adventures. Health food enthusiasts of the 1970s revitalized the home food dehydrating movement with the first electric home food dehydrators. Interest in home drying food has been growing ever since, especially with health conscious individuals, survivalists, vegans and raw foodies. Even astronauts eat dehydrated foods on their missions to the International Space Station and beyond!

How to dehydrate your own food?
You can dehydrate your own food at home by using a combination of heat to evaporate water from a food and air circulation to carry the moisture away from the food. There are so many methods to dehydrate foods. All involve using a heat source to draw moisture out of a food and a source of moving air to blow the water vapor away.
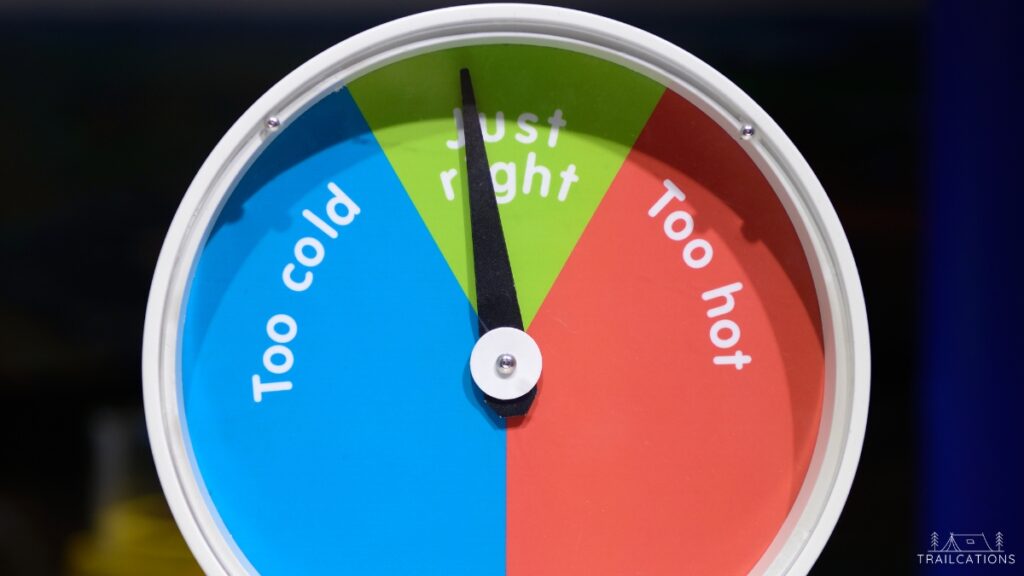
Heat Source – The Goldilocks Temperature
Dehydrating food requires a heat source to evaporate naturally occurring moisture inside the food. Evaporation is the process that changes liquid water inside the food into a gaseous water vapor outside the food.
Too little heat and you risk the drying process taking too long, allowing microorganisms to grow and spoil the food.
Too much heat during the dehydration process and you’ll cook the food and lose valuable nutrients. Or worse, the food could become “case hardened” where moisture inside the food can’t escape the hardened outside of the food. Case hardened food must be consumed immediately or thrown out – you won’t ever be able to dehydrate it completely.
The temperature in your dehydrator should be The Goldilocks Temperature: just right in order to properly dry your food for long term storage. Luckily, there are lots of resources online or in your appliance’s instruction manual providing optimal temperature ranges for dehydrating foods.
Air Flow
Once a heat source (ex: heating element in a stove, the sun, etc.) has evaporated the moisture from a food, the air surrounding the food becomes heavy with water vapor. Think about how humid it gets before a rainstorm. The air can only hold so much water before it condenses and falls back as rain. Having good airflow around your dehydrating food is necessary to push the humid air away otherwise the moisture will condense and drip back down. Airflow can come from an electric fan in your appliances or something as simple as the natural air currents found outdoors in sun drying.
Categories of Food Dehydration Preservation Methods
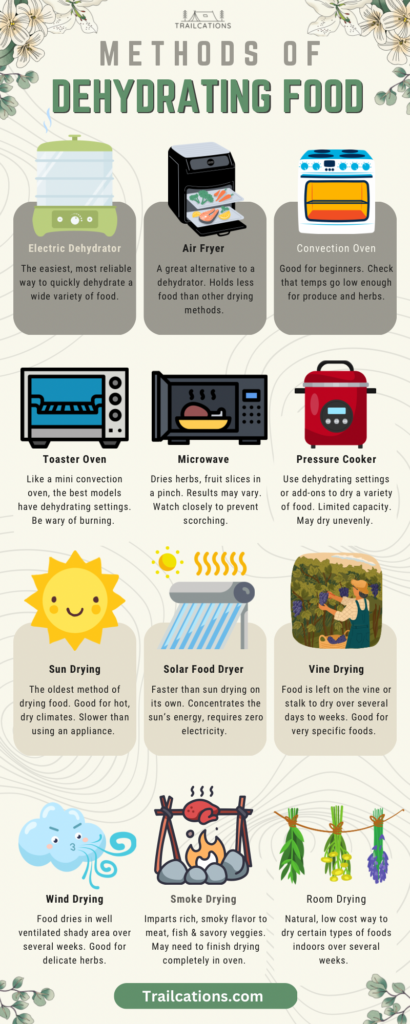
There are two different categories of dehydrating food methods, each with its pros and cons: Appliance Dehydration and Natural Dehydration.
Appliance Food Dehydration
Using an electric powered appliance such as an electric dehydrator, convection oven, air fryer, pressure cooker, microwave or even a stovetop dehydrator allows you to dehydrate foods year round no matter where you live. Appliance drying requires some form of electricity but also provides some of the fastest ways to dry food with the best results.
Electric dehydrators work the best but convection ovens and air fryers with low temperature settings work well too if you don’t want to spend extra money. Microwaves are okay for drying some foods like herbs or flowers but are notoriously unreliable. Be careful while using stovetop dehydrators as many older models meant for wood stoves have been discontinued due to fire hazards.
Natural Food Dehydration
These methods use the natural power of the sun and wind to dehydrate foods. They use renewable, low cost resources to dry food over several days to several weeks. Even though people have been drying food like this for thousands of years, by modern food safety standards you should be careful what type of food you choose to dry. Since natural methods take so long to dry a food, you may find your ingredients spoiling before they can completely dry. Natural methods of food dehydration include sun drying, wind drying, room drying and smoke drying.
Is it worth buying a food dehydrator?
The fastest, most consistent way to safely dry a wide range of food is with a food dehydrator. After thousands of years of dehydrating food, humans have mastered the food drying process with electric dehydrators. Temperature to air flow ratios have been engineered to perfection, drawing out moisture from a food with heating elements and carrying it away at optimal rates with electric fans. Inside an electric dehydrator, food dries in hours, not days, at a cost of less than 1 US dollar per every 10 hours. The faster a food dries means the less risk of bad bacteria or mold growing (and the sooner you can enjoy delicious dried treats)!
Is it cheaper to dehydrate your own food?
Most of the time, it is much cheaper to dehydrate your own food than buy the same dried food at the grocery store.
In the US, it costs just under a dollar for the electricity to run a large food dehydrator for a 10 hour drying cycle. In my experience, dehydrating your own food ends up being 25% to 55% cheaper than purchasing the same dried food at the store. That’s with factoring in the costs of raw materials like fresh produce or meat, depreciation costs of purchasing a dehydrator, storage packaging and electricity costs.
You can save even more money by using low cost, electricity free options to dehydrate food like sun drying, wind drying and vine drying. Growing your own food in a garden vs. buying the ingredients at a store also saves you money in raw materials costs.
However, it doesn’t always make sense financially to dehydrate your own food, especially when you look into buying commercially dried bulk ingredients. These are giant containers of dehydrated or freeze dried vegetables, fruits, dairy, eggs, meat and meat alternatives are typically used for emergency rations, survivalists, if you live off grid, etc. that typically aren’t found in grocery stores. The companies that bulk dry ingredients pay far less for raw foods than you as a consumer will ever see as they buy and dry in huge volumes. Luckily, they pass on these savings to the customer! More often than not, the prices of purchasing bulk dried ingredients are often better than what you can get by dehydrating your own food.
Do a little research before splurging on a dehydrator or appliance for drying food at home. If you’re only occasionally using dried food, maybe it makes more sense to buy bulk ingredients. However if you’re trying to feed a family or are an avid outdoor adventurer, having a dedicated appliance for dehydrating may make more sense financially.

How to dehydrate food with a dehydrator?
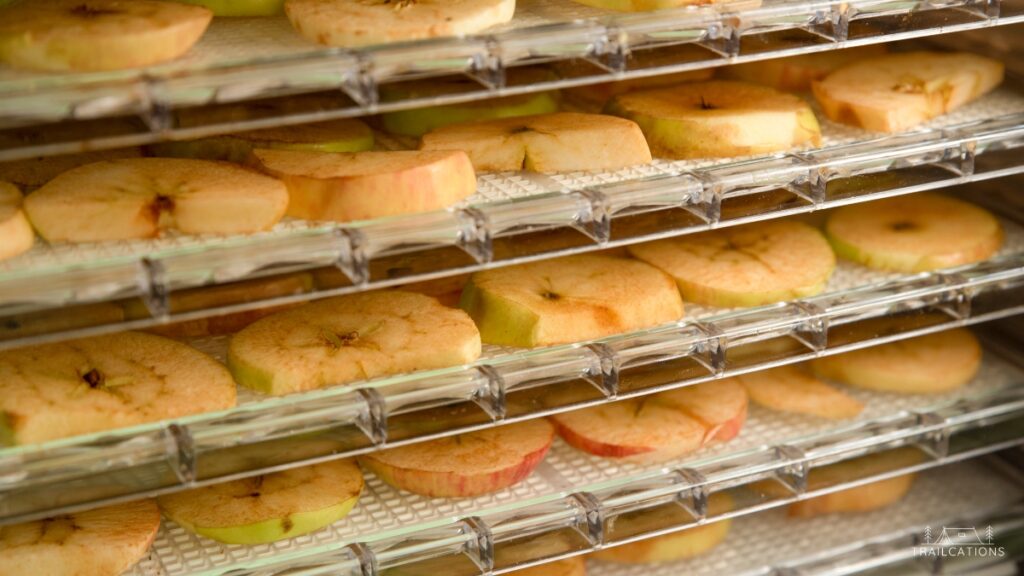
It is surprisingly easy to dehydrate food with a dehydrator. Slice the food into uniform sizes and thicknesses, place the slices in a single even layer on the dehydrating trays, set the temperature dial to the appropriate temperature and go about your day. After several hours, you’ll have delicious and nutritious dried food.
To promote even drying, most dehydrators benefit from turning the food on the trays halfway through the drying time. Some foods like spinach and kale only take a few hours to dry; others with tough skins like plums, dates and figs can take over a day to dry.
Once the food looks, sounds and feels dry with no signs of moisture, shut off the dehydrator and let the food cool briefly. Condition the batch of food by placing it in an airtight container or bag for a day or two. Conditioning allows the moisture levels of the individual pieces to even out and ensure there’s no residual moisture left as evidenced by condensation.
Store the food long term in a vacuum sealed bag or container with an oxygen absorbing packet. To lengthen the shelf life, pretreat your food by dipping in a Vitamin C or citrus juice solution prior to drying and make sure your dried food is stored in a cool, dark and dry place.
How do you dehydrate food without a dehydrator?
Don’t worry if you don’t have a food dehydrator – you can still easily dry food at home without one. Remember, all you need to dehydrate food is heat and air flow. There are lots of affordable alternatives to a dehydrator that will allow you to dry food at home. Some methods work better than others. Appliance drying usually takes a few hours to completely dry a food whereas natural drying methods take a few days to a few weeks.
Appliance Drying
-Oven
-Air fryer
-Toaster oven
– Pressure Cooker (ex: Ninja Foodi multi-use or Instant Pot + Air Fry Lid)
-Microwave
-Refrigerator
-Freeze dryer
-Stovetop dehydrator
-Smoker
Natural Drying
-Sun drying
-Solar Food Dryer
-Vine drying
-Wind drying
-Room drying
Dehydrating Roundup: 15 Methods to Dry Food at Home
No matter what your budget, there are lots of ways you can dehydrate food at home. Check out some of our favorite methods to home dry food (and a few you should avoid at all costs)!
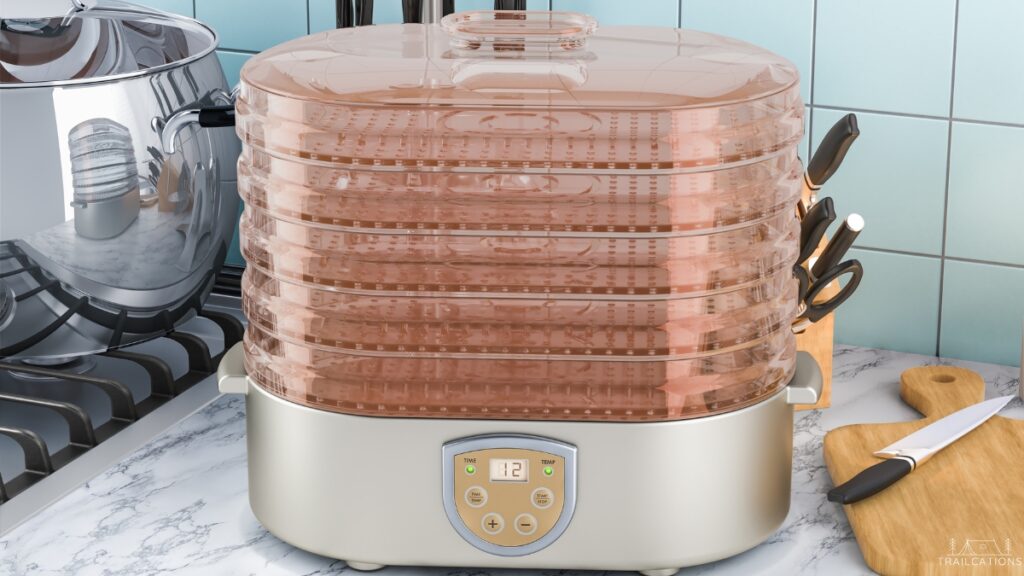
1. Electric Food Dehydrator
Overall rating: ★★★★★
Pros
✓ Gold standard for dehydrating food at home.
✓ Holds more food than most other appliances used for dehydrating.
✓ Costs less to dry a batch of food in an energy efficient dehydrator vs. an oven, air fryer, toaster oven or pressure cooker.
✓ Dries food evenly and consistently every time.
✓ One of the fastest methods to dry food. Takes hours to dry vs. other methods that take days or weeks.
✓ Retains nutrients better than other appliance methods of drying.
✓ Adjustable temperature dial dehydrators allow you to safely dry a variety of foods such as herbs, produce, raw foods, fruit leathers, grains, meats, meat alternatives, fish and jerky.
✓ Doesn’t take up valuable cooking appliance space during meal times.
✓ No need to babysit the dehydrator – it won’t burn food like other methods of drying.
Cons
✗ Brand new dehydrators can be expensive to buy.
✗ May need to rotate trays or individual pieces of food halfway through the drying cycle for even drying.
✗ Can be as noisy as a laundry machine dryer.
✗ Electric dehydrators remove 80-95% of moisture in a food compared to freeze dryers which remove 99% of water.
✗ May be difficult to store in smaller living spaces like apartments or dorm rooms.
Electric Dehydrator drying tips:
For best results, place your dehydrator somewhere where the fan noise won’t bother you and where there is good ventilation for the fan intake. Most electric dehydrators require some turning of the trays during the drying cycle to ensure food is evenly dried. With the precise temperature settings of most electric dehydrators, you can’t overdry food so it’s not an issue if the appliance runs a few hours longer than needed.
The Verdict on Dehydrating Food in an Electric Dehydrator:
The electric dehydrator is the result of optimizing thousands of years of food drying knowledge and reigns supreme in the home food dehydrating game. If you want to dry lots of food quickly, an electric dehydrator is the tried and true way to go. You can safely dry almost anything non-oily from meat to produce to herbs using an electric dehydrator. However, being the gold standard of modern day home food drying does come with a bit of a price tag. A large, high quality electric dehydrator model can cost you up to several hundred dollars. So if you’re just starting out with dehydrating, trying out another method of drying with an appliance you already own might be a better way to see if you like it or not.
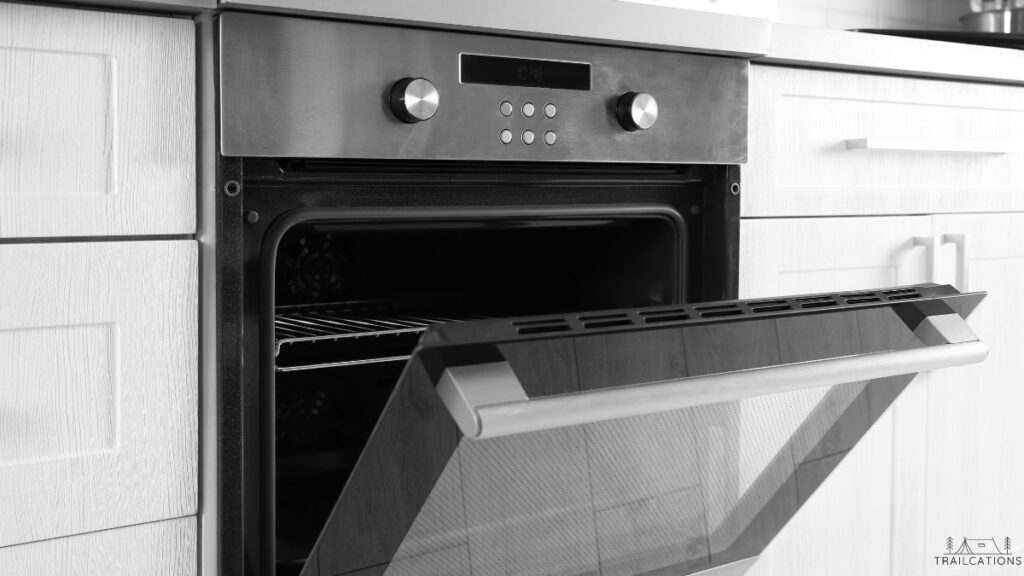
2. Oven
Overall rating: Convection Oven: ★★★★☆
Electric/Conventional Oven: ★★☆☆☆
Gas Oven: ☆☆☆☆☆
The Pros and Cons of Using an Oven as a Dehydrator
Pros
✓ No need to buy a new appliance if you already have an oven at home.
✓ Good for drying meat, fish and jerky if lowest oven temp is between 155-170℉ (68-77℃).
✓ Convection ovens or ovens with dehydrating settings are most efficient and safest for drying food.
✓ Can be faster than dehydrator but may cook the food instead of drying it.
✓ Acts as an extra tool to finish drying the last stages of a batch of food so you can start a new batch in the dehydrator.
Cons
✗ Cannot use your oven during meal times while also drying foods.
✗ More expensive electricity costs. Ovens require more power to run vs. a dehydrator and cost 2 to 15 times more to dry a batch of food.
✗ Usually cooks the food instead of drying it unless you have dehydrator settings on your oven.
✗ Not good for drying fruits, vegetables and herbs unless oven has specific dehydrating temperatures between 95-135℉ (35-57℃).
✗ Not practical to use oven for hours in summer time heat.
✗ Lose more nutrients by drying food in an oven vs. electric dehydrator.
✗ Can be dangerous if you prop open your oven door to allow moisture to escape during dehydrating.
Oven drying tips:
Ovens are good for dehydrating when you want to make snacks like jerky, fruit crisps, veggie chips or granola bars. However, ovens make your food crispier than in a dehydrator as you’re cooking more than drying your food.
- Check if you have a convection oven (one with a fan inside the oven), ideally with a dehydrating setting. If you have a conventional or conduction oven (no fan inside) we don’t suggest trying oven dehydrating. Dehydrating with a conventional/conduction oven is not recommended and can be dangerous or even deadly.*
- Verify that your oven goes down to low enough temperatures. Most modern ovens bottom out around 170℉ (77℃) on their “Warm” settings as you risk bacteria growth cooking with lower temperatures. Unfortunately, 170℉ (77℃) is on the higher range of temperatures for drying meats, jerky and fish and may slightly cook them. Your oven may not have a low enough setting for drying delicate herbs, vegetables and fruits which need temperatures between 95-135℉ (35-57℃) to dry and not cook.
- Test the actual temperature inside your oven, not what the temp dial says. Use an oven thermometer to obtain an accurate reading.
*Warning: Some books and online resources may recommend cracking open the door of your conventional oven and angling an electric fan at the open door to blow humid air away. This is extremely dangerous for several reasons. Children, mobility impaired adults or pets can bump into the hot open door if the oven is left cracked open for several hours. If you have an older gas oven, do NOT leave the door open as fatal amounts of odorless, colorless Carbon Monoxide gas will be emitted. Electric ovens are better but can overheat and cause an electrical fire if left running for an extended period of time with the door open.
The Verdict on Dehydrating Food in an Oven:
If you want to start dehydrating your own food, using an oven is a great way to try it out without having to shell out money for a dehydrator. However, food may actually become cooked instead of dried. It’s recommended you only try dehydrating in your oven if you have a convection oven, ideally one with a dehydrating setting, to safely achieve low temperatures needed for produce and herbs.
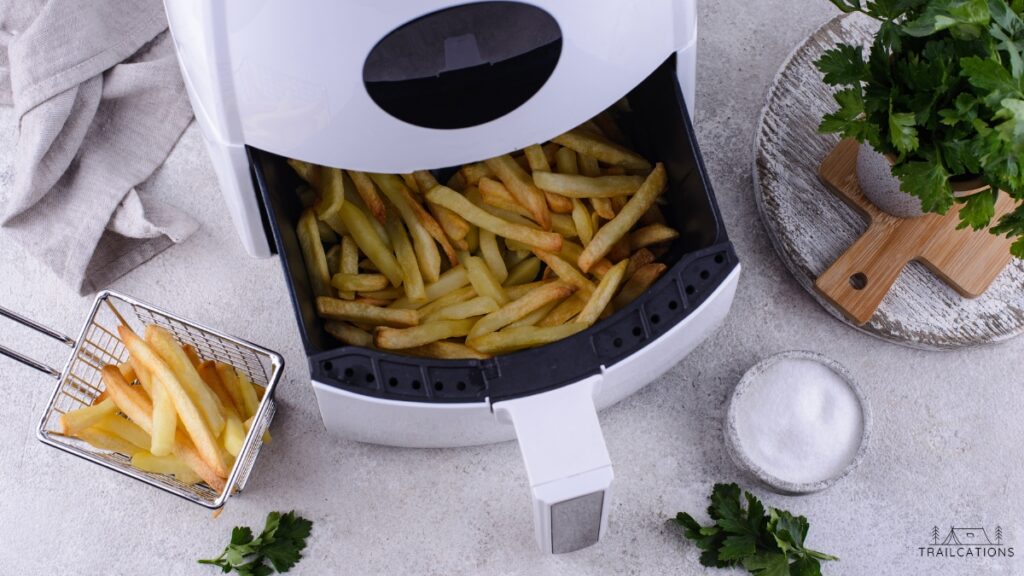
3. Air Fryer
Overall rating: ★★★★☆
The Pros and Cons of Using an Air Fryer for Dehydrating
Pros
✓ No need to buy a new appliance if you already have an air fryer at home.
✓ Great for drying all types of food if the air fryer has a low enough temperature range.
✓ Very effective at drying foods without cooking them.
✓ Evenly dries food due to excellent air flow circulating in the air fryer.
✓ Acts as an extra tool to finish dehydrating the last stages of a batch of food so you can start a new batch in your dehydrator.
✓ Very easy to dry food in an air fryer.
Cons
✗ Small capacity limits the amount of food you can dry at one time. Can add stackable stainless steel racks or wooden skewers to increase drying space.
✗ May have to cut food up into smaller pieces than normal in order to fit in air dryer.
✗ More expensive electricity costs. Air Fryers require more power to run and cost 2 to 6 times more to dry a batch of food vs. a dehydrator.
✗ Cannot use your air fryer during meal times while also drying foods.
Air fryer drying tips:
Increase your air fryer food drying capacity by adding stainless steel stackable racks. Alternatively, wooden skewers pierced through the food can be hung throughout the air fryer basket. Double check that you are using the lowest air frying temperatures before leaving your food to dry for a few hours.
The Verdict Dehydrating Food in an Air Fryer:
You can easily dry all types of food in your air fryer with excellent results if it has a low enough temperature range (120-140℉ / 49-60℃). Dehydrating in an air fryer provides consistently and evenly dried foods every time thanks to its controlled heat and circulating air flow. The only downside to an air fryer is that it typically has a smaller drying space compared to ovens and food dehydrators. For the smaller capacity and more expensive electricity costs per batch, it might not be the most cost effective way to dry food but is worth experimenting if you already have one in your kitchen!

4. Toaster Oven
Overall rating: Convection Toaster Oven: ★★★★☆
Regular Toaster Oven: ★★☆☆☆
The Pros and Cons of Using a Toaster Oven for Dehydrating
Pros
✓ No need to buy a new appliance if you already have a toaster oven at home.
✓ Some convection toaster ovens have special dehydrating settings which are perfect for drying food.
✓ Toaster ovens are more energy efficient than conventional ovens. There are cheaper electricity costs to dry a batch of food in a toaster oven than a normal oven.
✓ Easy to use for dehydrating and doesn’t require special knowledge. Good for starting out dehydrating small quantities of food.
✓ Doesn’t take up a lot of counter space.
✓ Can dry a variety of fruits, vegetables, meat, jerky, etc.
✓ Lowest temperature setting on a toaster oven is usually cool enough to dehydrate food instead of cooking it.
Cons
✗ Can accidentally burn or overcook ingredients in a toaster oven if you don’t keep a close eye on them.
✗ Small capacity limits the amount of food you can dry at one time.
✗ Results may vary for how dry vs. cooked the food becomes. Foods may develop an overcooked taste and texture.
✗ Cannot leave the toaster oven unattended while drying as risk of burning (or catching fire) is significant.
✗ 2-6 times more expensive electricity costs to use a toaster oven to dry food vs an electric food dehydrator.
✗ Not practical for drying food in the summer as toaster ovens generate a lot of heat.
✗ Air isn’t always circulated evenly so food may dry unevenly.
Toaster Oven Drying Tips:
Unless your toaster oven has a convection fan or dehydrating setting, you’ll need to prop open the door to allow moisture to escape. Leaving any oven door open (toaster ovens included) is very dangerous. Leaving a toaster oven door open can cause electrical fires or the heat can melt or burn fixtures or cabinets. It especially is not recommended as in households with small children, pets or mobility impaired adults.
Due to fire hazards, even at the lowest toaster oven temperature setting, you cannot walk away from drying food like you can with an electric dehydrator. Speaking from experience, do NOT use the toaster oven to dry oily food (ex: jerky with oil in the marinade) and do NOT grease the toaster oven trays or they will catch fire!
The Verdict on Dehydrating Food in a Toaster Oven:
If you’re in a pinch or just starting out dehydrating your own food, the toaster oven is a good place to start out. Toaster ovens are relatively cheap and don’t take up much space. They use more electricity than an electric dehydrator but less than a normal oven. Ideally you’d want to use a convection toaster oven that has a fan to remove moisture from the food. What would be even better is a toaster oven with special dehydrating settings to ensure food actually dries instead of cooks.
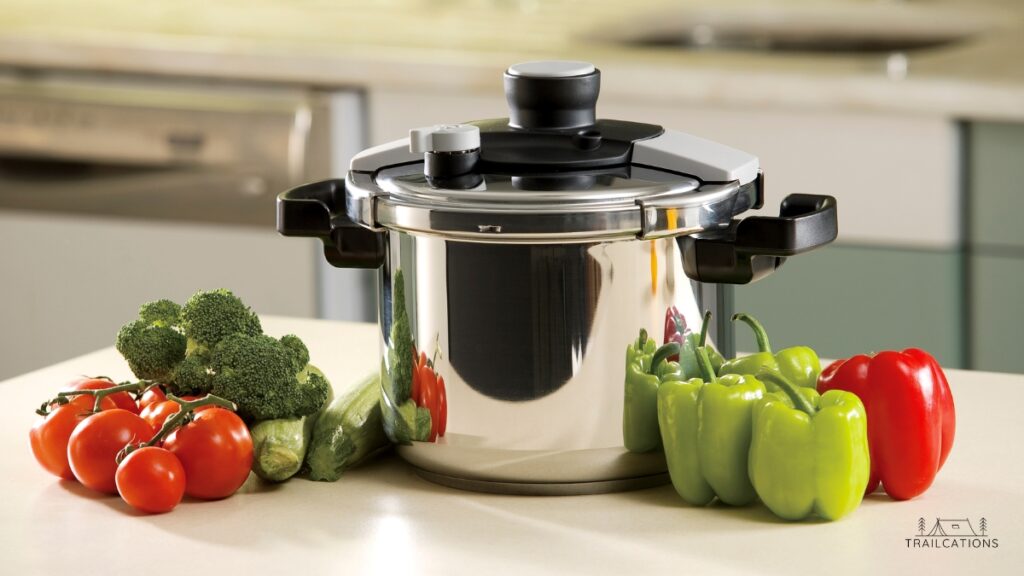
5. Pressure Cooker
Overall rating: ★★★☆☆
The Pros and Cons of Using a Pressure Cooker (Ninja Foodi, Instant Pot Air Fry Lid, etc.) for Dehydrating
Pros
✓ No need to buy a new appliance to dehydrate if you already have a multi-use pressure cooker at home like the Ninja Foodi.
✓ Pressure Cookers are more energy efficient than conventional ovens. There are cheaper electricity costs to dry a batch of food in a toaster oven than a normal oven.
✓ Easy to use for dehydrating and doesn’t require special knowledge. Good for starting out dehydrating small quantities of food.
✓ Tiered metal drying racks or trays increase available drying capacity in pressure cooker.
✓ Can dry a variety of fruits, vegetables, meat, jerky, etc.
Cons
✗ May have to buy pricey Air Fry Lid to enable dehydrating settings if you have Instant Pot pressure cooker. Lid costs about the same as an air fryer or small electric dehydrator, both of which dry food more evenly.
✗ Uneven drying occurs causing some parts of the food to be tough and other parts to be moist.
✗ Cannot use your pressure cooker during meal times while drying is taking place.
✗ Some models take up to 72 hours to dry food which is much longer to dehydrate food than other appliances. Food safety becomes an issue the longer it takes it to dry.
✗ 1.5 to 5 times more expensive electricity costs to use a pressure cooker to dry food vs an electric food dehydrator.
✗ Capacity for drying food in pressure cooker may be more limited than other appliances.
✗ Air isn’t always circulated evenly so food may dry unevenly. Users report having better dehydrating results with a dedicated air fryer.
Pressure Cooker Dehydrating Tips:
The quality of drying food in a pressure cooker depends on the pressure cooker model. For instance, drying food with the multi-use Ninja Foodi Pressure Cooker is simple with the dedicated built-in dehydrator settings. However, drying food in an Instant Pot requires a couple extra pieces of gear which can quickly add up in cost. If you already have an Instant Pot with the Air Fry Lid, the lower temperatures perform decently well for dehydrating. Some users have reported that the air flow isn’t super consistent making for uneven heating and drying and longer than normal drying times. No matter which pressure cooker you have, you can increase the amount of drying space by purchasing an affordable tiered drying rack that fits inside your appliance.
The Verdict on Dehydrating Food in a Pressure Cooker:
Good results of drying food in a pressure cooker seems to depend on whether the dehydrating function is already built-in or if you have to buy an extra accessory to dehydrate. Built-in dehydrating settings in pressure cookers like the Ninja Foodi seem to work fairly reliably. On the other hand, the Instant Pot requires the purchase of the costly Air Fry Lid which on its own costs about as much as buying a small electric dehydrator or air fryer. The air flow and heat on the Air Fry Lid appear to give users inconsistent results when dehydrating, causing food to be tough and dry in parts while moist in other areas. With the limited surface area capacity for drying and higher electricity costs to dry a batch of food, it may be worth it to spend that extra money on an actual dehydrator.
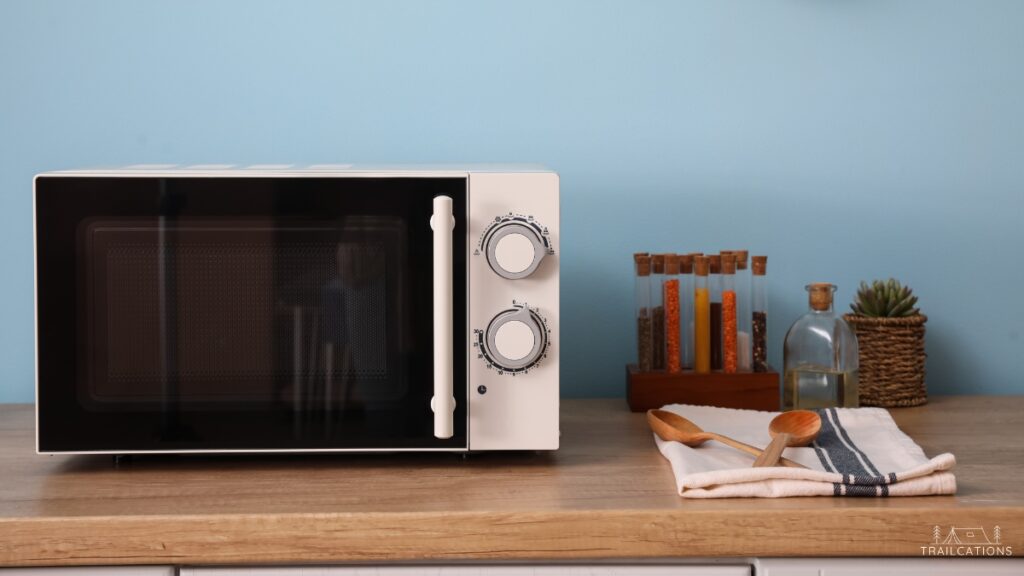
6. Microwave
Overall rating: ★★☆☆☆
The Pros and Cons of Using a Microwave for Dehydrating
Pros
✓ No need to buy a new appliance to dehydrate if you already have a microwave at home.
✓ Cheaper electricity costs of running a microwave vs. a food dehydrator for herbs and fruit.
✓ Super quick way to dehydrate herbs. Only takes a couple of minutes instead of a couple of hours.
✓ Okay for drying fruit slices. Takes 30-45 minutes in a microwave to dry vs. many hours in an electric dehydrator.
Cons
✗ Can accidentally burn or overcook ingredients in a microwave if you don’t keep a close eye on them.
✗ Small capacity limits the amount of food you can dry at one time.
✗ Very limited in types of food you can dry. Typically only small batches of herbs or dried fruit can be dried with varying levels of success.
✗ Foods may develop an overcooked taste and texture.
✗ Cannot leave the microwave unattended while drying as risk of burning (or catching fire) is very real.
✗ Uneven drying tends to happen on fruit leathers and slices.
Microwave Drying Tips:
Only use the defrost settings to dry food in the microwave. Do not turn up the power on the microwave above defrost or you will burn your food! Fruits may take between 30 to 45 minutes to dry and you should not leave the microwave unattended while they are drying or you risk burning the food.
The Verdict on Dehydrating Food in a Microwave:
The microwave is not the best place to dry foods but it is a quick way to dry herbs and some fruits in a pinch. Expect foods dried in the microwave to have an overcooked taste or texture. Defrost should be the only setting that you use to dry foods in the microwave. Not only do you run the risk of cooking the food, but you have to keep checking to make sure the food isn’t burning. I’m sure at some point we’ve all added that extra “zero” to the microwave and walked away only to come running back to smoking ruined food. 2 minutes versus 20 minutes in the microwave is potentially catastrophic.
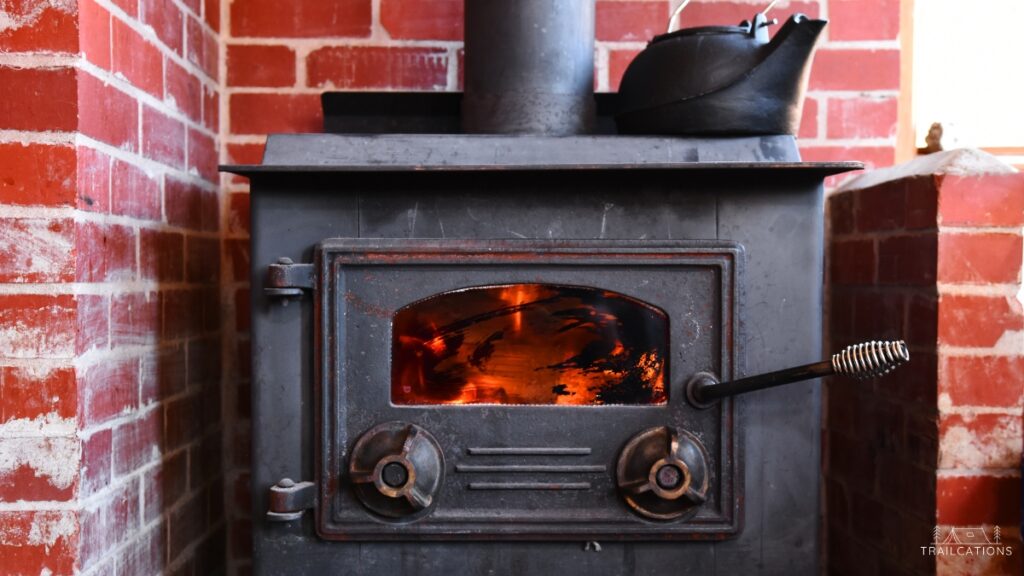
7. Stovetop Dehydrator
Overall Rating: ★☆☆☆☆
The Pros and Cons of Using a Stovetop Dehydrator for Dehydrating
Pros
✓ It doesn’t cost a lot of money to make a stovetop dehydrator.
✓ Can dry a decent amount of food on the stacked tray models.
Cons
✗ Have to either DIY or find an antique stovetop dehydrator on eBay or similar website.
✗ Most commercial models have been phased out due to being fire hazards. Dehydrator technology has evolved and there are many more efficient and safer food drying options out there.
✗ Dangerous to operate, especially on modern gas or electric stoves since they were designed for old wood-fired stoves.
✗ Wood framed models are vulnerable to catching fire.
✗ Need to watch food closely so it doesn’t burn or scorch the dehydrator.
Stovetop Dehydrator Drying Tips:
There are lots of videos on how to build your own stovetop dehydrator for cheap. However, unless you’re very much living off the grid, you may want to opt for a different method to safely dry food. Fire prevention is a big reason why wood-fired stovetop dehydrators aren’t manufactured anymore.
The Verdict on Dehydrating Food in a Stovetop Dehydrator:
Stovetop dehydrators are not the safest method to dehydrate food and have been phased out by modern electric dehydrators, air fryers and convection ovens with dehydrating settings. Unless you’re living off the grid, there are many more effective and less dangerous methods to dehydrate food to choose from. You can build your own stovetop dehydrator for relatively cheap but it needs to be constantly watched to avoid burning food or catching fire.
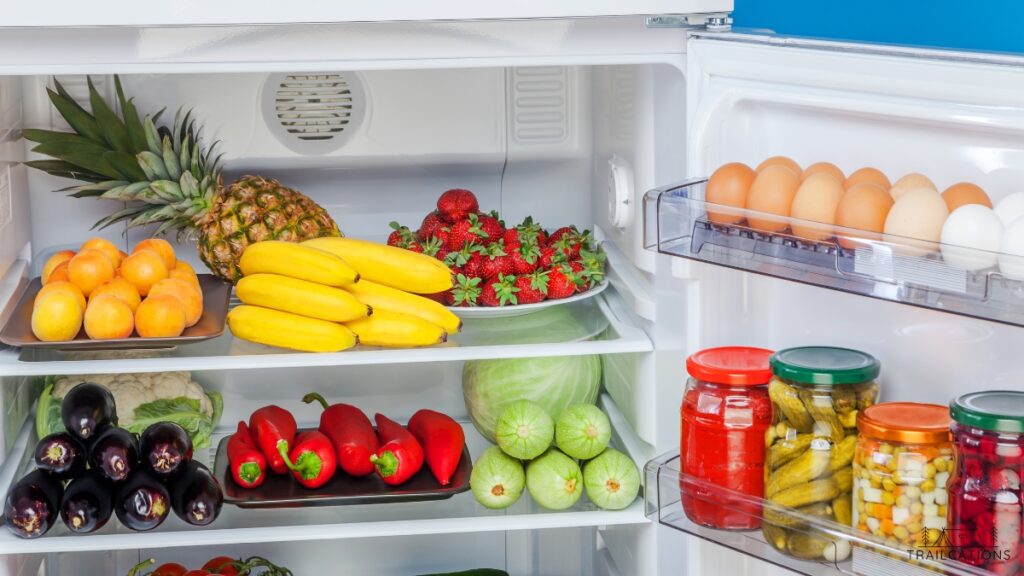
8. Refrigerator
Overall Rating: ★☆☆☆☆
The Pros and Cons of Using a Refrigerator for Dehydrating
Pros
✓ Okay for dehydrating herbs in refrigerator.
✓ No need to buy another appliance as most people have refrigerators.
✓ Easy to do with minimal equipment.
Cons
✗ Food takes up valuable real estate in your fridge for 1 to 3 weeks.
✗ Unreliable method of drying. Food risks rotting before actually dehydrating.
✗ Foods dried in the refrigerator tend to lose more nutrients faster than in an electric dehydrator.
Refrigerator Drying Tips:
Separate your herbs in a single even layer by stacking baking racks on a shelf where they can get good airflow.
The Verdict on Dehydrating Food in a Refrigerator:
Refrigerator drying isn’t recommended but can be done in a pinch. Results may vary and it is only adequate for foods like herbs. Unfortunately, you lose a lot of nutrients and risk mold growing with this method. There are lots of faster and safer methods to dry foods to choose from besides refrigerator drying.

9. Smoke Drying
Overall Rating: ★★★☆☆
The Pros and Cons of Using a Smoker for Dehydrating
Pros
✓ Food becomes tender and juicy, not too dry.
✓ Smoking adds a delicious flavor to a food without adding salt or sugar.
✓ Easy to run a smoker no matter if it’s rainy or cloudy.
✓ Good for drying specific foods like jerky, meats, meat alternatives, fish and savory veggies.
✓ Most smokers don’t use electricity but require some sort of fuel – gas, wood or charcoal. Cost of drying a batch of food in a smoker is often cheaper than in an oven.
✓ Smokers are easy to use and do not require tray or food rotation like dehydrators or solar food dryers.
✓ Can dry a large amount of food at once.
Cons
✗ Food doesn’t dry all the way via smoking. If storing food for long term, it is necessary by modern food safety standards to finish drying food in a dehydrator.
✗ For most consistent results, you would need to purchase a dedicated gas, wood-fire, charcoal or wood pellet smoker which can be pricey.
✗ Must perform smoking operations outside which may be difficult or impossible in the winter or very bad weather.
✗ Not all foods are good for smoking due to the strong smoke flavor imparted. Fruits, herbs, most veggies and grains don’t always taste great smoked.
✗ Smoked food has a shorter shelf life than food dried in a dehydrator.
✗ Smoked meats and fish can’t be safely stored at room temperature as they don’t dry all the way. For food safety reasons, smoked foods should be stored in a refrigerator or freezer.
✗ It can be challenging to control the exact temperature inside a smoker.
✗ Costs of drying a batch of food in a smoker tends to be higher vs an electric dehydrator.
✗ Usually need to add some sort of salt or preservative to meats to preserve them via smoking.
✗ You have to keep a close eye on a smoker to monitor any fire risks, especially with a wood-fired or charcoal one.
Smoke Drying Tips:
Use only hardwood for making smoke as soft wood from pine and cedar will leave an unpleasant taste in the food. Smoked food can take anywhere from a few hours to a few days to dry. If you want to speed up the process, you can dry food in a smoker for a few hours and then finish the drying in a dehydrator.
The Verdict on Dehydrating Food in a Smoker:
It’s pretty simple to use a smoker or pellet grill to dry meat, fish, jerky, peppers or tomatoes. Keep in mind that other types of food might not taste as palatable with the smoky flavor imparted by smoke drying but don’t hesitate to experiment with savory ingredients. Smoked foods will be more tender than traditionally dehydrated ingredients as they aren’t completely dried. However, the storage life of smoked foods is much shorter than dehydrated food and they usually have to be refrigerated or frozen immediately. If you want to keep smoked ingredients for long term use, ensure the food is entirely dry by finishing the drying process in a dehydrator.
10. Solar Food Dryer
Overall Rating: Hot, dry environments: ★★★★☆
Temperate, cloudy environments: ★★☆☆☆
The Pros and Cons of Using a Solar Food Dryer for Dehydrating
Pros
✓ Faster to dehydrate food vs sun drying on its own. Focuses sun’s energy using reflective material and some have backup electric heat sources for cloudy days.
✓ Natural, low cost way to dry foods.
✓ Minimal carbon footprint when drying foods with this method.
✓ Easy to do if you live in a warm, dry place.
✓ Tons of DIY options for building solar food dryers of all sizes.
✓ Commercial personal solar food dryers are starting to become more popular and cheaper.
✓ Can dry a large amount of food at once.
Cons
✗ Takes a long time to safely and effectively dry food. On average you need 3-5 days with a minimum 8 hours sunshine per day, humidity less than 60% and temperatures of at least 90℉ (32℃) to successfully dry food.
✗ Not good for herbs because delicate essential oils will burn away in the sun and leave a flavorless product.
✗ Not effective during cloudy, rainy or cool weather.
✗ Air pollution, heavy traffic or wildfire smoke will affect purity of food dried in this method.
✗ Not safe to dehydrate meat, fish or jerky with a solar food dryer unless the food has tons of preservatives and salt. Bad bacteria will start growing on meat long before it dries in a solar food dryer.
✗ Must bring food in at night to avoid moisture collection and hungry animals.
✗ Need to turn food 3 to 4 times per day to achieve even drying.
✗ Not as fast or reliable as electric dehydrators and take up more space.
✗ Some assembly required.
Solar Food Dryer Dehydrating Tips:
Check your weather forecast before using your solar food dryer to make sure you have 3-5 days with a minimum 8 hours sunshine per day, humidity less than 60% and temperatures of at least 90℉ (32℃) to successfully dry food. Clouds, precipitation and cool breezes will prevent food from drying entirely. If you live where there is bad air pollution, heavy traffic or wildfires, you risk contaminating your food due to airborne emissions.
There are lots of videos out there on how to build a solar food dryer. Screens need to be safe for food contact. Good options are plastic mesh, teflon-coated fiberglass or stainless steel (although metal can burn your food). Avoid materials that would leave harmful residue on food such as galvanized metal hardware cloth (coated in cadmium or zinc). Avoid copper and aluminum which discolor and corrode.
The Verdict on Dehydrating Food in a Solar Food Dryer:
If you’re looking to dehydrate your food without electricity, a Solar Food Dryer provides the most effective way to dry food using solar power. It concentrates the sun’s energy and can safely dry a variety of foods but is unreliable for delicate herbs and unsafe for drying meat, jerky or fish. They work best in hot, dry, sunny environments with good air quality. A Solar Food Dryer takes several days to dry foods vs an electric appliance that only takes a few hours. However, they are relatively cheap to build and if you have enough space and patience, they can be an effective tool to dry food without having to buy a dehydrator or pay for electricity.
11. Sun Drying
Overall Rating: Hot, dry environments: ★★★★☆
Temperate, cloudy environments: ★★☆☆☆
The Pros and Cons of Sun Drying for Dehydrating
Pros
✓ Easy to do if you live in a warm, dry place.
✓ Natural, low cost way to dry foods.
✓ Essentially zero carbon footprint when drying foods with this method.
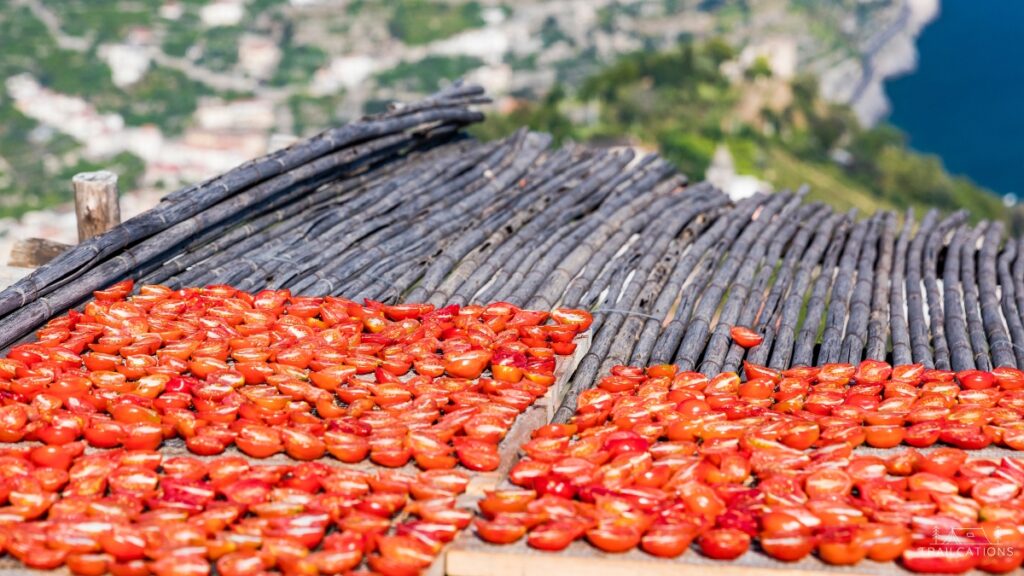
✓ Certain foods become much sweeter, tomatoes especially, when dried in the sun vs. other methods.
✓ Tons of cheap commercial and DIY options for all sizes and types of sun drying.
✓ Collapsible tiered mesh hanging drying racks don’t take up much space and are good methods for solar drying.
✓ One of the oldest methods of drying food.
Cons
✗ Takes a long time to safely and effectively dry food. On average you need 3-5 days with a minimum 8 hours sunshine per day, humidity less than 60% and temperatures of at least 90℉ (32℃) to successfully dry food.
✗ Not the most reliable option if you live somewhere with lots of clouds, rain or cool weather.
✗ Air pollution, heavy traffic or wildfire smoke will affect purity of food dried in this method.
✗ Not safe to dehydrate meat, fish or jerky by sun drying unless the food has tons of preservatives and salt. Bad bacteria will start growing on meat long before it dries in a sun.
✗ Not good for herbs because delicate essential oils will burn away in the sun and leave a flavorless product.
✗ Must bring food in at night to avoid moisture collection and hungry animals.
✗ Need to turn food 3 to 4 times per day for even drying.
✗ Not as fast or reliable as electric dehydrators.
✗ Takes longer to dry food vs a Solar Food Dryer.
Sun Drying Tips:
Like solar food drying, you’ll need to check your weather forecast before sun drying to make sure you have 3-5 days with a minimum 8 hours sunshine per day, humidity less than 60% and temperatures of at least 90℉ (32℃) to successfully dry food. Clouds, precipitation and cool breezes will prevent food from drying entirely. If you live where there is bad air pollution, heavy traffic or wildfires, you risk contaminating your food due to airborne emissions.
There are lots of videos out there on how to build a hanging or screen sun dryer. Screens need to be safe for food contact. Good options are plastic mesh, teflon-coated fiberglass or stainless steel (although metal can burn your food). Avoid materials that would leave harmful residue on food such as galvanized metal hardware cloth (coated in cadmium or zinc). Avoid copper and aluminum which discolor and corrode.
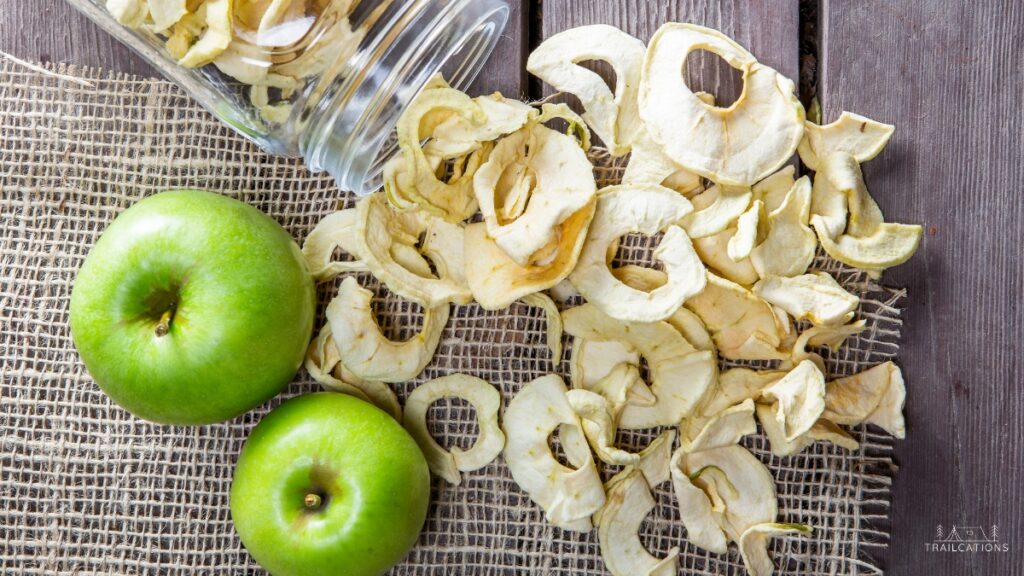
The Verdict on Dehydrating Food by Sun Drying:
Sun drying is one of the oldest methods of food preservation and has been perfected over thousands of years. It is super easy and doesn’t cost much to hang food to dry in tiered mesh bags, from a drying line or simply placing netting over a baking tray on your back porch. Sun drying works best in hot, dry, sunny environments with good air quality. It is not the most reliable option if you live somewhere with a lot of clouds, precipitation or temperate weather. Since sun drying doesn’t require electricity to dehydrate food, it may take several days to completely dry food, making sure to bring food in at night to avoid dew and hungry critters. Sun drying is great for creating delicious fruits and veggies but is too unreliable by modern food safety standards for drying meat, jerky, fish and herbs.
12. Wind Drying
Overall Rating: ★★☆☆☆
The Pros and Cons of Wind Drying for Dehydrating
Pros
✓ Food is hung to dry in a shaded area so drying is easy to do no matter what type of weather.
✓ Natural, low cost way to dry foods.
✓ Perfect for windy climates.
✓ Almost zero carbon footprint when drying foods with this method.
✓ Good for specific foods like herbs, flowers, mushrooms and acidic fruits and veggies.
Cons
✗ Takes a long time to dry food, usually several days to weeks.
✗ Some foods may spoil before they dry completely.
✗ Not as fast or reliable as electric dehydrators.
✗ Not safe to dehydrate meat, fish or jerky by sun drying unless the food has tons of preservatives and salt. Bad bacteria will start growing on meat long before it dries in a sun.
✗ Would need to add lots of salt and preservatives to meat and fish to dry safely with this method.
Wind Drying Tips:
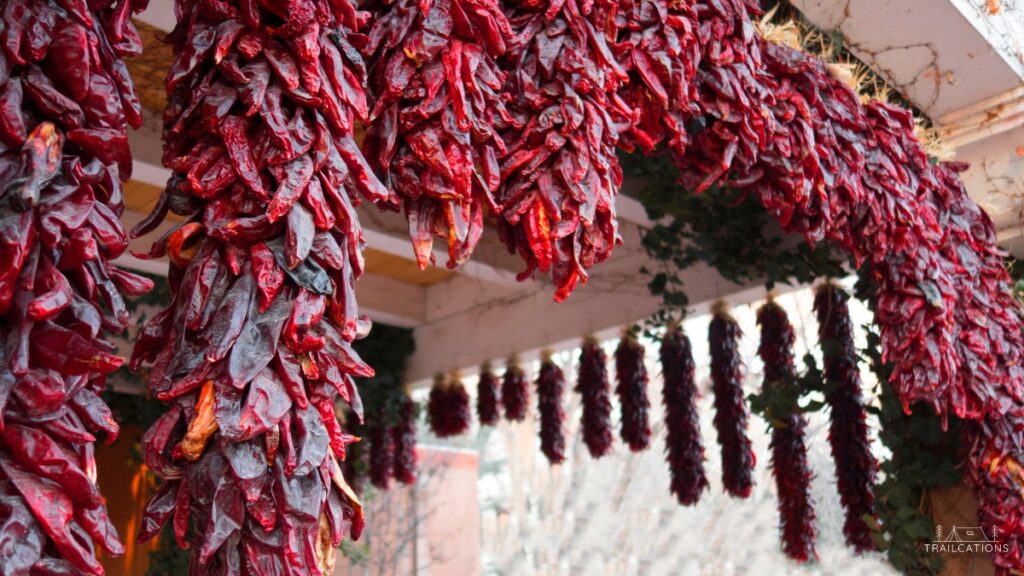
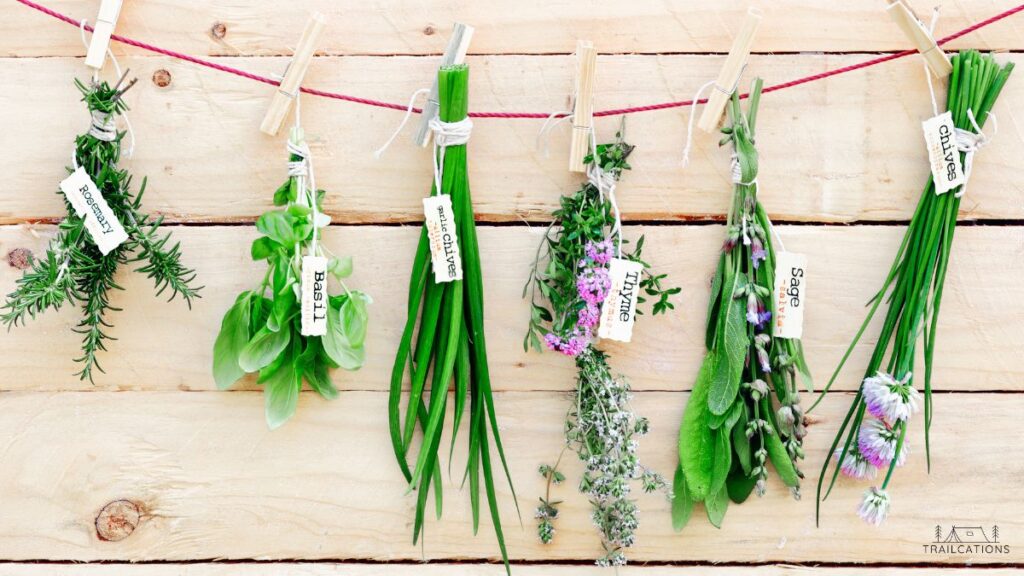
Food is hung in a shaded area to dry using only the power of the wind. Only certain ingredients can safely be dried this way but need to be monitored to ensure they don’t spoil. Special drying houses with slats or airy doorways can be built to allow constant air flow around hanging food. Alternatively, food can simply be hung under a covered porch, strung up under a shade tree or placed in an area of your yard that doesn’t receive sunlight.
The Verdict on Dehydrating Food by Wind Drying:
If you have the ideal shaded outdoor space to dry food, you can easily use the wind to dehydrate lots of garden herbs, flowers or mushrooms for almost zero cost. The sun won’t bleach the food or sap nutrients with wind drying as it can with sun drying methods. However, it can take up to several weeks for food to become completely dry so in the wind you must have some patience when trying this method. Keep in mind that by modern food safety standards, wind drying isn’t a safe option to dry meats, fish, jerky, most veggies and low sugar, low acid fruit.
13. Vine Drying
Overall Rating: ★★☆☆☆
The Pros and Cons of Vine Drying for Dehydrating
Pros
✓ Easy to do if you live in a warm, dry place.
✓ Natural, low cost way to dry foods.
✓ Zero carbon footprint when drying foods with this method.
✓ One of the oldest methods of drying food.
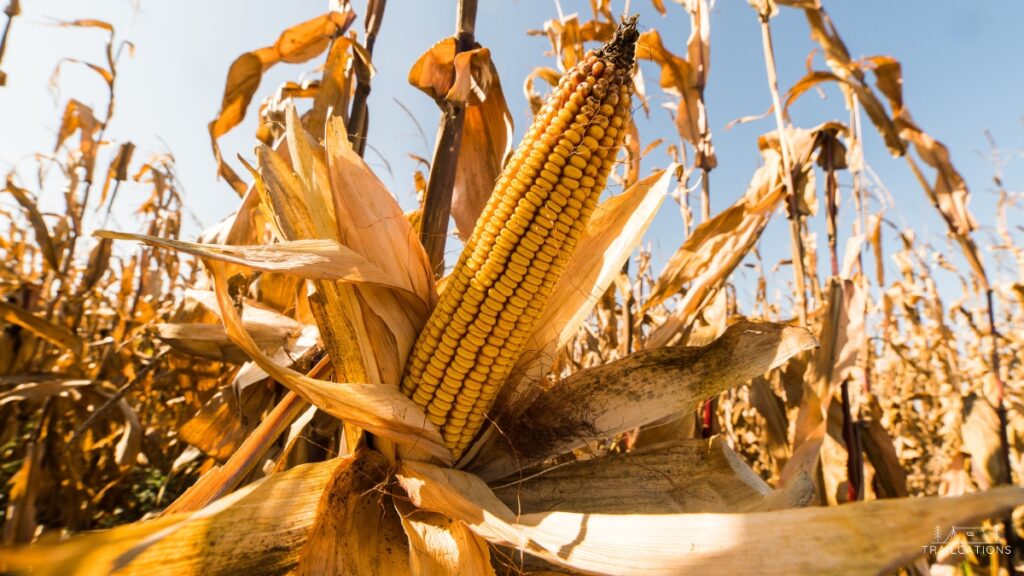
✓ Good for specific foods like beans, corn and certain fruits.
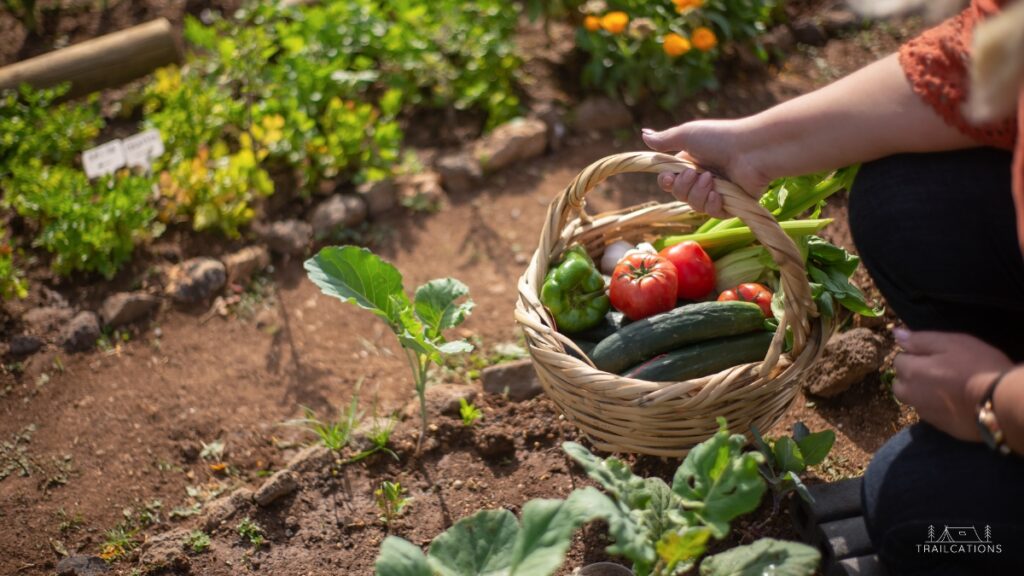
✓ Low effort way for gardeners to quickly preserve a large amount of food.
Cons
✗ Not the most reliable option if you live somewhere with lots of clouds, rain or cool weather.
✗ Takes a long time to dry food, usually several days to weeks.
✗ Air pollution, heavy traffic or wildfire smoke will affect purity of food dried in this method.
✗ The longer you leave food on the vine, the more food will be sacrificed to hungry animals and insects.
✗ Pasteurization of vine dried food is a must to kill any insects and their eggs.
✗ Not good for herbs because delicate essential oils will burn away in the sun and leave a flavorless product.
✗ Not as fast or reliable as appliance dehydrating.
Vine Drying Tips:
Vine dried food must be completely dried and pasteurized before storing. If needed, you can complete the drying process in an oven, dehydrator or sun. Make sure to either freeze your food below 0℉ (-18℃) for 48 hours or dry in an oven at 160℉ (71℃) for 30 minutes to kill any insects or eggs from vine drying. If you live where there is bad air pollution, heavy traffic or wildfires, you risk contaminating your food due to airborne emissions.
The Verdict on Dehydrating Food by Vine Drying:
The type of foods you can vine dry are pretty limited but it’s a super easy way to dry certain kinds of food from your garden. Vine drying takes several days to several weeks and you may end up sacrificing some of your harvest to animals and insects. Make sure to pasteurize food and ensure it is completely dry and insect free before storing long term.
14. Room Drying
Overall Rating: ★★★☆☆
The Pros and Cons of Room Drying for Dehydrating
Pros
✓ Easy to do no matter what type of weather.
✓ Natural, low cost way to dry foods.
✓ Minimal carbon footprint when drying foods with this method.
✓ Good for drying specific foods like herbs, flowers, mushrooms and acidic fruits.
Cons
✗ Can collect dust or insects if not covered in muslin or paper bags.
✗ Takes a long time to dry food, usually several days to weeks.
✗ Cannot safely dehydrate most veggies, meat, fish or jerky by room drying.
✗ Not as reliable or as fast as appliance drying.
Room Drying Tips:
Best if food is hung from a line. Herbs placed in paper bags poked with small holes from a pen or pencil will dry faster. Don’t overstuff the bag, allowing airflow between leaves and stems. Seal the bag shut at the opening with a rubber band, string, staples or clip to prevent dust from collecting and sunlight. Food will take approximately 1-3 weeks to dry, be sure to check for mold. Being near a door or window helps with proper airflow. Sunrooms, greenhouses or next to wood stoves are good places to do this.
The Verdict on Dehydrating Food by Room Drying:
If you have the ideal indoor space to dry food, you can easily dehydrate lots of garden herbs, flowers or mushrooms for almost zero cost. Room drying takes several weeks for food to become completely dry so you must have some patience when trying this method. Place small bunches of whole herbs or flowers in a paper bag or cover food in muslin to protect it from dust and insects. Your house will smell amazing as the food dries. Keep in mind that by modern food safety standards, room drying isn’t a safe option to dry meats, fish, jerky, most veggies and low sugar, low acid fruit.

15. Car Drying
Overall Rating: ☆☆☆☆☆
The Pros and Cons of Car Drying for Dehydrating
Pros
✓ No need to buy another appliance if you have access to a car.
✓ Easy to do with minimal equipment.
Cons
✗ Lots of Food Safety Issues. Car upholstery, trim and interiors can off-gas high levels of Volatile Organic Compounds (VOCs) in high temperatures. These are cancer-causing chemicals like formaldehydes and benzenes and permanent nerve damaging toluenes.
✗ Foods take up valuable real estate in your car for several days.
✗ Need to have sunny, dry weather for several days.
✗ Unreliable method of drying food. Not as reliable or as fast as appliance drying.
✗ Not recommended for meats, fish, jerky and low sugar, low acid produce where consistent temperatures can be controlled.
✗ Temperatures are hard to control. Temperatures can be too low to completely dry food or too high and cooks the food.
Car Drying Tips:
The car drying method is not recommended to dehydrate foods. Most people trying to home dry foods are trying to avoid added preservatives found in many commercially dried foods. With that in mind, car drying should not be your first (or second or third) choice to dehydrate food. The plastics, foam and upholstery inside a car all off-gas a series of chemicals called Volatile Organic Compounds (VOCs), especially under high temperatures like those found in parked cars on a sunny day. VOCs can cause nerve damage, cancer and a variety of other unpleasant permanent effects. Food should not be exposed to these chemicals and if you’re drying ingredients in a hot car, you risk high levels of VOCs leaching into your food.
If you’re not concerned about any of this, make sure to park in a sunny spot with good air quality. Crack your windows open slightly to allow airflow to carry away moisture. If you don’t cover the windows with mesh, cheesecloth or muslin, you may want to pasteurize your food to ensure insects haven’t laid eggs (see Vine Drying). Before drying fruits and vegetables, check the average temperature in your car with a thermometer to ensure it doesn’t scorch or underdry your ingredients. To speed up drying, separate your food into a single even layer on baking racks or trays on the dashboard, seats or rear window. You can hang dry food by stringing line between the overhead grab handles (aka the “Oh Sh*t” handles). Just make sure to remove your food before using the car to drive.
The Verdict on Dehydrating Food by Car Drying:
Dehydrating food in your car is kind of like having a giant mobile Solar Food Dryer but with a toxic chemical off-gassing interior instead of food safe trays and materials. This method is not recommended. If you’re looking to dry food without electricity, try a simple Solar Food Dryer, Sun Drying, Wind Drying or Room Drying for safer options.
What is the cheapest way to dehydrate food?
Overall the cheapest way to dehydrate food is any method that dries ingredients without electricity – vine drying, sun drying, wind drying, room drying or with a Solar Food Dryer. The costs of drying food without electricity are essentially zero, save for some consumables like string to hang food, rubber bands, food drying screens, paper bags, etc.
Using the power of the sun and wind is the cheapest way to dehydrate food. This process to dry food has been used for thousands of years but it does come with some setbacks. Food dried under the sun, in a room, with the wind, etc. takes such a long time to dry that by modern food safety standards, you can’t use these methods to safely dry meat, fish, jerky or any low sugar, low acid vegetables and fruits.
If you don’t live in a hot, dry environment with a minimum 8 hours sunshine per day, humidity less than 60% and temperatures of at least 90℉ (32℃), you may struggle to successfully dry food outdoors. That doesn’t mean you shouldn’t try! Devices like a DIY or commercial Solar Food Dryer can speed up the drying process concentrating renewable energy from the sun.
The cheapest way to dry food with an appliance is by using an electric food dehydrator. Compared to other kitchen appliances used for drying, electric dehydrators consume the least amount of electricity to dry a batch of food. A microwave is also a very cheap way to dry herbs and some fruit slices but the results aren’t always the best and it’s easy to burn the food.
The cheapest and fastest way to dry food at home without an electric dehydrator is by using an air fryer. Air fryers are essentially mini convection ovens, blowing hot air over food to cook it without oil. Many air fryers come with dehydrating temperature settings that are perfect for quickly and evenly drying food without cooking it. The electricity costs of drying a batch of food in an air fryer are much less than using other appliances like ovens, instant pots, toaster ovens, etc.
What is the fastest way to dehydrate food?
The fastest way to dehydrate food is by using an appliance like an electric dehydrator, air fryer, convection oven or toaster oven. All of these appliances require electricity to dry food. Appliance drying takes several hours to dehydrate food completely compared to sun or wind drying which takes days or even weeks.
How to dehydrate food faster?
You can dehydrate food faster by blanching, steaming or parboiling it before drying.
With blanching, fruit, vegetables or nuts are briefly submerged into boiling water to loosen or pop the tough outer skins. The food is then placed in an ice bath to prevent cooking.
Steaming also helps loosen firm skins and break open cell walls in tough root veggies. It also retains more nutrients in a food than blanching or parboiling.
Parboiling partially cooks dense foods like carrots, broccoli and rice using boiling water. Ingredients are submerged in boiling water for several minutes, drained, put in an ice bath, drained again and then dehydrated.
Performing one of these methods of pretreatment will speed up the dehydrating time for fruits with tough skins, dense root vegetables, pastas and most grains. These types of pretreatment will also speed up the rehydrating time when you eat the dried food.
How to Naturally Dehydrate Food Without Electricity?
It is pretty easy to dehydrate food naturally and without electricity. Evidence of dehydrating food dates back at least 14,000 years to sun dried meat and fish found in archeological sites in the Middle East. The first commercial electric dehydrators weren’t invented until the 1920s and shockingly enough, the first home electric dehydrators didn’t hit the market until the 1970s! So really, in the whole history of human civilization, home dehydrating enthusiasts have only had access to electric dehydrators for about 60 years.
You can dehydrate food without electricity by one of the following methods:
-Sun Drying
-Solar Food Dryer
-Vine Drying
-Wind Drying
-Room Drying
-Smoke Drying
Methods to dehydrate food safely and naturally without electricity typically use the energy of the sun and wind to dry food. Smoke drying uses wood, charcoal or natural gas to dry food.
The advantages of dehydrating food without electricity are
-It’s essentially free (or very low cost).
-It’s all natural.
-It’s good for the earth if you’re using renewable energy from the sun and wind.
-Some foods taste better dried under the sun like tomatoes or grapes/raisins.
Disadvantages of dehydrating food without electricity are
-It takes days or weeks to dry a food naturally vs. only a few hours with appliances.
-The climate has to be hot (>90℉ / 32℃), dry (<60% humidity) and with a sunny (8+ hours sun/day) weather forecast for several days.
-Only certain foods can be dried safely this way like herbs, mushrooms and high sugar, high acid fruits and vegetables.
-Meats, fish and jerky cannot be safely dried in the sun unless they have inedible amounts of preservatives and salt in them.
-Food can spoil if the drying process takes too long.
-Smoked food has a shorter shelf life than dehydrated food.
-You have to bring in food at night to avoid moisture collection and hungry animals.
Manually dehydrating food without electricity is an easy, cheap and timeless way to dry food, often without harming the environment. Unfortunately by modern food safety standards, the types of food you can safely dry without electricity are limited and for good reasons. Our ancestors didn’t have access to the food science knowledge we have today and as a result suffered from dangerous or even deadly microorganisms that cause Botulism and food poisoning, all of which are easily avoided by following basic food safety practices. Be smart when dehydrating food without electricity and only follow trusted recipes.
Is there a dehydrator that doesn’t use electricity?
A solar food dryer is a type of dehydrator that doesn’t use electricity. Solar food dryers focus the energy of the sun to dry food faster than sun drying alone. Solar food dryers tend to be bigger and bulkier than electric dehydrators so keep that in mind if your outdoor space is limited.
It is easy to build a solar food dryer for not much money or by purchasing one online. They were popular in the health food movement of the 1970s, especially as oil and gas prices soared. Today, solar food dryers are making a comeback as history appears to be repeating itself with healthy eating trends and rising energy costs.
How to dehydrate food without an oven?
There are lots of ways to dehydrate food without an oven. If you don’t have access to an oven or live in a household where the oven is used to cook daily meals, you would be hard pressed to find a way to use an oven for hours at a time to dehydrate food.
Appliance drying
If you don’t have an oven but do have access to other appliances, you can try dehydrating food with one of these methods:
-Electric food dehydrator
-Air fryer
-Toaster oven
-Pressure Cooker with dehydrating function
-Microwave
-Refrigerator
-Freeze dryer
-Stovetop dehydrator
Without an oven, your best bet to dehydrate food would be to use an appliance. Most appliances listed will have similar drying times as they would in an oven. Some appliances have better airflow for more uniform drying and have cheaper electricity costs than dehydrating a batch of food in an oven.
Natural drying
You can dehydrate food without an oven (and without electricity!) by one of the following methods:
-Sun Drying
-Solar Food Dryer
-Vine Drying
-Wind Drying
-Room Drying
-Smoke Drying
Without an oven and electricity, your next options to dehydrate food would be using the energy of the sun, wind or fire. Although these methods are natural and have a smaller carbon footprint than dehydrating in an oven, they are weather dependent, take a lot longer to dry completely and the types of food you can safely dry are much more limited.
Freeze Drying vs. Dehydrating
The first thing you should know is that freeze drying is NOT the same as dehydrating.
Freeze drying food is an extremely effective preservation method using a deep freezer and vacuum to remove up to 99% of the moisture of a food. Food retains its original size, shape, color and more nutrients compared to dehydrating. Freeze dryers allow you to dry pretty much any ingredient including dairy, fatty meats, oily fish and eggs.
Dehydrating only removes about 80-95% of the water in a food using heat and airflow. Dehydrated food shrinks and loses some of its texture, color and nutritional value. Oily foods, fatty meats or fish, eggs and dairy cannot be safely dehydrated as the fats will become rancid over time.
How Does Freeze Drying Work?
Raw foods are placed inside freeze drying chamber where temperatures drop to -30℉ to -50℉ (-34℃ to -46℃). Moisture inside the food is frozen, the pressure in the machine is dropped and the trays are heated slightly to transform the ice directly into vapor via a process called sublimation. A strong vacuum extracts the water vapor and the food is dried completely over 1 to 2 days.
Freeze dried food has much longer shelf life than dehydrated food and can be stored for 15 to 25 years without losing nutritional value or quality. However, a home freeze dryer is not only bulky and heavy, it is super pricey costing anywhere from $2,500 to $5,000.
How Does a Food Dehydrator Work?
An electric food dehydrator heats ingredients to temperatures of 95℉ to 165℉ (35℃ to 74℃) allowing moisture inside the food to evaporate into water vapor. A fan blows the moisture away from the food, allowing it to dry out completely over several hours. Dehydrating temperatures are high enough to prevent spoilage but low enough not to cook the food and retain most nutrients.
Dehydrated food will keep for a few months to a few years stored in an airtight container at room temperature. A home electric dehydrator can cost anywhere from $50 to $550 but dehydrating can also be performed in the oven, air fryer or hung outside for only a few dollars.
The purpose of dehydrating or freeze drying is to preserve food by removing moisture so it doesn’t decompose or grow harmful bacteria or mold. Unlike canning or freezing, dehydrating and freeze drying avoid completely destroying the composition of the food which increases the nutritional content and shelf life. However, keep in mind that freeze drying and dehydrating are two very different food preservation processes with different outcomes and costs.