If you’re an avid user of a food dehydrator, you know how important it is to keep it clean and sanitized. But with so many parts and components, it can be overwhelming to know where to start.
In this guide on how to clean a food dehydrator, we’ll provide you with a step-by-step process for removing dirt, grime, and bacteria from your machine to ensure it runs smoothly and produces delicious, healthy food every time. Whether you’re a seasoned pro or a newbie to dehydrating, these tips will help you maintain your unit and extend its lifespan while keeping your food free from harmful contaminants!
- Do You Have To Clean A Food Dehydrator?
- 11 Reasons To Clean Your Food Dehydrator
- Safety Precautions For Cleaning Your Food Dehydrator
- What Supplies You Need To Clean A Food Dehydrator
- How to Clean A Food Dehydrator: A Step by Step Guide
- How to Clean the Inside of a Dehydrator
- How to Clean the Dehydrator Base
- Best Ways to Clean Dehydrator Trays, Metal Dehydrator Racks, Mesh Inserts and Fruit Roll Sheets
- How Do You Clean Silicone Dehydrator Sheets?
- How to Get Strong Smells (Onion, Garlic, Hot Peppers) Out of a Food Dehydrator
- FAQs for Cleaning Your Dehydrator
- Now You Try Cleaning Your Dehydrator!
Do You Have To Clean A Food Dehydrator?
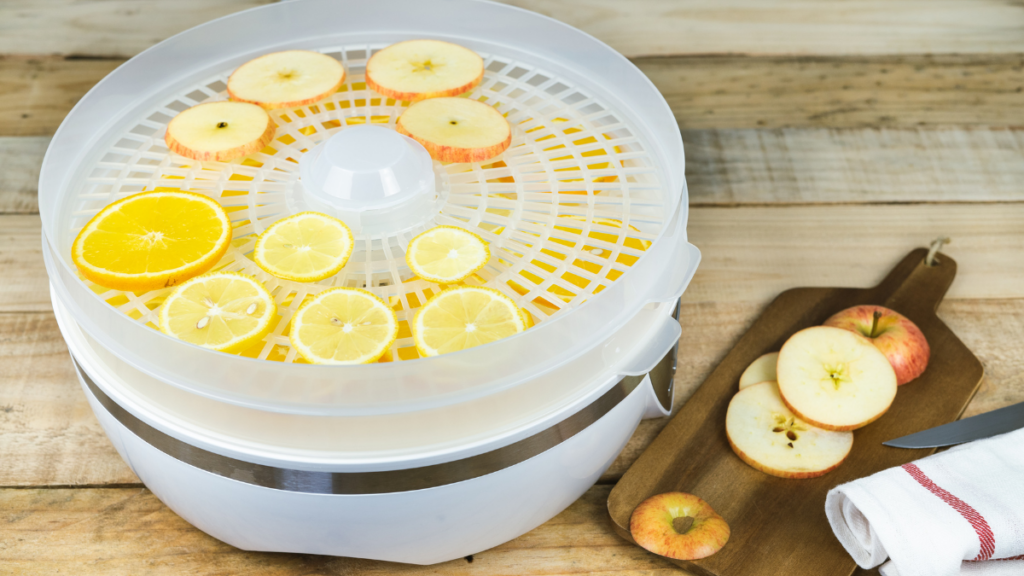
Food dehydrators are a fantastic addition to any kitchen, allowing you to quickly create delicious and healthy dried snacks and meals. However, like any appliance, proper care and maintenance are essential for getting the most out of your dehydrator for many years to come. From soaking trays to wielding toothbrushes, this article will leave no crumb unturned on how to clean your food dehydrator!
You’ll learn the best ways of how to clean and maintain your food dehydrator, ensuring its longevity and the quality of your dried foods. If properly maintained, your seemingly delicate dehydrator can actually last for decades without need for repairs!
It’s important to make sure your food dehydrator is clean, no matter whether it sits in storage for most of the year until gardening season or if you use it on a daily or weekly basis. Cleaning your dehydrator is necessary after drying each batch of food as leftover food particles can build up, transferring unpleasant odors or allowing bacteria to grow. Every now and then you’ll need to do a food dehydrator deep clean and we have some great tips to keep your appliance in top shape.
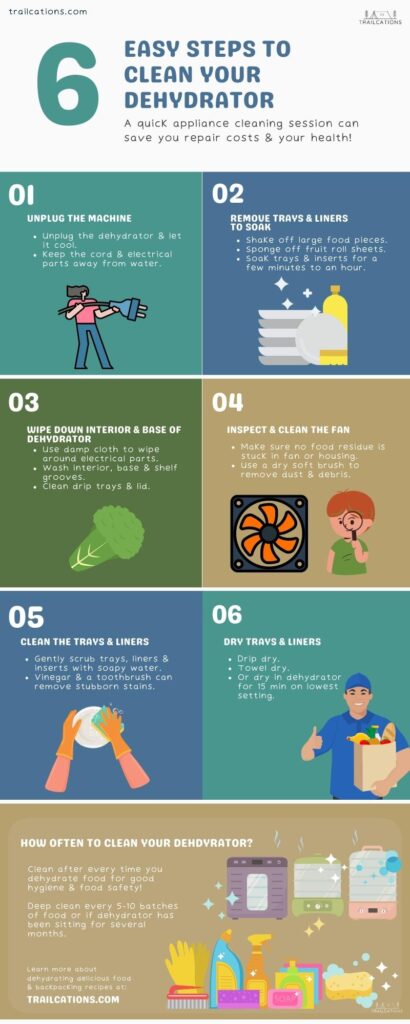
6 Basic Steps of How to Clean Your Food Dehydrator
1) Unplug the Machine
2) Remove the Trays and Liners to Soak
3) Wipe Down the Interior and Base of the Dehydrator
4) Inspect and Clean the Fan
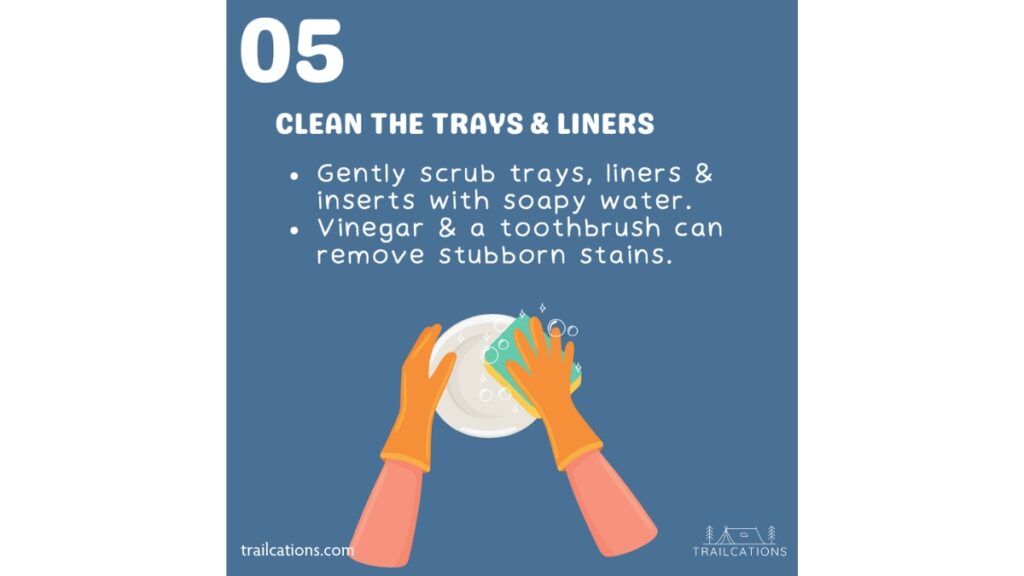
5) Clean the Trays and Liners
6) Dry the Trays and Liners
Not to worry, with a few simple steps and the correct tools, cleaning your food dehydrator is a breeze! Let’s dive in and explore the proper techniques for keeping your food dehydrator in peak condition.

11 Reasons To Clean Your Food Dehydrator
There are many important reasons for cleaning your food dehydrator. Here are a few of the best reasons for regularly cleaning your dehydrator:
1) Food Safety: First, and most importantly, your appliance needs to be spotless to maintain good hygiene and ensure that the food is safe to eat. You wouldn’t eat off a dirty plate so why would you eat off a dirty dehydrator tray?
2) Prevents Bacteria from Growing in the Dehydrator: If you don’t clean your dehydrator between projects, you risk food spoiling, or worse, food poisoning. Following basic food safety protocols are super important for storing dehydrated food long term. Cleaning your dehydrator with soap and warm water after every batch of food prevents bad bacteria and mold from growing.
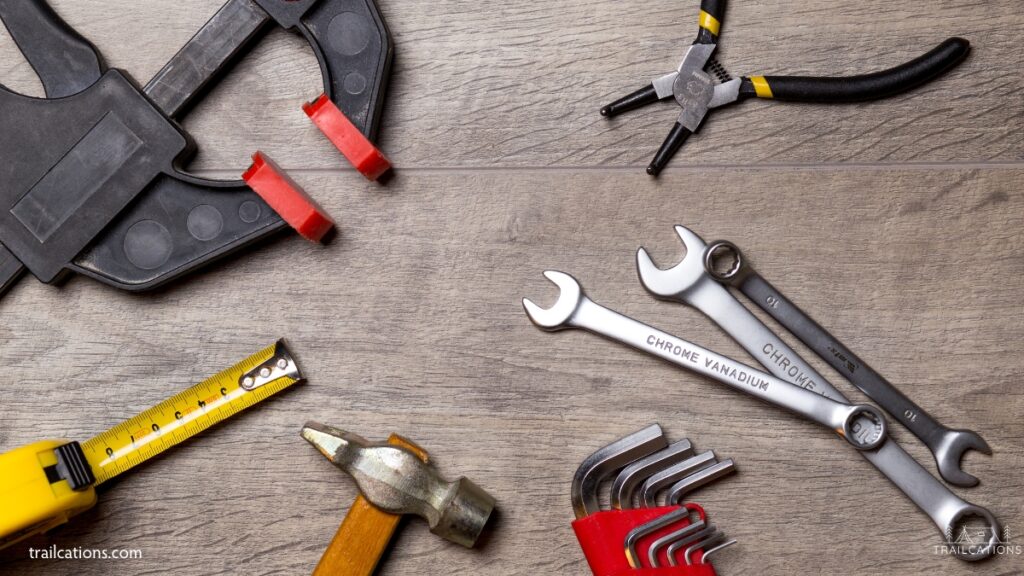
3) Less Money Spent on Repairs: Keeping your dehydrator clean will prolong its lifespan meaning that you won’t have to spend extra money and time on replacement parts.
4) Removes Food Residue and Particles: When you use the dehydrator, some stubborn food particles are bound to stick to the trays or fall to the bottom of the appliance. These particles can slow down the drying process in the future, contaminating the food with unpleasant smells, bad bacteria or allowing it to only dry partially.
5) Get Rid of that New Plastic Smell: The first time you use a new dehydrator, you will probably notice a new plastic smell. The plastic smell can seep into the food the first few times you are drying food, making it taste funny. Clean the unit with soapy water before the first use to avoid contamination.
6) Hygienic Dehydrating Space: Dehydrators are perfect for making a variety of healthy, delicious tasting snacks that everyone loves. In all of the nooks and crannies, it is easy to leave behind food particles which can mold or spoil, cross-contaminating future batches of food. Make sure to leave the interior sparkling clean so as to not contaminate each new batch of food.
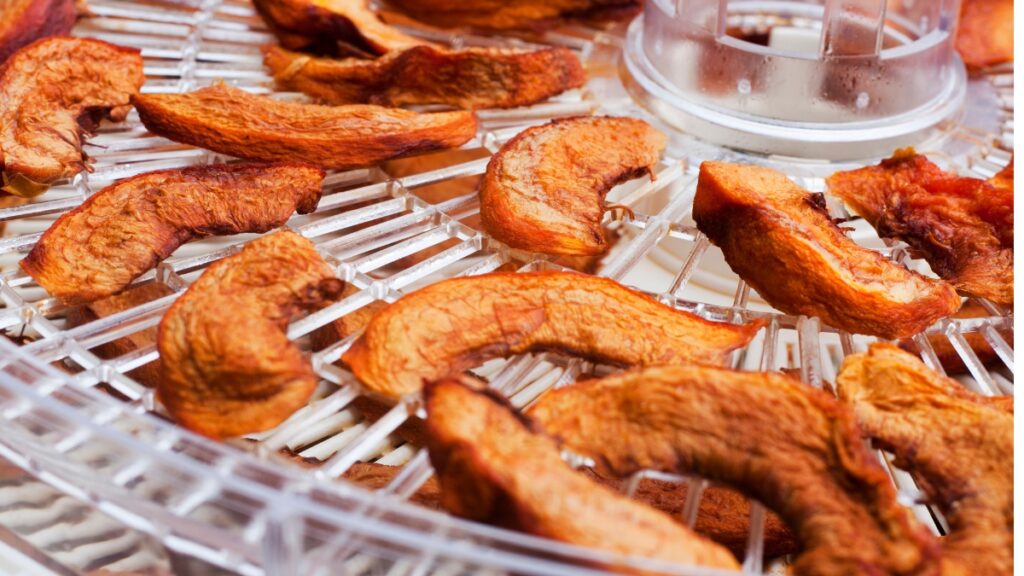
7) Prevents Food from Sticking to Your Dehydrator Trays: Keeping your dehydrator trays clean is important to prevent food from sticking to them. The dehydration process concentrates natural sugars in the food which can act like a sticky glue. Cleaning between batches of food removes residue and debris that cause dehydrated food to stick to the trays. Ensuring you have a clean dehydrator every time is a great way to prevent food from sticking to your dehydrator trays.
8) Remove Unwanted Scents Trapped in the Appliance: Once you start dehydrating, you’ll quickly realize some foods such as onions, garlic and hot peppers have a very strong scent that can stay trapped in the dehydrator after being used. To avoid those strong smells from contaminating future batches of foods like fruit or herbs, clean the dehydrator after every use. No one wants garlic dust on their dehydrated fruit!
9) Preventative Maintenance Ensures the Device Continues to Work: Regular cleaning and inspection of your dehydrator’s power unit, heating element and fan will make sure it will keep working for a long time.
10) Clean Up the Pooled Moisture: Some foods, especially watery fruits and vegetables, hold more water content than others. The dehydrating process evaporates this water into vapor that can condense and drip at the base of your appliance. For electrical safety reasons and to avoid bacteria growth risks, you should always remove the drippings of pooled moisture before using the dehydrator again.
11) Faster Drying Times: If your dehydrator fan or fan housing is all gunked up with food debris, it will take longer to dehydrate a batch of food as the air flow is restricted. Keeping the fan area free of food residue and dust will ensure fast drying times and a more efficient dehydrator.

Safety Precautions For Cleaning Your Food Dehydrator
When it comes to cleaning and maintaining your food dehydrator, safety should always be a top priority. By following some simple precautions, you can protect yourself from potential harm and ensure that your dehydrator stays in peak condition for years to come.
Unplug the Dehydrator
This may seem like common sense, but it goes without saying that before you begin cleaning your food dehydrator, always remember to unplug the device to prevent any electrical hazards. To do this, simply grasp the plug firmly and pull it out of the socket. Avoid touching any wet surfaces or objects while handling the plug, and never yank the cord to remove it, as this can damage both the cord and the outlet.
Keep Electrical Parts Dry
When cleaning your dehydrator’s electrical parts such as the heating element, power base, fan or fan housing, first use a dry bristle brush to remove residue and dust. Never submerge your dehydrator’s electrical components into water as this can potentially cause electrocution (!!) next time you turn it on. The water exposure will also damage your dehydrator and likely void your warranty. Avoid exposing overly wet sponges and dish cloths to the electrical components.
PRO TIP: A quick scrub with a soft bristle brush or a blast of compressed canned air are great ways to dislodge debris or residue stuck on your dehydrator’s sensitive electrical parts.
Ensure Drying Trays Are Dishwasher Safe
There are many dehydrator models that have the option to wash your dehydrating racks, top covers, drip trays and mesh or metal inserts in the dishwasher, as long as they are removed before the high heat of the drying cycle. The drying cycle of the dishwasher can warp or melt your dehydrator trays and mesh inserts. Refer to your dehydrator’s owner’s manual to make sure your drying racks, covers and mesh inserts are dishwasher safe.
Use Safe Cleaning Tools
Selecting the right cleaning tools and supplies for your food dehydrator is essential. This not only helps you maintain the device properly but also ensures your safety during the process. When selecting cleaning supplies, consider the following guidelines:
- Opt for gentle soaps and mild detergent that doesn’t leave behind residue.
- Avoid overly fragrant cleaning sprays with strong perfumes that can leave behind chemical smells and flavors in the next batch of food. Abrasive cleaners can damage dehydrating trays or leach into your food.
- Always use warm water for cleaning, as it can help loosen dried-on residue more effectively.
- Use non-abrasive soft brushes and sponges to clean the trays and walls of the dehydrator, preventing any scratches or damage to the surface.
- Avoid steel wool, rough metal sponges or sharp utensils which can damage the dehydrator.
- For stubborn stains and build-up, consider using white vinegar as a gentle yet effective cleaning solution.
By following these safety precautions and using the appropriate cleaning tools, you can ensure the longevity of your food dehydrator while keeping you and your loved ones safe.
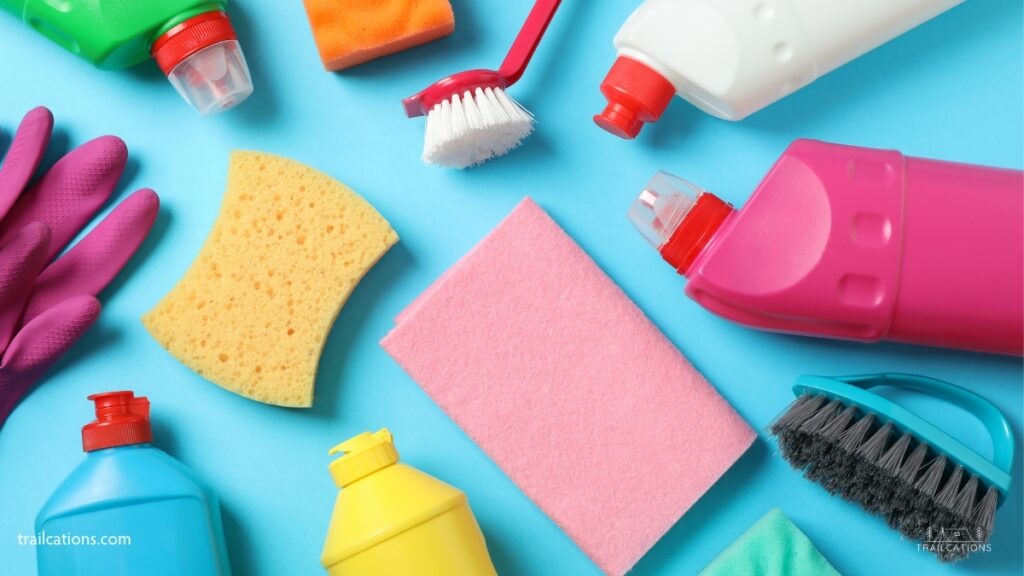
What Supplies You Need To Clean A Food Dehydrator
Before cleaning your food dehydrator, consider having the following supplies on hand to make the task easy and quick.
1. Soap
A gentle, diluted dish soap should be enough to clean your dehydrator. Try to use a fragrance free soap to avoid leaving behind unwanted scents in the next batch of food. Cheap soaps sometimes leave behind sudsy residue so make sure to thoroughly rinse drying trays.
2. Warm Water And A Big Enough Sink
Depending on the size of your dehydrator trays, ensure you have enough space in your sink and warm water to clean your machine. Usually a kitchen sink offers substantial space to wash drying trays but if not, a bathtub or plastic tote filled with warm water also works.
3. Sponge or Dish Cloth
A normal kitchen sponge or dish cloth will be your best friend with quick cleaning of dehydrator trays. Avoid using metal sponges, wire brushes or scouring pads which can cause damage to the dehydrator.
4. Non-Abrasive Soft Bristle Brush
Nothing beats using a soft scrubbing brush or toothbrush to scour away stubborn food residue caught in the nooks and crannies of a dehydrator tray. Make sure that the brush is soft enough not to scratch the plastic on your dehydrator’s surface. Don’t use a wire brush as it can scratch your dehydrator.
5. Kitchen Towel
Somehow I always manage to spray everything with water while clearing my dehydrator! Having an absorbent high quality kitchen towel or two on hand is super helpful to ensure you don’t create a mini flood in your kitchen.
6. Rubber Gloves
A good pair of rubber cleaning gloves will ensure your sleeves stay dry from an intense deep clean of your food dehydrator.
7. White Vinegar Or Non-Abrasive Food Safe Cleaner
For stubborn, hardened residue on your dehydrator trays, a quick soak in white vinegar can help remove even the toughest of stuck-on food. Alternatively, try some food-safe Powdered Brewery Wash, Bon Ami Powder Cleaner (Non Scratch) or Dawn Platinum Powerwash. Be sure to test a small area before using on all of your trays. Avoid using bleach or other harsh chemicals as they can leach into your food or ruin your dehydrator.
8. Compressed Air Can
I recently learned about using canned or compressed air to blow out stuck on pieces of food collecting in the fan at the back of my shelf tray dehydrator. It literally blew my mind (and all of the pieces of food debris stuck back in my dehydrator)! Make sure to hold the can upright as it sprays liquid when you tilt it sideways.
PRO TIP: 9. Handheld Vacuum
After drying a batch of food, I like to first use my handheld vacuum to suck up any bits of food that have fallen to the bottom of my dehydrator. It’s a quick way to easily clean up a lot of food residue!
How to Clean A Food Dehydrator: A Step by Step Guide
Keeping your food dehydrator clean and well-maintained is essential for the longevity of the appliance and the quality of the food you dehydrate. In this section, we’ll discuss the best methods to thoroughly clean your dehydrator, step by step.

1. Unplug the Machine
Before you start cleaning, it’s important to unplug your dehydrator and give it some time to cool.
-Unplug the dehydrator from the outlet.
-Keep the cord and machine away from water.
-Let the dehydrator cool.
-Use a damp cloth or sponge to clean your dehydrator. Never submerge your appliance into water.
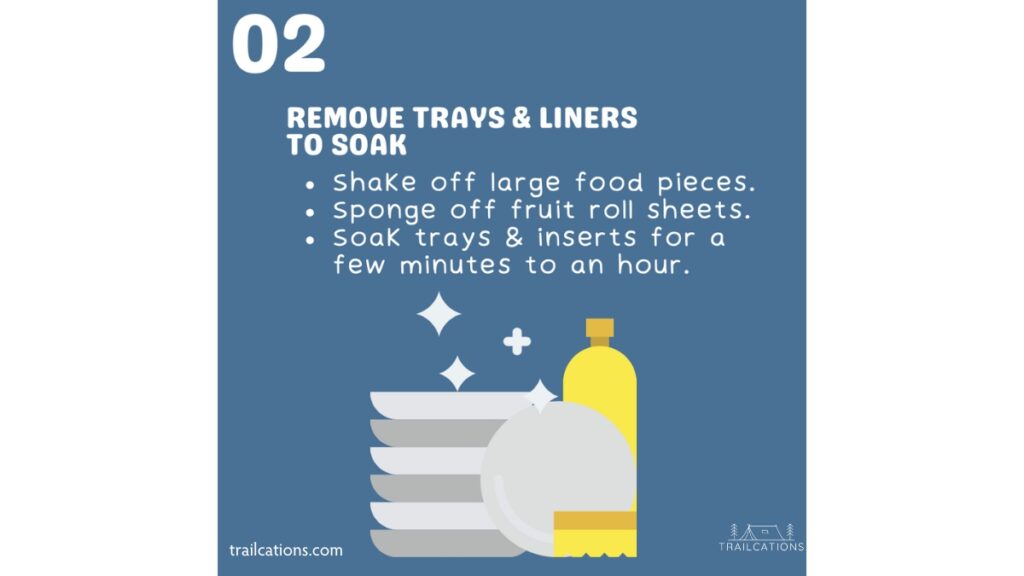
2. Remove the Trays and Liners to Soak
Be sure to shake off any stubborn pieces of food that may be attached to your dehydrator trays, drip trays or mesh inserts before soaking them in warm soapy water for a few minutes up to an hour. It makes cleaning so much easier as the mesh liners especially seem to hold onto everything!
Cleaning Nonstick Liners or Fruit Roll Sheets
If you’re using nonstick liners (aka Paraflexx sheets, silicone nonstick liners or fruit roll sheets) for fruit leathers and sauces, there’s no real need to soak them as they easily wipe clean with soapy water and a dishcloth or sponge. Some manufactures actually warn against soaking silicone liners!
Soaking Trays For Easier Cleanup
Soaking usually loosens most of the food residue and stains on a dehydrator tray. If stubborn debris still remains, you can easily scrub the trays with a soft brush or toothbrush to remove the tiny pieces and stains.
What To Do If Your Sink Isn’t Big Enough (Or You Don’t Have Access To A Sink)
If you have a larger dehydrator, the drying trays may not fit in your sink. Other options for places to soak drying trays and mesh inserts include:
-Large plastic tote
-Recycling bin (I’ve used this before in a pinch – make sure to clean it out first!)
-Industrial or commercial kitchen sink
-Bathtub
-Dishwasher*
PRO TIP: *Dishwasher Safety: Some plastic and metal dehydrator trays are able to be washed in the dishwasher but be sure to check the appliance manual to see if they’re also able to be safely dried in the dishwasher. The high heat of a dishwasher drying cycle may warp some dehydrator trays. Take caution to put the dehydrator trays in the top rack of the dishwasher.

3. Wipe Down the Interior and Base of the Dehydrator
Next, focus on cleaning the dehydrator’s body, focusing on its inner walls and housing, top power unit or base unit. Use a damp cloth and mild soap to wipe down the surfaces. For hard-to-reach areas, use a soft brush or cotton swab/Q-tip to gently access the crevices. Once the dehydrator body is clean, use a dry cloth to remove any moisture before reassembling the dehydrator.
–Fan at Top (Stackable Tray Dehydrator)
If your dehydrator has a drip tray, it’s essential to clean it regularly to prevent residue buildup. You can use warm water, mild soap, and a soft brush to scrub the drip tray. After cleaning, rinse the drip tray well and let it air dry. Make sure to clean the top lid as well with a damp cloth, avoiding dripping water into the power unit for the fan. Never submerge the power unit at the top of your dehydrator in water.
–Fan at Bottom (Stackable Tray Dehydrator)
My favorite part of cleaning stackable tray dehydrators is how easy it is to clean the base of your machine with a soapy damp cloth. Be careful not to drip any water into the fan or power unit at the base. Never submerge the base of your dehydrator in water if it has electronic parts inside. Cleaning the bottom of your dehydrator is important as to not introduce bacteria and mold which could grow on food residue and be blown upwards with the fan. Make sure to not forget to clean the top lid as well with soapy water and sponge.
-Fan at Side/Rear (Shelf Tray Dehydrators):
For shelf tray or box dehydrators, I like first using a handheld vacuum to remove any large pieces of food that have fallen during the drying cycle. Then I use warm soapy water, a soft bristle cleaning brush and some elbow grease to get into the shelf grooves. If your dehydrator has a drip tray, make sure to remove this every time and clean with warm soapy water and a cloth.
PRO TIP: For stubborn stains or dried-on residue, using a clean toothbrush or Q-tips can be effective tools to reach into the corners and edges of your dehydrator.
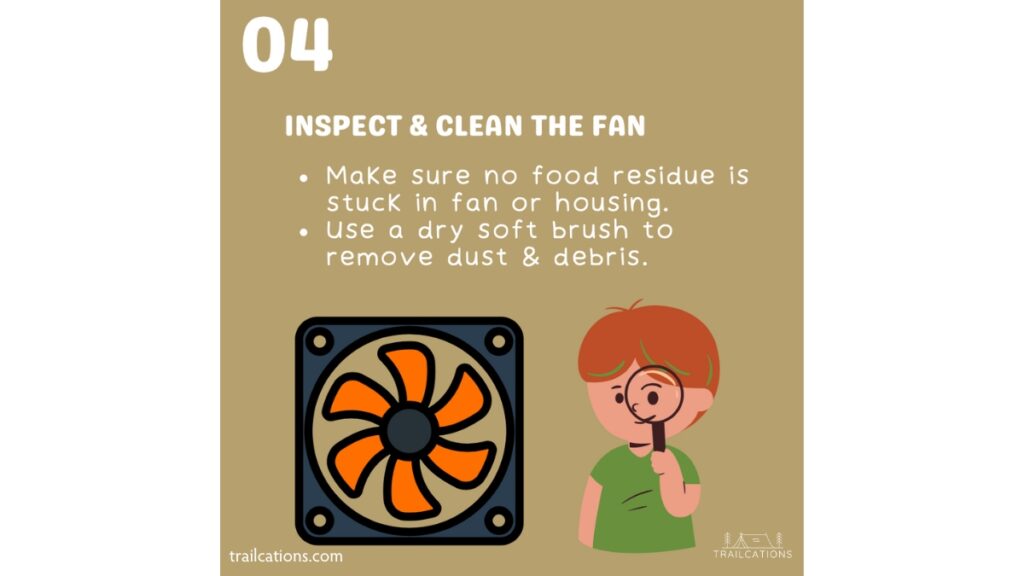
4. Inspect and Clean the Fan
While cleaning the base or interior of my dehydrator, I usually do a quick inspection of the fan to make sure it looks clean and make sure no food residue is stuck in the fan housing. Lightweight or small sized foods like greens or chopped peppers tend to be the culprits that blow back into the fan housing. While some manufacturers don’t call out this cleaning step, I’ve found it super helpful to make sure the machine runs efficiently.
–Fan at Base or Top (Stackable Tray Dehydrator):
Make sure the dehydrator is unplugged and cool before wiping away residue with a soft cloth or dry brush. Don’t drip water into the fan or heating elements or you could short out the electrical parts.
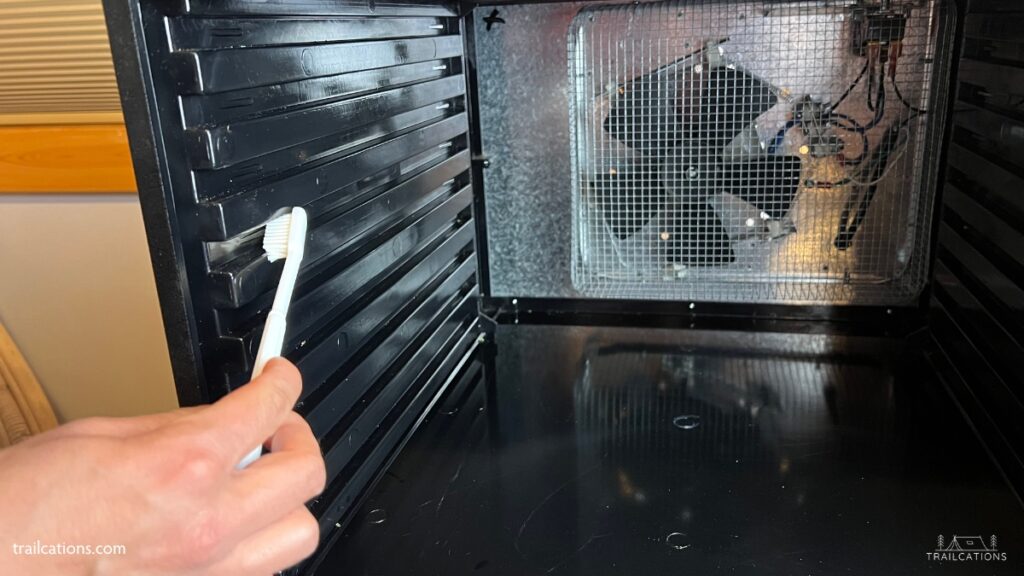
-Fan at Side/Rear (Shelf Tray Dehydrators):
Usually all you need is a quick wipe down with a dry, soft brush on the fan housing which tends to loosen the food debris. Compressed canned air can also be used for stuck on, hard to reach food residue. I spray the compressed air from the back of the machine to not spray debris directly into the motor box.
5. Clean the Trays and Liners
Remember those drying trays, drip trays, racks, fruit roll sheets and mesh liners we started soaking way back in Step 1? After a long soak, it’s time to clean them!
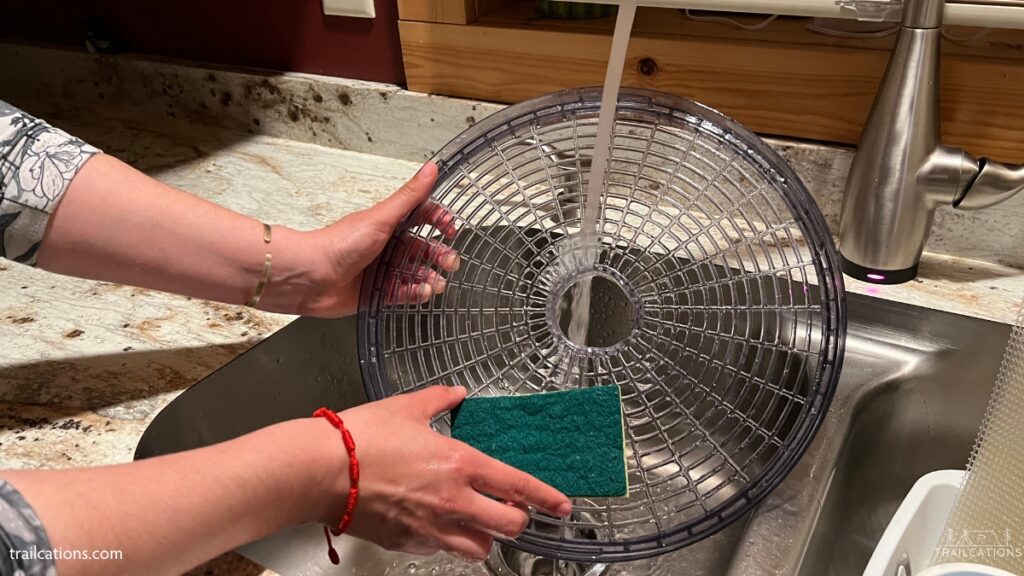
-Rinse off any large food pieces from the dehydrator trays, fruit roll sheets (aka silicone, nonstick or Paraflexx sheets) and mesh liners under warm water.
-Use a sponge or brush with soap to gently scrub the drying trays, racks, nonstick sheets and mesh liners.
-Avoid using abrasive materials like wire brushes or harsh chemicals that may damage the trays and inserts.
-Once the trays, racks, inserts and fruit roll sheets are cleaned, rinse them thoroughly to remove any residual soap.
6. Dry the Trays and Liners
There are several ways to dry out all of the water caught up in the crevices of your dehydrator trays, racks, inserts and liners. Here are a few of my favorite ways to dry out trays and liners:
Drip Dry
This is the tried and true method for drying your dehydrator trays and liners. Stack them in a drying racks vertically like books on a bookshelf, wait a few hours and your trays should be good to go. It seems like there is always a bit of moisture that gets stuck in the tiny mesh trays after drip drying in the dish rack so you may have to be patient or try one of the other methods listed below.
Sun Dry
The sun will quickly dry your trays for you in a few minutes but don’t leave them out too long or they might warp in the heat!
Towel Sandwich Method
Sometimes I dry my drying trays by making a dehydrator tray “sandwich.” First, lay a towel down as the “bread.” Next, place the dehydrator tray on top as the “sandwich filling.” Finally, fold the other end of the towel over the tray as the top layer of “bread.” Gently move the towel around to blot away excess moisture. Rinse and repeat with the next trays (or maybe, dry and repeat, haha!).
Dry in Dishwasher
Of the 50+ dehydrator models I’ve researched, I’ve only ever seen 1 or 2 dehydrator models whose manufacturer’s owner’s manuals specifically indicated that their drying trays were safe to leave in the dishwasher drying cycle. Most plastic drying or drip trays need to be removed from the dishwasher before the high heat of the drying cycle melts or warps the soft plastic material. Many dehydrator trays, inserts, liners and racks can’t even go in the dishwasher washing cycle so check your owner’s manual before attempting this.
Drying Trays in Dehydrator: I recently learned about this next drying trick on a food dehydrating forum and was kicking myself for not thinking about this before! Since the dehydrator is a machine that removes moisture, you can finish drying your trays and liners by putting them back in the dehydrator, turning it on and your dehydrator dries the trays for you. Genius! It only takes about 15-20 minutes to dry the trays at the lowest temperature your dehydrator goes and is much less harsh than drying the trays in the dishwasher.
How to Clean the Inside of a Dehydrator
Cleaning the inside of a dehydrator is important to maintain good food safety, as well as avoid moisture and food debris from collecting. Bad bacteria and mold can build up on leftover food inside a dehydrator and smells can transfer from one batch of food to another, leading to strange tasting flavors. To clean the inside of a dehydrator, follow these simple steps:
1. Unplug the unit and open the door
Remove all drying trays, mesh inserts, nonstick sheets and drip trays.
2. Wipe down the walls and bottom of the dehydrator
Use a soapy sponge or dishcloth for easy cleaning of the walls and bottom of the dehydrator. I like first using a handheld vacuum to remove large pieces of food at the bottom which makes it easier to then scoop up the remaining food pieces with a cloth.
3. Scrub along the tray rails on the sides
For cabinet or shelf tray dehydrator models like the Excalibur dehydrator, you’ll need to crub along the tray rails on the sides with a sponge to remove any food residue. I like using a soft bristle brush, Q-tips or toothbrush to scrub away stubborn residue on the drying tray rails. Wipe away any moisture with a dry towel.
4. Clean the fan housing if needed
Take a dry soft bristle brush to clean the fan housing if needed. Don’t get any of the electrical parts wet!
5. Dry the dehydrator completely
Let your dehydrator air dry completely by leaving the door open or components unstacked before turning the machine back on.

PRO TIP: If your dehydrator doesn’t have a drip tray, place a silicone nonstick liner, fruit roll sheet or parchment paper at the bottom of the dehydrator to catch drippings. This makes clean up even easier!
How to Clean the Dehydrator Base
Cleaning the base or bottom of a dehydrator is important to maintain good food safety as well as avoid moisture and food debris from collecting. Bad bacteria and mold can build up in a dehydrator base if it isn’t cleaned, causing food contamination and possibly illness. Luckily, cleaning a dehydrator base is super easy and can be accomplished in a few simple steps.
Use a cloth or sponge and mild soap to wipe down the surfaces on the base. For hard-to-reach places inside the base of the dehydrator, use a soft brush or Q-tips to access the nooks and crannies. Once the dehydrator base or bottom is clean, use a dry cloth to wipe away moisture and air dry. Ensure everything is dry before reassembling the dehydrator and turning it on.
How to Clean Dehydrator Drip Trays:
-If your dehydrator has a moisture drip tray, it’s important to clean it after every batch of food to prevent residue buildup. Remove the tray from the machine.
-Use warm water, soap and a soft brush to gently scrub the drip tray.
-After cleaning, rinse the drip tray well and let it air dry.
Dishwashing the Base of Your Dehydrator:
Some dehydrator drip trays and bases without electrical parts can be placed in the upper rack of the dishwasher. Just remember to remove them before the drying cycle starts! Check your owner’s manual to see if this applies to your dehydrator.
Fan at Top (Stackable Tray Dehydrator):
-If your dehydrator has a drip tray at the bottom, it’s essential to clean it regularly to prevent residue buildup. You can use warm water, mild soap, and a soft brush to scrub the drip tray.
-After cleaning, rinse the drip tray well and let it air dry.
-Make sure to clean the top lid as well with a damp cloth and dry brush avoiding dripping water into the power unit for the fan.
-Never submerge the power unit at the top of your dehydrator in water.
Fan at Bottom (Stackable Tray Dehydrator):
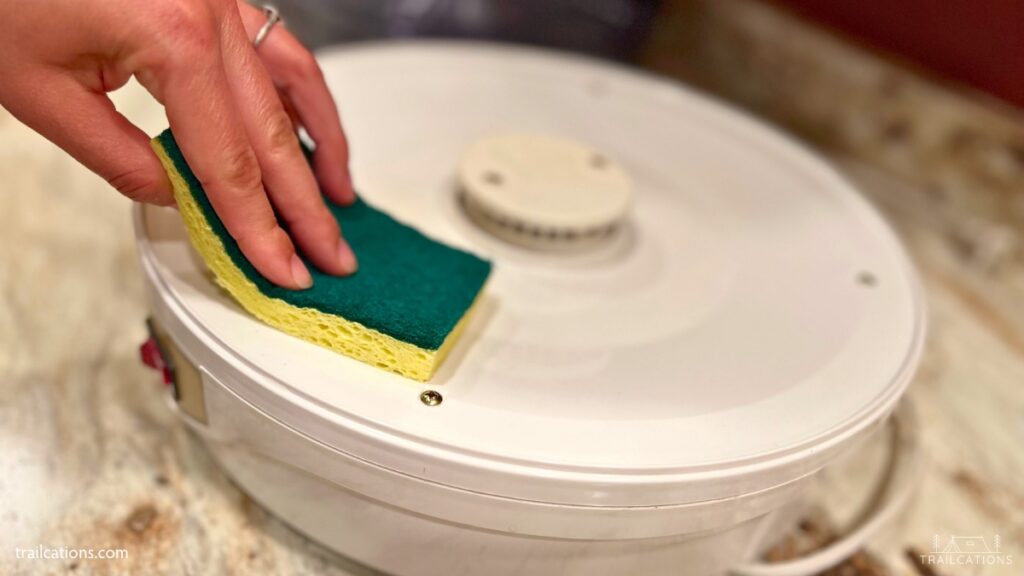
-It is super easy to clean the base of your stackable dehydrator simply using warm, soapy water and a sponge.
-Feel free to use a soft brush or damp cloth to gently clean around the fan element to remove food particles.
-Let the base unit air dry or use a towel to ensure it is completely dried.
-Do NOT submerge the power unit at the base of your dehydrator in water or you risk electrocution and will ruin the electronics.
Fan at Side/Rear (Shelf Tray Dehydrator):
-For shelf tray or box dehydrators, I often use a small handheld vacuum to remove any large pieces of food that have fallen to the bottom of the dehydrator during the drying cycle.
-Then I use a soapy sponge or dish cloth to wipe the interior and base of the dehydrator.
-Next, I use warm soapy water, a soft bristle cleaning brush or a damp paper towel to get into the shelf grooves.
-To dry the dehydrator, use a towel to blot away moisture or leave the door open to air dry the bottom of the dehydrator.
PRO TIP: Again for stubborn stains or dried-on residue, using a clean toothbrush or Q-tips can be an effective tool to reach into nooks and crannies.
Best Ways to Clean Dehydrator Trays, Metal Dehydrator Racks, Mesh Inserts and Fruit Roll Sheets
The best ways to clean your dehydrator trays, metal dehydrator racks, nonstick liners, mesh inserts and fruit roll sheets are to use a sink, sponge and some warm soapy water and soak the items to loosen the food particles. I find it best to clean your drying trays as soon as possible after you’re done dehydrating to more easily remove food residue and avoid permanently staining them.
How to Quickly Clean Dehydrator Trays, Metal Dehydrator Racks, Mesh Inserts and Fruit Roll Sheets
1. Shake it Off: First, shake off any large food pieces from the dehydrator trays, racks, mesh inserts and nonstick silicone sheets into the trash or compost. Rinse them under warm water.
2. Soaking: This isn’t always necessary but I really do find it easiest to clean crusty or stained drying trays and racks by filling my sink up with warm, soapy water and letting them soak for a few minutes to an hour. This greatly loosens the hardened natural sugars found in fruits, vegetables and beef jerky marinades. If you’re using silicone liners, Paraflexx sheets or fruit roll sheets for fruit leathers and sauces, there’s no real need to soak them as they easily wipe clean with soapy water and a dishcloth or sponge. Some manufacturers actually recommend to NOT soak their fruit roll sheets.
3. Sponge it Down: After soaking the trays, racks and mesh inserts, gently scrub them with a sponge or brush and soapy water. Clean fruit roll sheets with a sponge and soapy warm water. Avoid using abrasive materials like wire brushes, scouring pads or harsh chemicals that may damage the dehydrating racks.
4. Rinse: Once the trays, racks and sheets are cleaned, rinse them thoroughly to remove any residual soap.
5. Dry: Let the trays, racks and sheets air dry. Alternatively, you can stick the cleaned trays and racks back in the dehydrator for 15 to 20 minutes on the lowest setting to let the fan dry them out! Towel drying works too – just be sure to get into all of the crevices of your drying racks.
How Do You Clean Silicone Dehydrator Sheets?
It is super easy to clean silicone dehydrator sheets due to the nonstick properties of the silicone material. As funny as this sounds, cleaning the silicone dehydrator sheets is one of my favorite parts of cleaning a dehydrator because of simple it is!
Place your silicone dehydrator sheets in a sink or basin full of warm, soapy water. Hand wash the silicone dehydrator sheets with a dish cloth or sponge, rinse and let air dry. I like to let my silicone dehydrator sheets dry by draping them over a clothes drying rack, on the racks of an open clean dishwasher, from a drying string, a chair, or wherever good airflow can get to them.
Never use abrasive sponges, brushes or harsh cleaners on silicone dehydrator sheets as you could damage them or create scratches on the surface where bacteria can grow. Some silicone dehydrator sheets should not be left to soak in water for a long time as it can ruin the lifespan of the sheets.
Using the Dishwasher to Clean Silicone Dehydrator Sheets
Check your manufacturer’s instructions to determine if your silicone dehydrator sheets are able to be washed in the dishwasher or not. Foodsafe silicone is a nonstick, flexible heat-resistant material often used in a variety of kitchen applications such as oven potholders or oven mitts. Many pure silicone items can be cleaned and dried in the dishwasher without worry.
However, silicone dehydrator sheets may not always be made from 100% silicone. This doesn’t mean they’re any less or more effective for dehydrating than pure silicone dehydrator sheets. In fact, the silicone-coated dehydrator sheets can actually be more affordable than pure silicone dehydrating sheets!
Silicone-coated or silicone-impregnated dehydrating sheets usually cannot withstand the high temperatures of the dishwasher and need to be hand washed (not soaked). Some dehydrator sheet manufacturers specifically warn against putting their silicone sheets in the dishwasher so double-check your owner’s manual before accidentally melting your nonstick silicone dehydrator sheets!

How to Get Strong Smells (Onion, Garlic, Hot Peppers) Out of a Food Dehydrator
Let’s face it: some dehydrated foods have very strong smells. The last thing you want to do is to transfer strong smells from foods like onions, garlic or hot peppers to something sweet or delicate like fruit or herbs. That just sounds gross!
Here are some tips to get rid of strong smells like onions, garlic, hot peppers and more out of a food dehydrator.
Basic Cleaning Process to Remove Strong Smells in Your Dehydrator
1. To get strong smells like onion out of a food dehydrator, unplug the appliance, remove the food and leave the dehydrator door open.
2. Next, rinse off the dehydrating trays, liners and racks and soak them in hot, soapy water for an hour or two.
3. Clean out the inside of the dehydrator with a sponge, soft brush and soapy water. Make sure to get as much food debris as possible, doing more of a deep clean than routine cleaning. I like turning on a ceiling fan to blow away any smells while I’m doing this.
4. Wipe away any food caught in the dehydrator fan with a soft brush as old food debris can transfer scents and flavors to the next batch of dehydrating food. Leave the door open or unit disassembled for several hours to allow smells to dissipate. Sometimes I let the dehydrator air out for a day or more just to be safe.
5. Return to the soaking drying trays, racks and liners. Wash them thoroughly with a sponge or dishcloth and warm, soapy water. Make sure there are no little particles of food left behind.
6. Rinse the trays and let air dry. The majority of the time this is all you need to do to get strong smells like onion out of a food dehydrator.
Vinegar Rinse to Remove Strong Smells in Your Dehydrator
For stubborn smells that just won’t get out of a food dehydrator, what I like to do is use a diluted 1:1 vinegar solution to clean the interior and trays of the dehydrator. Never mix vinegar with other cleaning chemicals as it can create toxic gases. And most importantly, make sure to air out your dehydrator after scrubbing it down with vinegar or your food might taste like pickles next time!
Air Out Your Dehydrator for at Least an Entire Day
I’ve found the easiest way to get rid of strong smells after drying a very fragrant food is to air out the dehydrator for at least a whole day. Wash and dry the dehydrator parts as usual and then let the disassembled dehydrator air out for at least a day. Air drying the dehydrator for 24 hours usually will remove most strong smelling foods.
Sacrifice a Batch of Food to Remove Strong Smells in Your Dehydrator
Alternatively, I’ll dehydrate a sacrificial batch of food after drying smelly food like hot peppers, mushrooms, onions, kimchi or garlic.
For example, after dehydrating about 70 spicy smelling jalapeno peppers a few weeks ago, I cleaned my machine thoroughly and then dehydrated sacrificed a batch of mild smelling spinach before cleaning it again and dehydrating apple slices.
Personally, I didn’t really mind if my spinach had a hint of spice as I was adding it to camping stews which could use a little flavor kick. However, I did mind if my apple slices ended up tasting like spicy peppers because I was planning on sharing them with someone who couldn’t tolerate spicy foods. In the end, my spinach didn’t even end up tasting spicy because I cleaned so well and aired out my dehydrator for about a day before drying again. And my apples tasted so great, my spice-intolerant friend asked me to make more!
TL;DR: Stinky Spicy Jalapeños –> Mild Smelling Spinach –> Beautiful Smelling Apple Slices
FAQs for Cleaning Your Dehydrator
Now You Try Cleaning Your Dehydrator!
As you can see, it is really quite easy to keep your food dehydrator clean and well-maintained with a simple post-project wipe down. When you need to do a deep clean, I hope these additional instructions help you have the confidence to channel your inner Marie Kondo or Mr. Clean! Cleaning your dehydrator is crucial to ensuring you can continue safely drying delicious foods for you and your loved one for decades to come.
How long has it been since you gave your dehydrator a deep clean? What are your favorite cleaning tips on keeping your machine clean?