
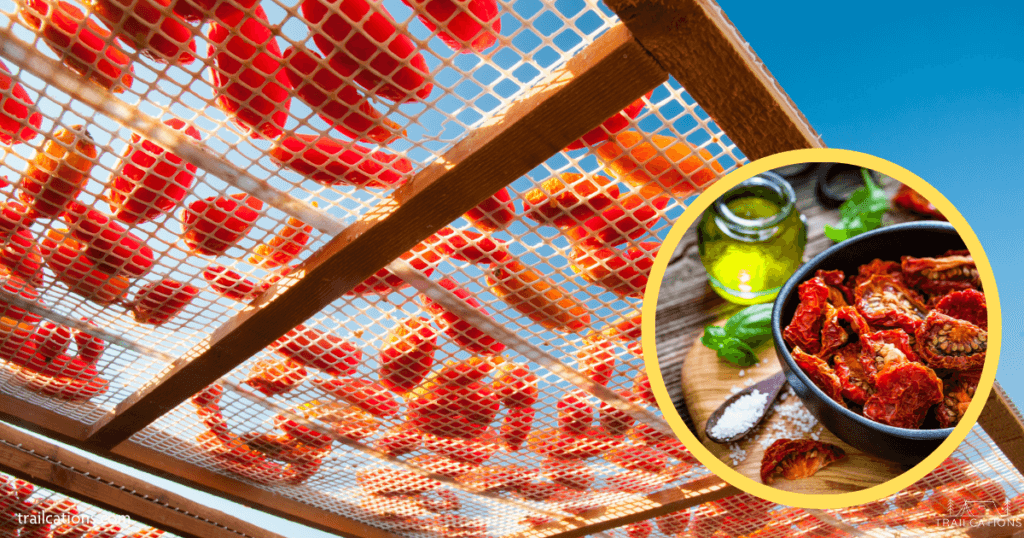
Whether you’re creating backpacking meals for the trail, looking to eat healthier with fewer preservatives or are trying to feed a family on a budget, our Dehydrating Guide has your drying needs covered. Learning how to dehydrate food has never been easier than with our beginner’s guide. From recipes to expert tips – we’ve got you covered!
Dehydrating food has been a popular preservation method for centuries, and it’s still an effective way to extend the shelf-life of many different types of food today. By removing moisture from food, we reduce the risk of spoilage and make it easier to store for long periods.


In this article, we will explore some essential information you need to get started on dehydrating your own food at home. Say goodbye to expensive, overly salty or sugary preservative-filled store bought snacks and say hello to saving money (and your health) with a home dehydrator!
From understanding the basics of food dehydration to mastering various methods and techniques, our goal is to provide you with a comprehensive resource for preserving your favorite snacks and meals! We’ll also discuss how to prepare your food for the dehydration process, time and temperature guidelines, as well as tips for storing and using your homemade dehydrated goodies.
Key Takeaways

- Learn all about food dehydration & its benefits
- How to dehydrate various types of food (including fruit, vegetables, herbs, meat, seafood, jerky, plant-based meat and meals)
- Top 3 things to look for when buying a dehydrator
- Best practices for storing dehydrated food for optimal flavor & nutrition
- How to rehydrate dried food
- Understanding the Basics of How to Dehydrate Food
- Prepping for Dehydration
- Methods of How to Dehydrate Food
- Top 3 Things To Look For When Buying a Food Dehydrator
- Dehydrator Time and Temperature Guidelines
- How To Dehydrate Different Types of Food
- Preventing and Handling Issues
- How do you test dehydrated food for doneness?
- Storing Dehydrated Food Long Term
- Nutritional Value and Rehydrating Dehydrated Food for Recipes
- 7 Dehydrating Tips for Beginners
- Frequently Asked Questions
- Footnotes
Understanding the Basics of How to Dehydrate Food
What is Food Dehydration?
Food dehydration is a 14,000-year-old preservation process that involves removing water content from food items to preserve them long term. This method of preservation not only reduces the growth of bad bacteria and mold but actually stops enzymes from spoiling the food, which in turn extends shelf life.
Food dehydration typically removes between 80 to 95% of the water in fruits and vegetables and about 50 to 75% of water in meats. Reducing the amount of water to these levels in a food essentially stops decomposition, as well as bacteria and mold growth. Consequently, dehydration allows food to be safely stored in an airtight container for many years (or even decades!) without significant loss of nutrients.
There are various ways to dehydrate food, including sun-drying, air drying, and using an electric appliance such as a convection oven, air fryer or our favorite – a food dehydrator. No matter what method you use, it is crucial to maintain the right temperature and air circulation during the process to ensure successful dehydration.
Importance of Dehydration for Food Preservation
Food preservation through dehydration is a time-tested and efficient technique. By removing moisture from the food, we create an environment that is less hospitable to bacteria and mold, which helps to preserve the quality of the food for long periods. Dehydrated food is not only convenient for storage, but it also allows us to enjoy our favorite fruits and veggies even when they’re not in season.
Dehydrated food offers numerous benefits, such as:
- Portability: Lightweight and easy to carry around, making them ideal for backpacking and camping trips.
- Long shelf life: Properly dehydrated food items can last for months, years, or even decades, reducing food waste and saving us money.
- Nutrient preservation: Dehydration helps to retain 97% of the food’s nutritional content, providing valuable vitamins and minerals as part of our diet.
- Space-saving: Reduces the size of food items and allows for compact storage, perfect for hikers, campers and gardeners with too much produce on their hands!
Still not convinced? Check out all these benefits and more in our article 49 Amazing Benefits to Dehydrating Food.
Investing time in understanding the process of food dehydration can reap many rewards. Not only do we help to preserve food and minimize waste, but we can also enjoy the convenience and tastes provided by dehydrated food all year round, making our lives a little more sustainable and enjoyable.
A Quick History of How to Dehydrate Food

Dehydrating is one of the oldest forms of food preservation.
Long before it was hip to “go green,” the first human civilizations used renewable solar and wind energy to dry their meat, fish, grains, seeds, fruits and vegetables. Paleontologists have even found bits of dried food in the Middle East demonstrating that humans have been drying food since at least 12,000 B.C.
Can you imagine that dehydrating is such a reliable preservation method that we’ve found perfectly preserved bits of 14,000-year-old food? Wow!
The first hot air dehydration machines were invented in 1795 in France. More food was able to be transported across the world because of its compactness and reduced weight. Militaries fighting in the World Wars also relied heavily on dehydrated food to support troops in the field, which brought about significant advances to refine the commercial drying processes.
Surprisingly, home dehydrators weren’t available until the health movements and exercising fads of the 1970s. Health gurus, backpackers, mountaineers, hikers, camping enthusiasts and cyclists quickly took to the dehydrating food craze, creating high quality, packable and shelf-stable meals and snacks to take their outdoor adventures to the next level.

Today, dehydrated food is quickly shipped across the globe, providing easier access to healthier options and regional cuisines. Dehydrated food also provides critical supplies to disaster relief programs, militaries and people living in rural off-grid communities.
There are thousands of commercially available dehydrated food brands ranging from individual ingredients to “just add water” entire meals. Home dehydrating has also never been easier with thousands of articles and videos available online as well as many hundreds of recipe books.
Prepping for Dehydration
Selecting the Best Quality Raw Ingredients
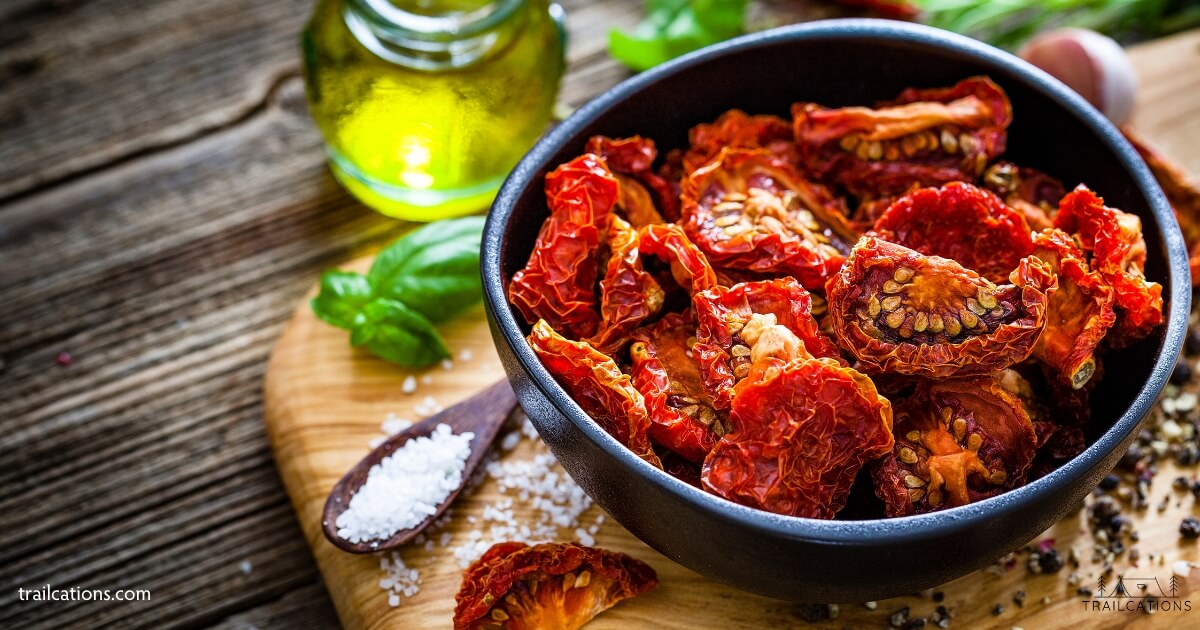
Dehydration concentrates the flavor of a food. It is a major reason many of the world’s best restaurants use food dehydrators when crafting their menus. Fruits become sweeter, vegetables are more savory and homedried herbs taste better than anything you could ever buy at the store.
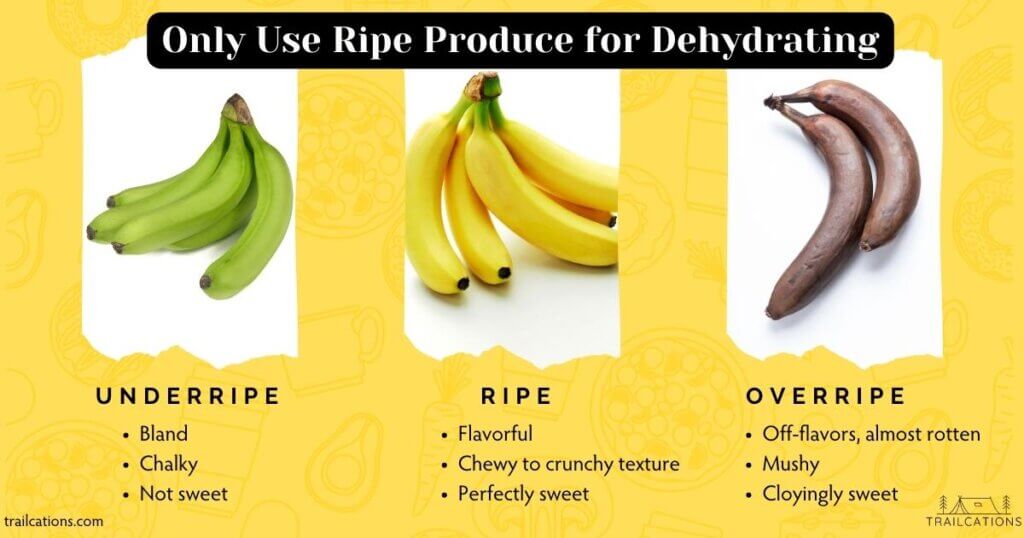
That being said, it’s important to use the highest quality ingredients when dehydrating food. For instance, if a banana isn’t quite ripe, dehydrating isn’t going to improve that flavor. Drying an unripe banana will just concentrate the unripe, chalky, semi-sweet tastes. On the other hand, if your green beans are overripe and starting to brown or decompose, those musky, unsavory flavors are only going to become more concentrated with dehydrating.
Even though dehydrating is a great way to preserve excess food in your fridge and avoid waste, make sure you use ingredients that are still good quality. Cut out any brown spots, discard mushy produce and definitely do not dehydrate anything that already has mold on it.
Buying produce in season and on sale is a great way to save money for home dehydrating. Alternatively, growing your own food in a garden to preserve by dehydrating is an excellent way to manage huge harvests. Farmer’s markets are a great way to access lots of fresh local produce just waiting to be dehydrated!
Cleaning and Slicing
Before dehydrating any food, we always start with a thorough cleaning. Washing fruits and vegetables is essential to remove any dirt, pesticides, food grade wax and bacteria. Gently rub the produce under running water, then pat it dry with a clean towel.
Never wash raw meat as spray and droplets can easily contaminate surrounding surfaces (USDA Meat Guidelines). Instead, slice off any visible fat and then freeze for 15 minutes to make it easier to cut into thin slices with a knife. Marinade meat in an oil-free dressing after slicing to maximize flavor.
Next, we slice our fruits, vegetables, and meats to a uniform thickness. Thinner slices will dry more quickly, so try to keep them between 1/8″ to 1/4″ (3 to 6 mm). For fruits like apples and bananas, remove any seeds, cores or peels before slicing. A handy kitchen tool called a mandolin is a perfect way to cut even produce slices every time. Mandolins drastically speed up the slicing process but be careful as they can be very sharp.
Leave herbs intact as much as possible when dehydrating. Gently wash or brush off the herbs before placing them whole in the dehydrator. Once you crush the dried herbs, you release many of the volatile essential oils that create flavor. To best preserve the herb’s potency, wait to crush or grind the homedried herb until just before using in recipes.
Handling Raw Meat and Poultry
When dehydrating meat and poultry, it’s crucial to follow proper food safety guidelines. Always wash your hands, utensils, and cutting boards thoroughly before and after handling raw meat. To prevent cross-contamination, we recommend preparing and dehydrating meat separate from fruits and vegetables.
Make sure you only use lean cuts of meat with less than 10% fat content and fish with less than 5% fat content. Oily fish and fatty meats will not dehydrate properly and can actually give you food poisoning or worse: fatal botulism.
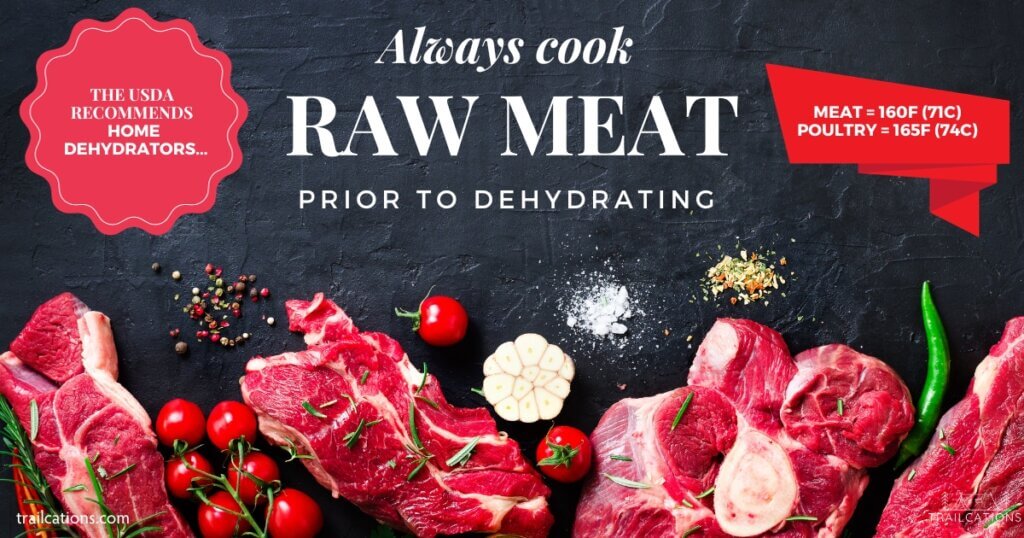
According to USDA food safety guidance, first cook meat to 160 °F (71°C) and poultry to 165 °F (74°C) before dehydrating. This step eliminates any harmful bacteria that might be present in raw meat. After cooking, be sure to slice the meat into thin, consistent strips to ensure even drying.

Why Cook Raw Meat Prior to Dehydrating? Learn from our mistakes!
Research studies have shown that dehydrators on their own can’t heat raw meat quickly enough to completely kill off bad bacteria like E. coli or Salmonella.
In fact, the low temperatures of a dehydrator can actually cause food poisoning bacteria to become more resistant to heat. If you dehydrate raw meat without cooking it first, you can accidentally breed a super strain of bad bacteria to become immune to heat. These microorganisms are not only surviving, they’re actually thriving on your homemade jerky, just waiting to give you food poisoning – yikes!
As the saying goes, what doesn’t kill you mutates and tries again. Always cook your meat first before dehydrating it!
Editor’s Note: Speaking from experience of spending 4 days with horrible food poisoning on the Appalachian Trail from eating home dried meat that wasn’t cooked properly (and likely was too fatty), you really don’t want to mess around with these meat food safety guidelines. Skip the food poisoning risk by using only lean meats and cooking your meat prior to dehydrating.
Preparing Fruits and Veggies: To Pretreat or Not To Pretreat?
Before dehydrating fruits and veggies, let’s take some extra steps to maintain their color, texture, and nutrient content.
Why Pretreatment?
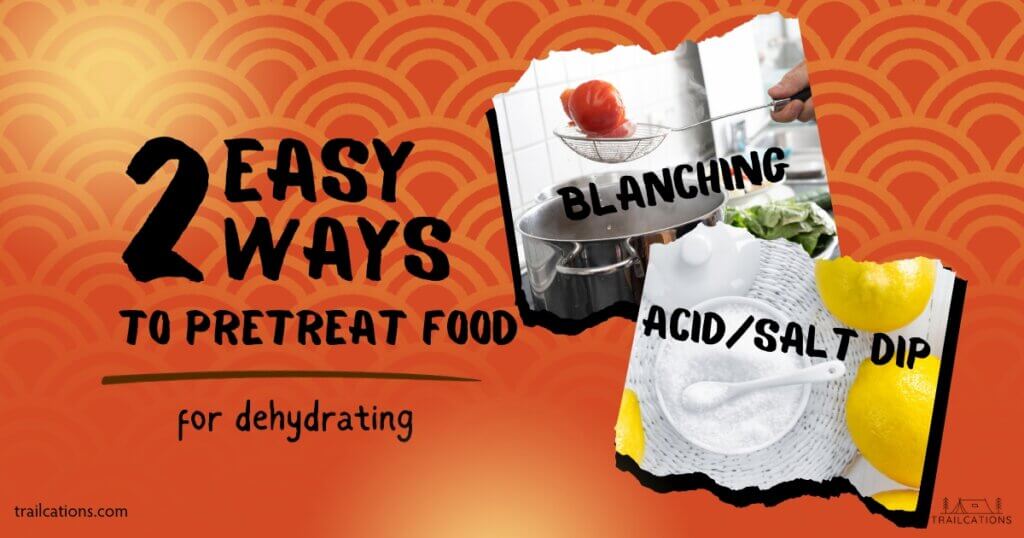
Research studies have shown that pretreating produce with an acidic or salt solution destroys harmful bacteria during dehydrating compared to no pretreatment solution. This includes Escherichia coli O157:H7, Salmonella species and Listeria monocytogenesm, some of the most common bacteria that cause food poisoning.
Besides preventing bacterial growth, chemical pretreatment also prevents oxidation (light colored fruits from turning brown).
Pretreatment can also include blanching or steaming food to break down cell walls and decrease dehydrating and rehydrating times. This usually applies to fruit with tough skins or dense root vegetables.
What do you need for Chemical Pretreatment?
- Sliced fruit or vegetables
- Large bowl
- Water
- One of the following acidic pretreatment powders (make sure it’s food grade):
- Citrus Juice (lemon, lime or unsweetened pineapple)
- Citric acid
- Ascorbic acid (Vitamin C)
- Sodium metabisulfite
All pretreatment powders are readily available inexpensively from homebrewing and winemaking suppliers and stores. Some can be found at drug stores, grocery stores, cheesemaking vendors, anywhere that sells canning supplies (sometimes hardware or farm stores) or online. Make sure to confirm what you’re buying is FOOD GRADE. This means your powders have been manufactured safely for human consumption vs. for industrial use.
Pretreatment Recipes per Quart (Liter) of Water
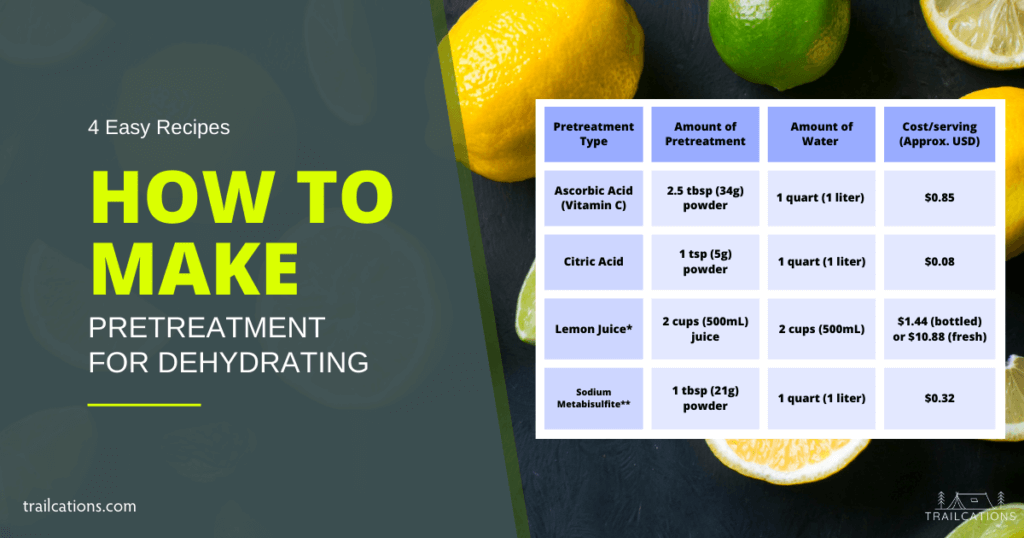
Mix specified Pretreatment amount into water. Cut peeled fruit directly into water solution. Let fruit soak in pretreatment solution for 10 minutes. Remove fruit with a slotted spoon or strainer, drain well and dehydrate.
| Pretreatment Type | Amount of Pretreatment | Amount of Water | Cost per Serving ($USD, approximate) |
|
Ascorbic Acid (Vitamin C) |
2.5 tbsp (34g) powder |
1 quart (1 liter) |
$0.85 |
|
Citric Acid |
1 tsp (5g) |
1 quart (1 liter) |
$0.08 |
|
Lemon Juice* |
2 cups (500mL) |
2 cups (500mL) |
$1.44 (bottled) or $10.88 (fruit) |
|
Sodium Metabisulfite** |
1 tbsp (21g) |
1 quart (1 liter) |
$0.32 |
- *Lime juice or unsweetened pineapple juice also work. Assuming 2 tbsp juice/lemon.
- **Potassium and Sodium Metabisulfites are interchangeable for food preservation purposes. Potassium metabisulfite = sodium metabisulfite and produce the same amount of metabisulfite in water solution. The only difference is you’re either left with a residual amount of sodium or potassium on your food. If you have high sodium levels, and especially if you are asthmatic, please consider using a different type of pretreatment. Up to 10% of the asthmatic population have been shown to have adverse reactions to sulfite additives with many cases of life-threatening reactions. You can actually be in your 40s or 50s before developing an allergy to sulfites.
Pretreating to Avoid Vitamin C Loss
The dehydration process naturally reduces the nutrient content of some water soluble vitamins like Vitamin C. Pretreating produce with a solution made from citrus juice, citric acid or Vitamin C powder (ascorbic acid) helps retain these nutrients. It also gives a nice crisp flavor to the fruits and vegetables!
Stop Oxidation (Browning) of Light Colored Fruits
For light–colored fruits prone to browning, such as apples or pears, soaking them in a 1:1 solution of water and lemon juice for a few minutes will help retain their color. Alternatively, you can save money by substituting food grade citric acid or Vitamin C powder (ascorbic acid).
Increase Shelf Life With Pretreatment
The acid in Vitamin C, citric acid and citrus juice helps increase the shelf life of your dehydrated food. So if you’re going to be going on a long backpacking trip, purchasing a lot of dried ingredients on sale or can’t eat the abundance of food in your garden, add a little Vitamin C to increase your dehydrated food shelf life.
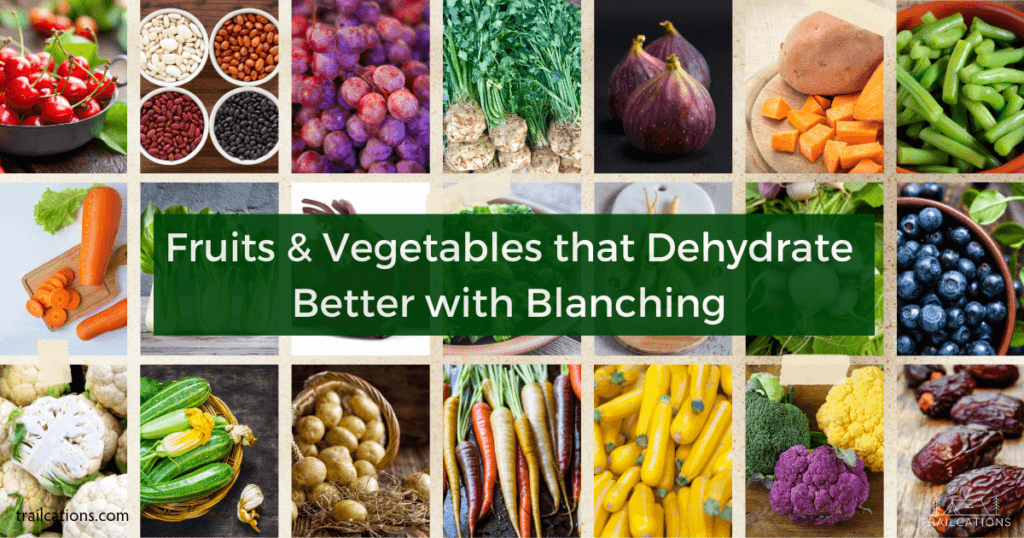
Decrease Drying Times of Tough-Skinned Produce & Root Veggies by Blanching
Similarly, blanching or steaming fruits and vegetables before drying preserves their vibrant hues and nutrients. This type of pretreatment results in faster dehydrating times by popping cell walls and tough skins (ex: grapes, blueberries). It also kills off bad bacteria that cause food poisoning. Blanching also results in quicker rehydrating times because the food is partially cooked already.
Blanching involves briefly boiling the veggies and then plunging them into ice-cold water to halt the cooking process. Water blanching is preferred to steam or microwave blanching as it allows for more even heat penetration.
Blanching Veggies – Generally veggies have much tougher cell walls than fruit. Blanching or steaming helps break down cell walls so moisture can easily be removed. It also kills surface bacteria.
Blanching Fruits – For fruits with tough skins like grapes, cranberries or blueberries, blanching will dramatically decrease the drying time. Alternatively, slicing or poking the skins with a fork can reduce dehydrating times.
What do you need for blanching or steaming pretreatment?
- Sliced veggies or whole berries
- Pot of boiling water
- Bowl filled with ice
- Cold water
- Colander
- Timer
- Optional: Steamer insert for steaming
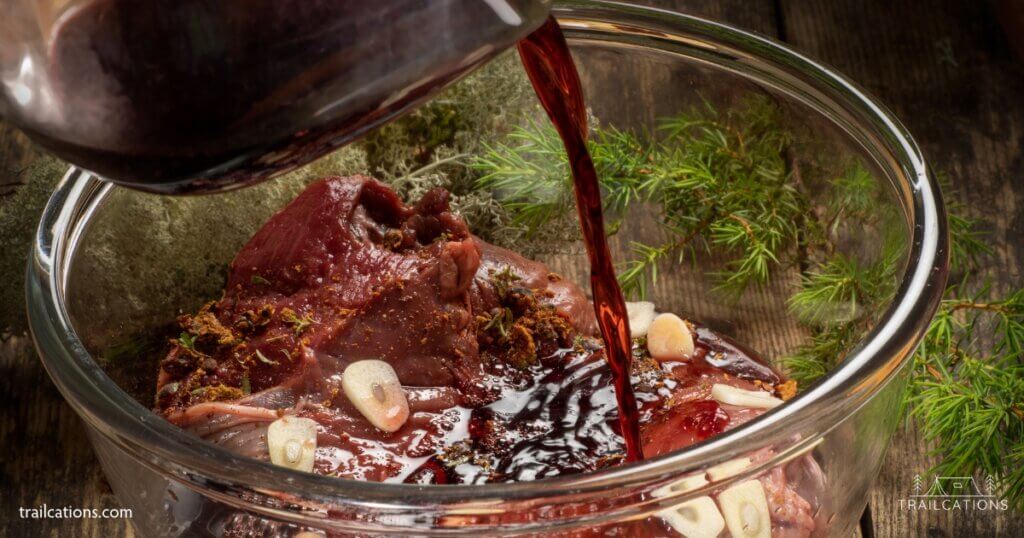
Marinading Jerky and Seasoning Food
When making jerky, avoid using commercial marinades or recipes with oils. Fats and oils will quickly become rancid and shorten the shelf life of the meat. Instead, substitute water for oil or opt for a fat free marinade.
For the best jerky flavors, slice the meat thinly and then marinade overnight before cooking and dehydrating. You can also make jerky from a variety of lean meats like chicken, turkey or fish. A jerky gun is a great tool to have to make vegan or vegetarian jerky. Some great ingredients for vegan jerky are plant-based meats, mushrooms or a mix of vegetables like cauliflower, peas and broccoli.
Add herbs, spices and flavorings at the beginning of dehydrating. Remember – a little will go a long way as food shrinks and the flavors are concentrated. Go easy on the seasoning with veggie chips, fruit snacks and jerky.
Never add sugar or salt at the beginning of dehydrating as you might add too much. Once the food shrinks and the flavors are concentrated, what might have seemed like a little bit of salt at the beginning can quickly become unpalatable in the finished product. Keep in mind that some fruits and veggies lose up to 90% of their volume when dehydrated. It can be very easy to overdo the sugar and salt as the food dehydrates!
Methods of How to Dehydrate Food
Dehydrating with a Food Dehydrator
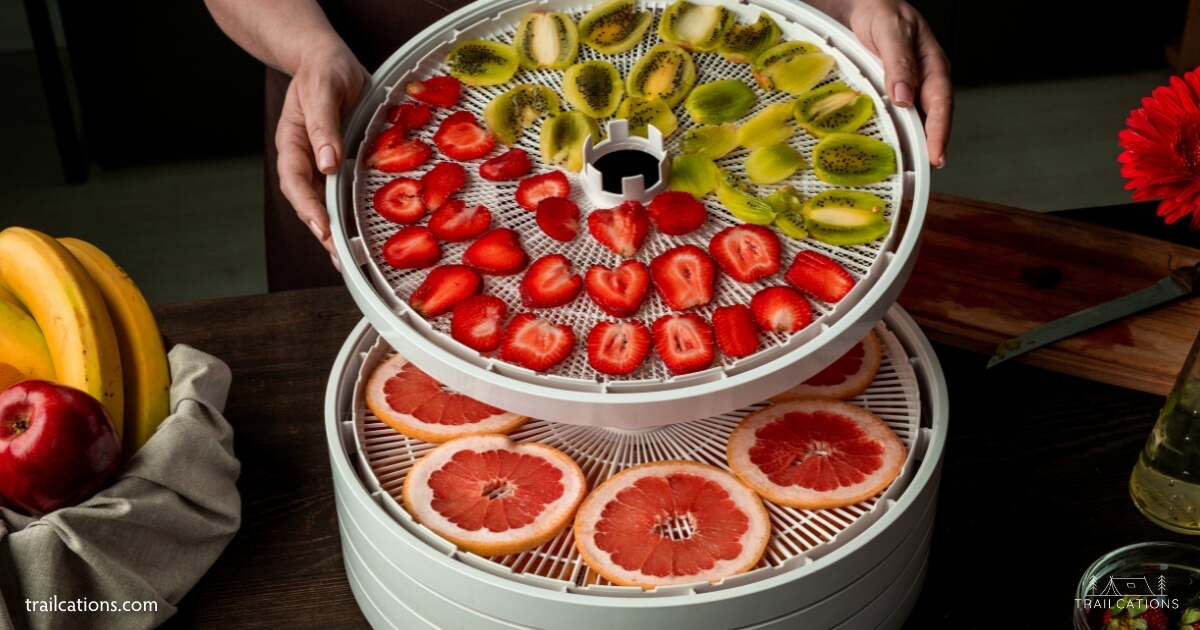
Using a food dehydrator is one of the most efficient methods for drying food. These devices are specifically designed for this purpose and often come with adjustable temperature settings to accommodate different types of foods.
Simply place the food on the dehydrator tray in a single layer and set the temperature. The dehydrator uses a heating element (like on a stove) and a fan to circulate warm air. The combination of heat and airflow remove moisture from the food. After several hours, food shrinks down to a fraction of the size of the fresh ingredients.
How to Dehydrate Food Without A Dehydrator?
If you don’t have access to a food dehydrator, there are several good substitutes that you may already have at home. Convection ovens and air fryers with dehydrator settings would be your best substitutes for an electric dehydrator. However, if you don’t have electricity and live in a dry, hot, sunny environment, solar drying or line drying might work for you.
Learn more about 15 Different Methods to Dehydrate Food and what foods work best for which drying method.
Oven Drying
Oven drying is an alternative to using a food dehydrator. Ovens are not as efficient and more costly in terms of energy usage than a dehydrator. However they can still be effective for drying food. A convection oven works best to dehydrate food as the built-in fan circulates the hot air around the food.
Preheat your oven to its lowest temperature setting which might end up being the “warm” setting. Place the food on a baking sheet or wire rack. If you have a convection oven, turn on the convection setting to ensure the fan blows the moist air away.
Words of Caution With Oven Drying
Conventional ovens need the oven door slightly ajar to allow moisture to escape with an electric fan nearby to blow moist air away. Warning: It’s not a good idea to prop your oven door open if you have small children, pets or handicapped individuals in the house. It is too easy for them to get burned.
Oven drying is not recommended during summer months as it heats up the house. The duration of the drying process will depend on the type of food. Oven drying usually takes many hours, during which you cannot use the oven for meals or cooking.
Keep in mind that most ovens don’t have low enough temperatures to dehydrate food without cooking it. Even on the “Warm” setting, the lowest temperature most ovens reach is 160°F (71°C) which is good for dehydrating jerky but not much else. Delicate foods like herbs and fruits that need temperatures ranging from 95 to 125°F (35 to 52°C) can be burnt, lose nutrient content and have their shelf life reduced when dried in an oven.
Sun and Air Drying: How to Dehydrate Food Without Electricity
Sun and air drying are perhaps the oldest methods of dehydrating food. To try this method, simply place the food on a clean, well-ventilated surface that receives direct sunlight, such as a window or outdoor table. This method works best for foods that dry quickly and are less prone to spoilage, such as fruits and herbs. You‘ll need to protect the food from insects and animals with a mesh screen or netting. Bring the food indoors at night and if the weather changes.
Can you Dehydrate Food in a Microwave?
Certain foods can be dried in a microwave but be warned that it’s likely that you won’t get good quality results. Only a few foods can safely be dehydrated in a microwave such as herbs or sliced fruits like apples. Set the microwave to defrost or the lowest power setting and place food on a microwave safe plate. Check the food every minute or so to prevent burning (or worse – catching the microwave on fire!).

Can you Dehydrate Food in an Air Fryer?
Lastly, you can also try using an air fryer to dehydrate food. Although they’re primarily designed for cooking food, some models feature a dedicated dehydrating function. To use an air fryer for dehydrating, set the temperature appropriately for the food type (less than 165°F/74°C). The drying time will vary depending on the type of food and the specific air fryer model. If your air fryer doesn’t have a dehydrator setting, you’ll actually cook the food instead of drying it which results in nutrient loss and shorter shelf life.
By using any of these methods, you can successfully dehydrate a variety of foods, preserving their flavors and nutrients for future enjoyment.
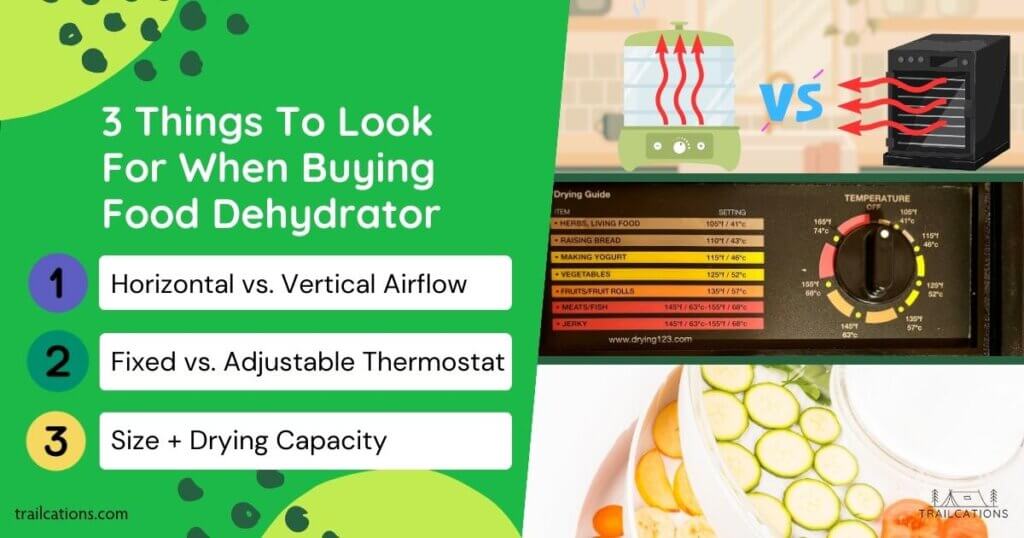
Top 3 Things To Look For When Buying a Food Dehydrator
Selecting the best food dehydrator for your drying needs is important to ensure high quality dehydrated foods. However, it can seem overwhelming to choose a dehydrator, especially for beginners! There are a few simple questions to ask yourself when learning how to dehydrate food that will help you pick out a great dehydrator.
Here are some basic questions to ask yourself in terms of dehydrator size, capacity, temperature control, fan position and budget.
Fan Position – Horizontal vs. Vertical Airflow?

One of the most important features of a food dehydrator is the fan placement. We’ve used tons of different dehydrator models over the years and always have had the best results with a rear-mounted fan that blows air horizontally across the food.
Horizontal Airflow Dehydrators: Pros & Cons
A rear-mounted fan allows food to dry more evenly and efficiently. Horizontal airflow dehydrators require less rotating of trays (or individual pieces of food) compared to vertical airflow models. Horizontal airflow dehydrators tend to be more expensive than vertical airflow models but also don’t require as much cleaning upkeep.
Pros of a Horizontal Airflow Dehydrator
- More even drying
- Tons of drying capacity
- Minimal rotating of trays
- Most models have nonstick trays
Cons of a Horizontal Airflow Dehydrator
- Expensive
- Bulkier and takes up a lot of storage space
- Can be more time consuming to clean
Vertical Airflow Dehydrators: Pros & Cons
Vertical airflow dehydrators have fans mounted on the top or bottom of the appliance. They are typically cheaper than horizontal airflow dehydrators. However, vertical airflow models tend to dry food at the interior of the individual trays and at the levels closest to the fan first. The uneven drying of vertical airflow dehydrators means that drying times can take much longer than a horizontal airflow model. Consequently, you’ll also need to be more involved rotating out trays and individual pieces of food every couple of hours.
Pros of a Vertical Airflow Dehydrator
- Inexpensive
- Easy to replace parts
- More compact for storage
Cons of a Vertical Airflow Dehydrator
- Uneven drying between trays
- Smaller drying capacity due to hole in trays
- May have to rotate individual pieces of food to avoid burning
- Food can stick more to this type of drying tray
Adjustable vs. Fixed Thermostat – What Types of Foods Will You Be Drying?
All dehydrators come with a heating element but not all dehydrators come with an adjustable thermostat. An adjustable thermostat is important because not all foods should be dehydrated at the same temperatures. Delicate herbs require low temperatures of around 95°F (35°C) to ensure their volatile flavoring oils don’t burn away. On the other hand, beef jerky and meats need to be dehydrated at high temperatures of around 160°F (71°C) to kill off any bad bacteria that can cause food poisoning.
Fixed Thermostat Dehydrators
If you’re only going to be dehydrating one type of food like jerky, a dehydrator with a fixed thermostat is probably all you need to spend money on. Fixed temperature dehydrators tend to be cheaper than adjustable thermostat models. However, they can also easily burn foods that should be dried at lower temperatures like fruits, veggies, nuts and herbs.
I actually almost burnt my kitchen down the first time I used a fixed temperature dehydrator trying to dry fruit! I didn’t realize most fixed temperature models dehydrate at around 165°F (74°C) whereas fruit should be 125°F (52°C). I had to throw out a whole batch of burnt fruit and the house stunk for days afterwards.
Adjustable Thermostat Dehydrators
However, if you’re going to be dehydrating lots of different types of food like fruits, veggies, herbs, meats, nuts, etc., you should absolutely opt for a dehydrator with an adjustable thermostat. This allows you to avoid nutrient loss but also prevents case hardening where the outside of the food dries into a hard shell while the inside remains moist. Case hardened food cannot be salvaged and must be thrown out. An adjustable thermostat also allows you to run the dehydrator for long periods of time without worrying about something burning.
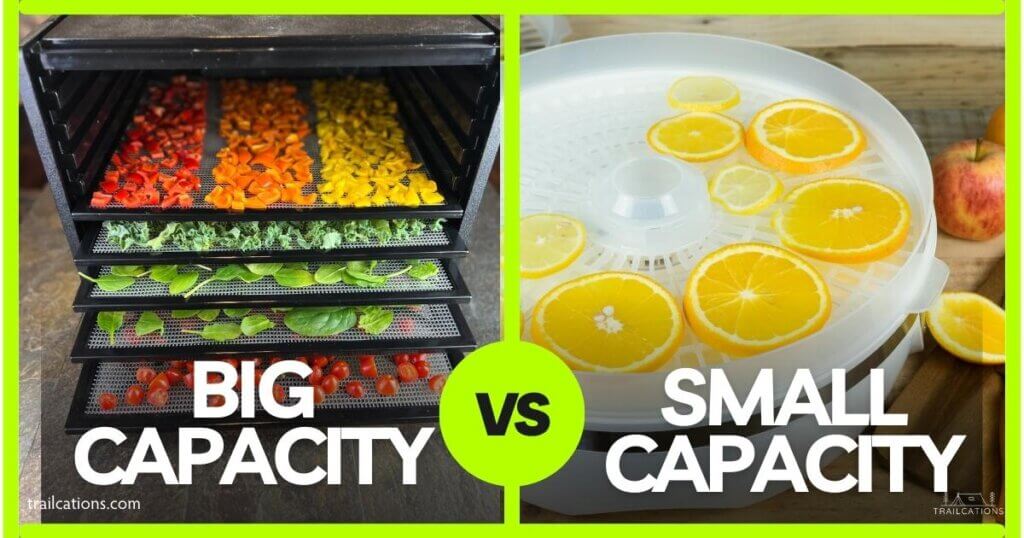
Dehydrator Size and Capacity – How Frequently and How Much Food Will You Dehydrate?
Dehydrators range in size from about the size of small microwave to as big as, well, your budget can afford! Small dehydrators range from about 2 to 7 square feet of drying space with typically stackable, round trays that have less drying capacity due to the hole in the middle for the vertical airflow top or bottom mounted fan. Larger dehydrators can have 10 to 15+ square feet of drying space, typically with slide out, square trays and a horizontal airflow rear-mounted fan.
Determine your drying capacity by estimating how often you’ll dehydrate and the amount of food you plan to dry. Since I dry a good amount of food 1 to 3 times a week, I opted for a larger removable tray dehydrator with 15 square feet of drying space that I can store in a pantry closet. However, if you’ll be dehydrating food a few times a year, it might make sense to opt for a smaller dehydrator. For those of us living in small apartments, dorms or shared living spaces, it might make sense to purchase a smaller dehydrator depending on your available storage space.
A small, 1 square foot tray can fit approximately 2 sliced apples, 2 sliced bananas, 2 medium sized sliced tomatoes or 6 ounces of sliced strawberries.
Additional Questions to Ask Yourself When Choosing a Dehydrator
- How often will you be dehydrating food – once a month, week, day?
- Will you be dehydrating a lot of produce, meat or fish? Or maybe just a small amount when cleaning out your fridge?
- Do you have space to store your dehydrator when it’s not in use?
- How much money can you spend on a dehydrator?
Recommendation: With over 10 years of home dehydrating experience, at minimum I would want my dehydrator to have a horizontal airflow fan and adjustable temperature control.
Dehydrator Time and Temperature Guidelines
What Temperature Should I Dry…?
It’s essential to set the dehydrator to the correct temperature for the type of food you’re dehydrating. Most dehydrators have a recommended temperature range for common items like fruits, vegetables, meat, nuts and herbs. Always consult the instruction manual for specific guidance on your dehydrator model. By following these temperature settings, you can trust that your food is dehydrated safely and efficiently.
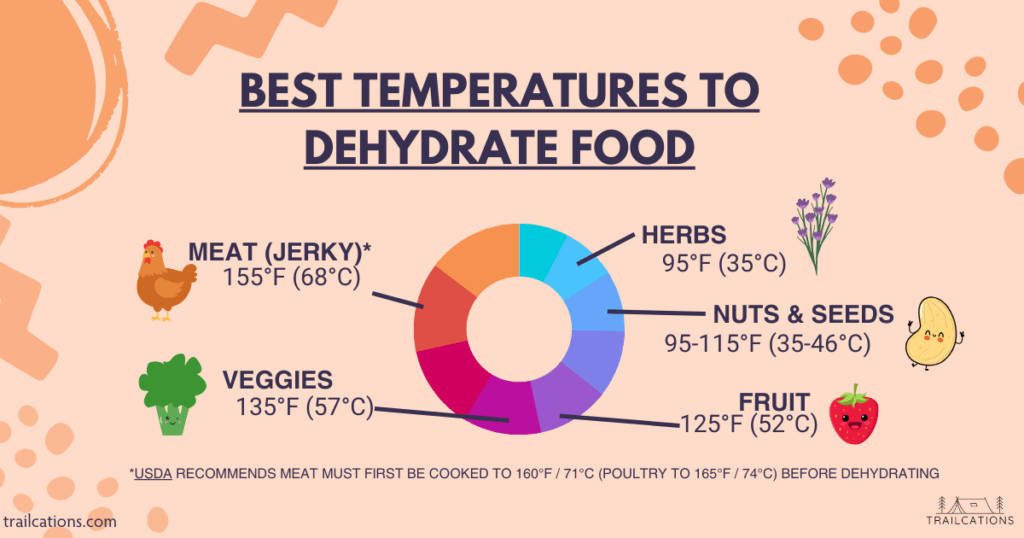
Optimal temperatures for dehydrating food are:
- Fruits, Fruit Leathers: 125°F (52°C)
- Vegetables: 135°F (57°C)
- Meats: Cook meat to 160°F (71°C) and poultry to 165°F (74°C). Then dehydrate at 155°F (68°C).
- Herbs: 95°F (35°C)
- Nuts & Seeds: 95 to 115°F (35 to 46°C)
How Long Does it Take to Dehydrate Food in a Dehydrator?
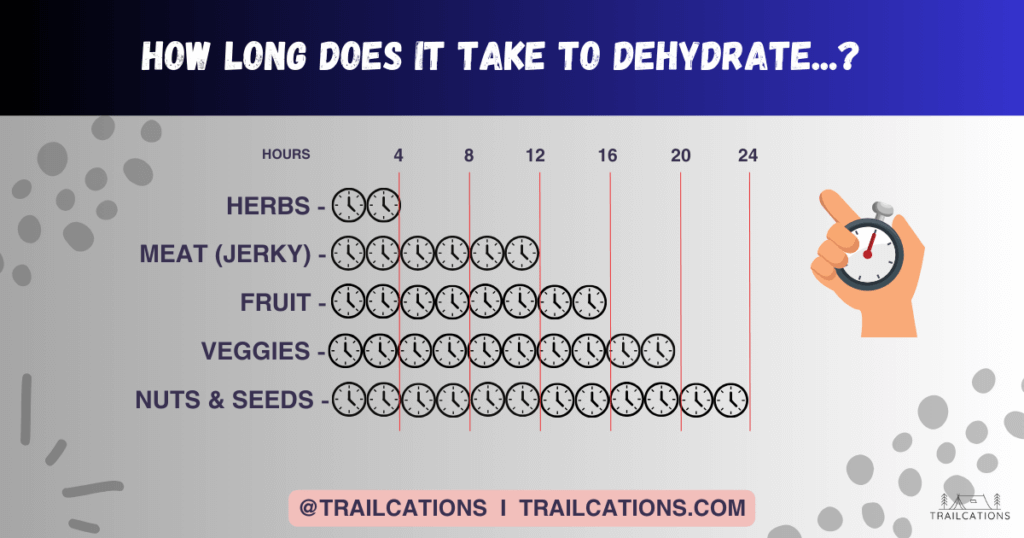
Different types of food will require different durations in the dehydrator based on their moisture content and thickness. Keep track of the time your food spends in the dehydrator with a timer. But don’t be worried if it takes longer to dry than what is listed below. A variety of factors can affect drying times including food type, slice thickness, dehydrator model and even outside humidity level! Some guidelines for how many hours it takes to dehydrate common foods:
- Fruits, Fruit Leathers: 6-16 hours
- Vegetables: 6-20 hours
- Meats: 6-12 hours
- Herbs: 2-4 hours
- Nuts & Seeds: 12-24 hours
Keep in mind that these durations are approximate. You’ll need to monitor your food for signs of dehydration, such as a dry appearance and a leathery texture. Remember that foods need to be 80-95% dehydrated for proper long term storage.
Understanding Oven Drying Temperatures
If you don’t have a dehydrator, oven drying can be an alternative for dehydrating food. Keep in mind that oven drying is less efficient than using a dehydrator due to the larger size of ovens. Conventional ovens have less even air circulation than a convection oven.
To use your oven for drying, set the temperature to around 140°F (60°C) and maintain this temperature throughout the drying process. You may need to crack the oven door open slightly to allow moisture to escape and ensure even drying of your food. Oven drying may take longer than using a dehydrator, so it is advisable to check the progress of your food regularly.
By considering these time and temperature guidelines, we can properly dehydrate various types of food and preserve their quality, flavor, and nutritional value.
How To Dehydrate Different Types of Food
What foods dehydrate well?
Foods that are fat-free or low fat dehydrate with the best results. Almost any fruit, vegetable, lean meat or fish can be dehydrated well. There are so many options so don’t miss out on our Complete List of 500 Foods You Can and Cannot Dehydrate (plus a free PDF!)
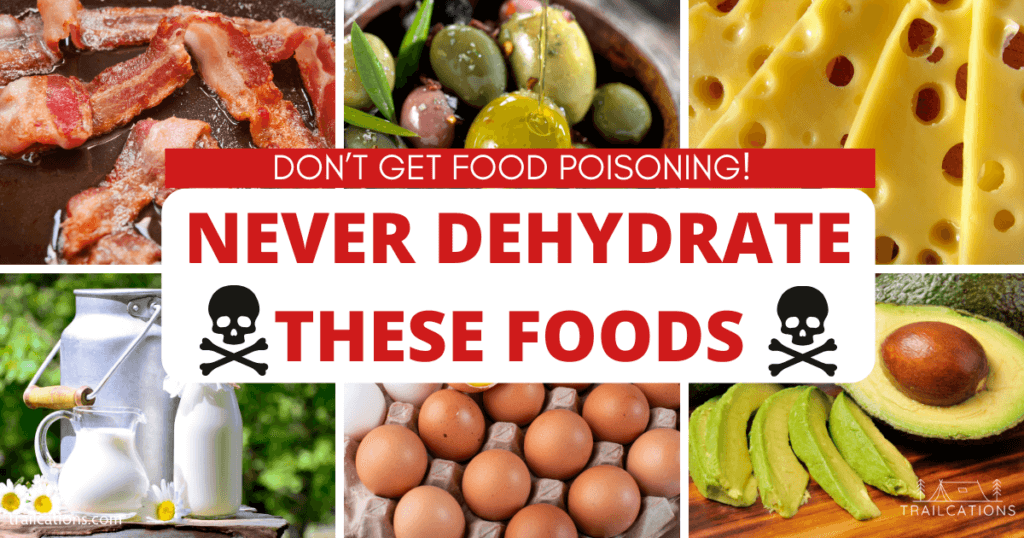
What Foods to Not Dehydrate
Never dehydrate fatty cuts of meat, oily fish, dairy, eggs, olives and avocados. The high oil and fat content can become rancid and spoil in storage. The low and slow temperatures of dehydrating actually promote bad bacteria growth on these foods. Instead, commercial products are freeze-dried or spray-dried. You can buy a huge variety of very affordable dairy and egg powders online or in the store.
For a full list of what not to dehydrate, check out our Complete List of 500 Foods You Can and Cannot Dehydrate (plus a free PDF!)
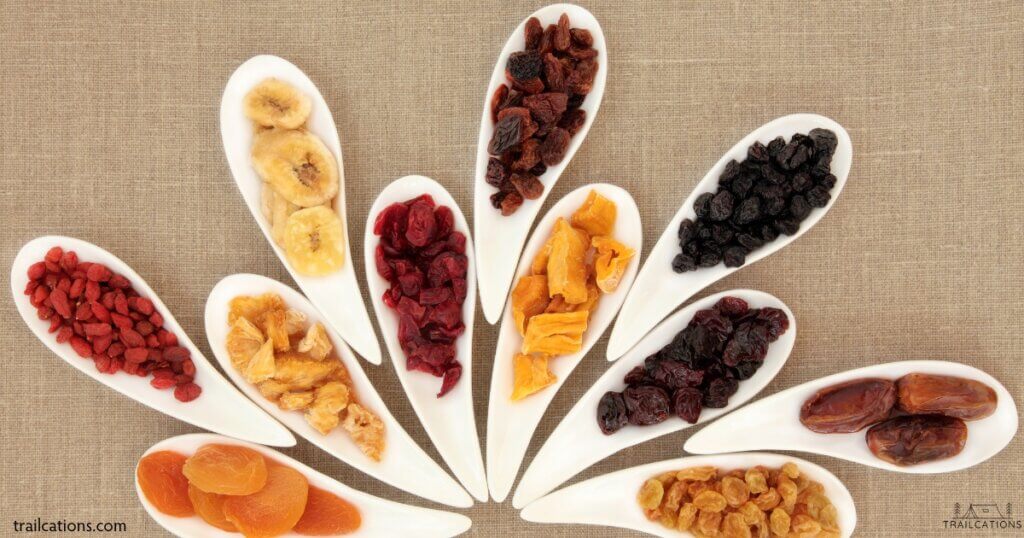
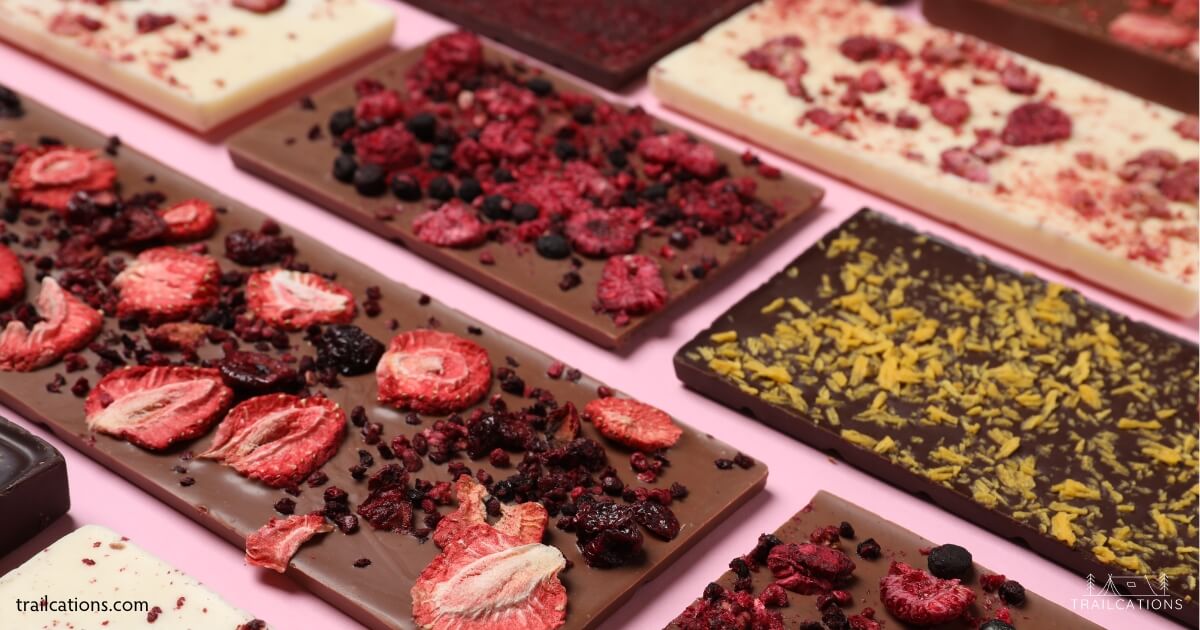
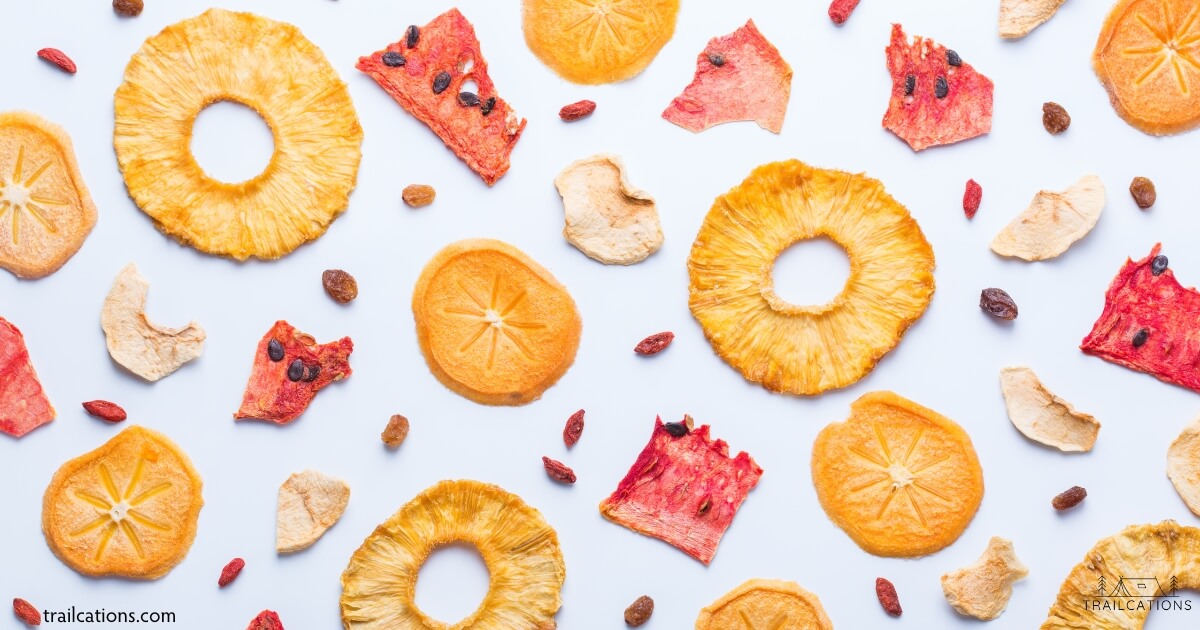
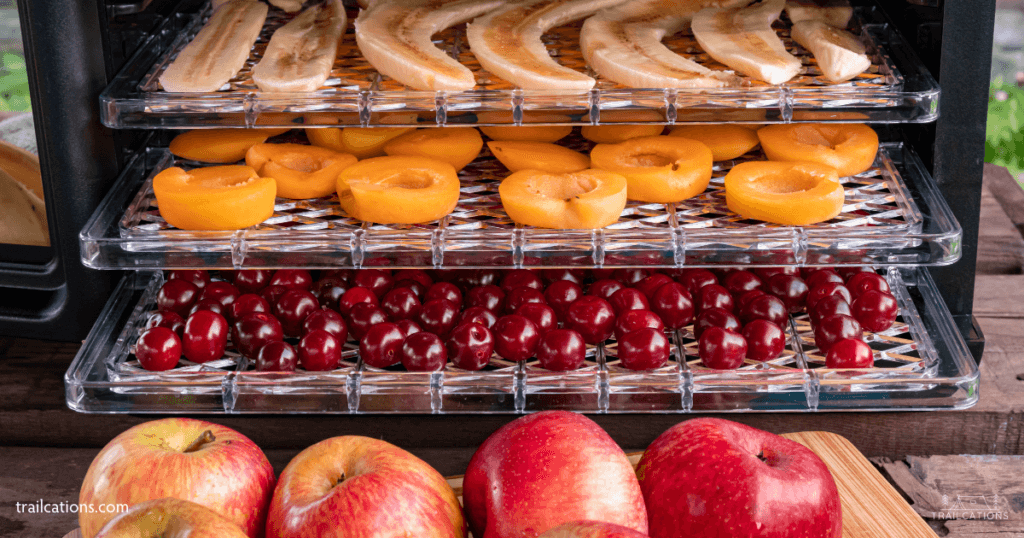
Dehydrating Fruits and Fruit Leathers
Dehydrating fruits is a great way to preserve their natural sweetness and nutritional value. To begin, wash and slice the fruits uniformly, removing peels, seeds and pits. Berries with tough skins should be blanched briefly or have their skins sliced or pricked with a fork to reduce drying times.
Place the slices on your dehydrator trays in a single layer spaced at least 1/4″ (6mm) apart to allow good airflow, and set the temperature to 125°F (52°C). Dehydrating times may vary, but most fruits will be dried within 8-12 hours.
Some popular fruits for dehydrating include apples, bananas, apricots, cherries, grapes, mangos, peaches and strawberries. If you don’t have access to fresh fruit, try dehydrating frozen fruit instead. Canned fruit tends to have excessive sugar that is hard to remove and the texture from canned fruit can be unpleasing after dehydration.
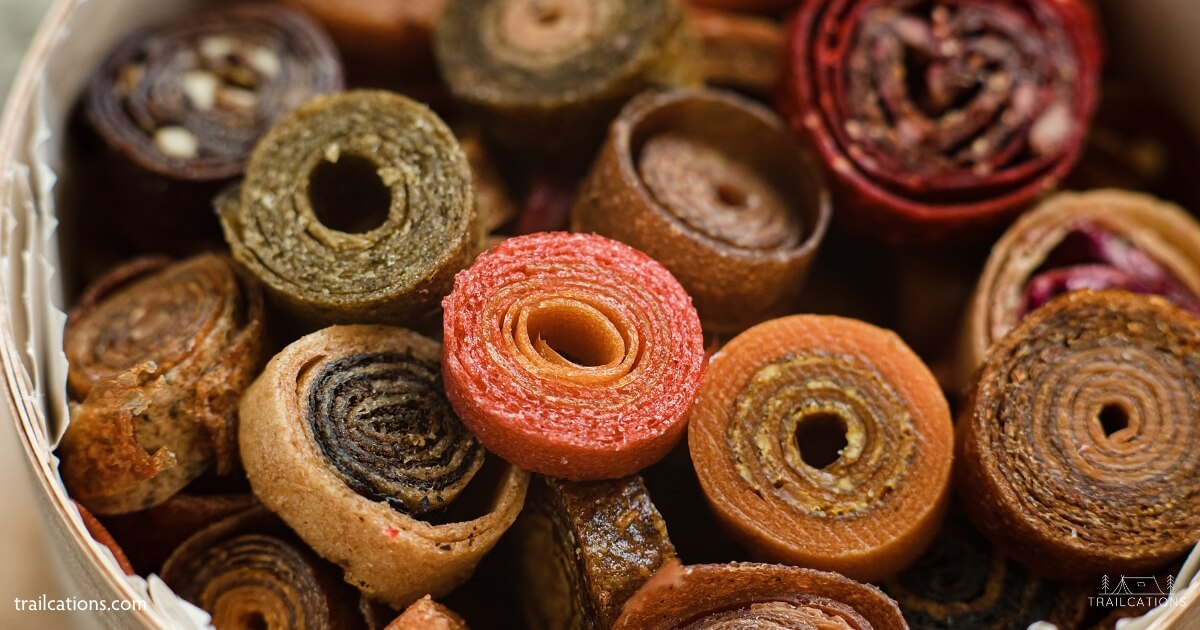
You can eat dehydrated fruit right off the drying trays as a snack or added to trail mix, oatmeal, baked goods or desserts. Fruit rolls, or fruit leathers, are a healthy and addictive snack where you blend fruit smooth, pour out onto a nonstick sheet and then cut into strips when dry.
Fruits are one of the easiest items to dry when learning how to dehydrate food. Here are a few ideas for fruits that you can try dehydrating:
- Fruits: apples, bananas, apricots, cherries, grapes, mangoes, peaches, kiwis.

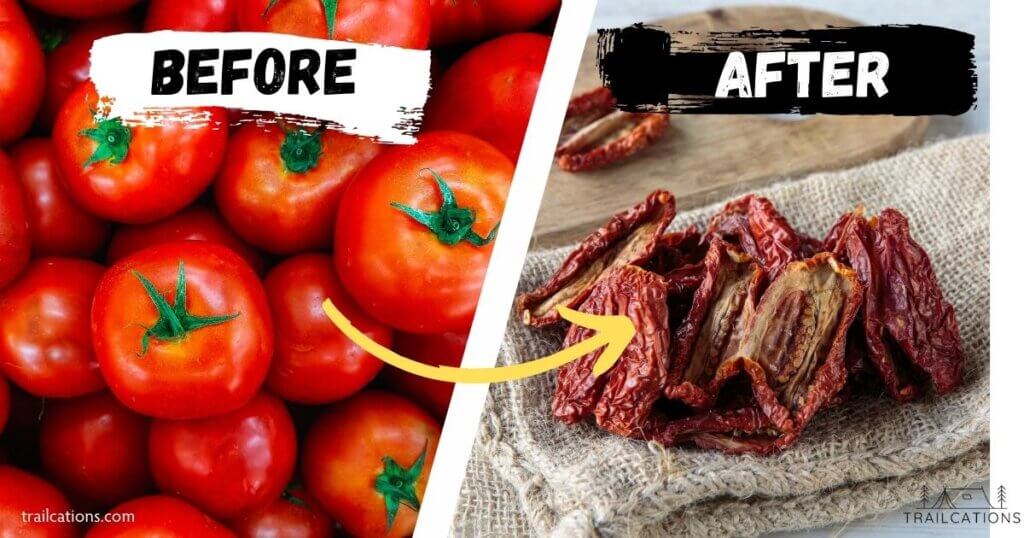
Dehydrating Vegetables
Preserving vegetables through dehydration not only extends their shelf life but also concentrates their flavors. Just like fruits, start by washing and slicing your vegetables. Blanching them beforehand can help retain their color and nutrients. Place the slices on your dehydrator trays, and set the temperature to 135°F (57°C). Dehydrating vegetables may take 6-12 hours, depending on the type.
If you don’t have access to fresh vegetables, you can also dehydrate drained canned or frozen veggies. For canned vegetables, make sure to rinse them under cold water in a colander and drain before placing directly on the drying trays. Many canned vegetables contain salt so it’s important to wash that off to avoid an unpalatable end product. Keep in mind that canned and frozen foods tend to have less vitamin content than their fresh versions.
We love creating veggie chip snacks, sprinkled with salt-free seasoning before drying. Veggies can also be shredded, riced or spiralized into gluten-free noodle substitutes. For picky eaters, dehydrate and grind up veggies into flavoring powders and “hide” the powders in sauces or smoothies.
Some favorite veggies to dry include:
Veggies: tomatoes, peppers, carrots, beets, broccoli, cabbage, corn, mushrooms, potatoes, eggplant and zucchini.

Drying Herbs and Spices
Drying herbs and spices is simple and an excellent way to enjoy their flavors throughout the year. Harvest your herbs early in the day when their flavors are most potent. Rinse off any dirt, shake off the excess water and place the entire intact herb on your dehydrator trays. Set the temperature to around 95-115°F (35-46°C). Be prepared to check the herbs regularly, as they may take anywhere from 1-4 hours to dry.
Leaving the herbs intact until you’re about to use them preserves their delicate essential oils and maximizes flavor. Just like how freshly ground pepper tastes better than pre-ground pepper, keep leaves and stems intact until just before cooking with them.
Some of the best herbs and spices to dehydrate are:
Herbs and Spices: basil, parsley, cilantro, rosemary, dill, cumin, sage, mustard and ginger.

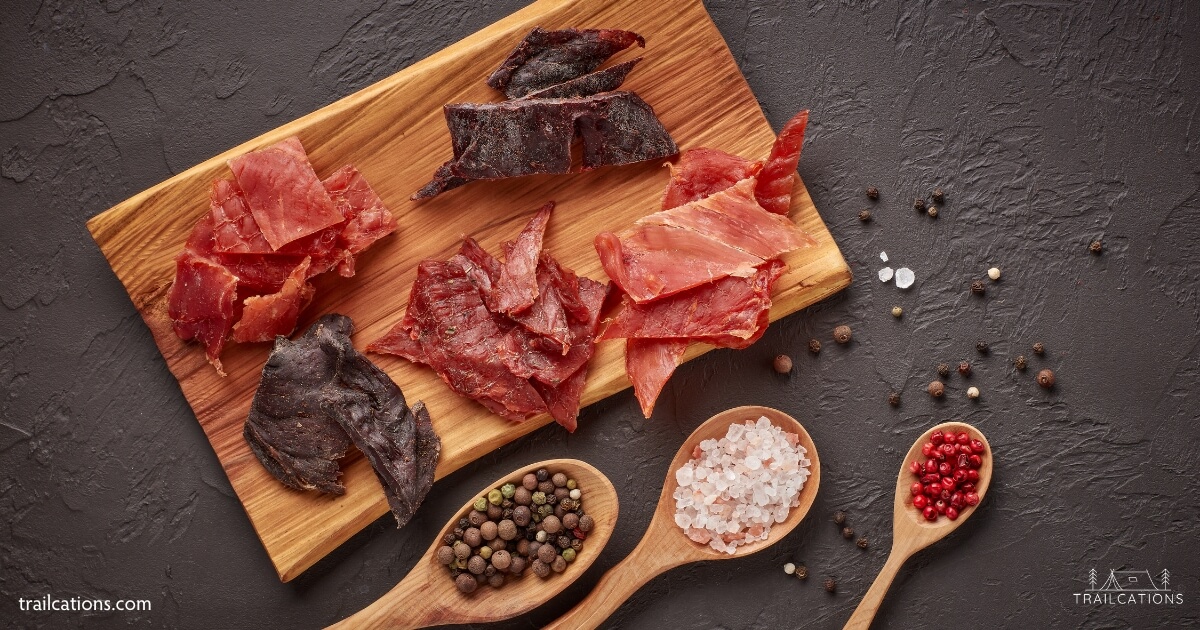
Making Beef Jerky and Dehydrated Meat
Beef jerky is a tasty and protein-rich snack, easily made at home through dehydration. To make jerky, choose only the leanest cuts of meat like flank steak or eye of round, with less than 10% fat content. Trim off any visible fat, freeze the meat for at least 15 minutes to make it easier to cut and slice the meat thinly against the grain. Marinate the slices in your desired seasoning mix or oil-free marinade for several hours or overnight.
According to the USDA, before dehydrating you should steam, roast, or cook raw meat and poultry to an internal temperature of at least 160° F (71° C) for meat and 165° F (74° C) for poultry to prevent foodborne illness. After cooking, place the marinated meat on your dehydrator trays in a single even layer, and set the temperature to around 155 to 165°F (68 to 74°C). It may take anywhere from 6 to 12 hours to reach your desired texture.
There are many low fat types of meat to choose from lean cuts of ground beef, bison, chicken and turkey.
As someone who got food poisoning from eating poorly prepared homemade dehydrated meat, it’s very important to follow USDA guidelines and only use the leanest cuts of meat. When learning how to dehydrate food, some of the best types of meat to dehydrate are:
- Meat: <10% fat beef, lean bison, chicken breast, turkey, low fat deli meat, elk, deer.
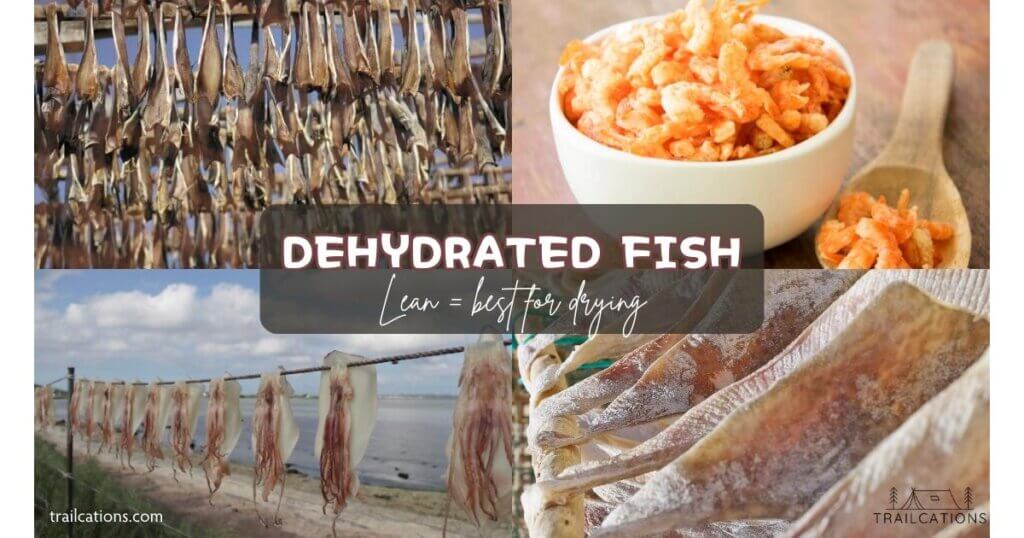
Preserving Fish and Seafood
Dehydrating fish and seafood is a fantastic way to make a lightweight, nutrient-dense snack. Choose lean, firm-fleshed fish with less than 5% fat content like cod and shrimp, and ensure it is as fresh as possible. Clean and fillet the fish, then slice into thin, even strips. Season the fish with your choice of spices, and arrange on your dehydrator trays. Set the temperature between 155 to 165°F (68 to 74°C), and expect the fish to take 4-12 hours to dehydrate, depending on the thickness.
Avoid dehydrating oily fish like salmon, tuna and mackerel and opt for canned or prepackaged versions of these. Some of our favorite dried fish and seafoods are:
- Fish and Seafood: shrimp, cod, flounder, squid, scallops, tilapia, bluegill and haddock.
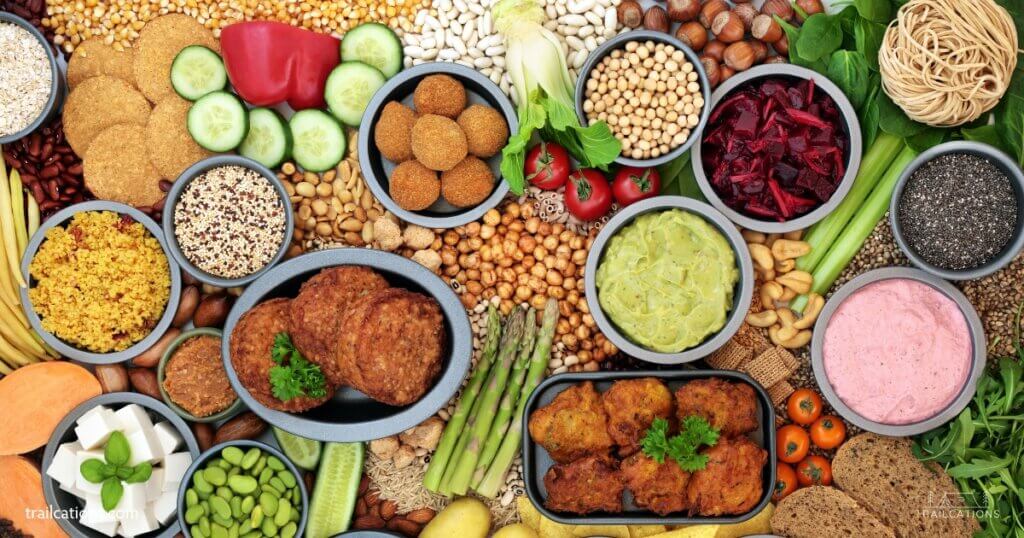
Dehydrating Plant-Based Meats
For those following a plant-based diet, learning how to dehydrate food like plant-based meats can provide flavorful and protein-packed options. You can use lean pre-packaged meat alternatives like tofu or seitan or make your own from ingredients like beans, lentils, or mushrooms. Slice your chosen plant-based meat into thin, even pieces or use a jerky gun to create strips of plant-based goodness. If desired, spice or marinate your meat alternatives in an oil-free marinade. Place the slices onto your dehydrator trays, and set the temperature to around 135°F (57°C). Dehydration times will vary depending on the type of plant-based meat, but most will take between 4-10 hours.
Some of our favorite low fat meat alternatives are:
Plant-based meat: low fat plant-based meat, Textured Vegetable Protein (TVP), mushrooms, lentils, tofu, beans, seitan, jackfruit, peas and eggplant.
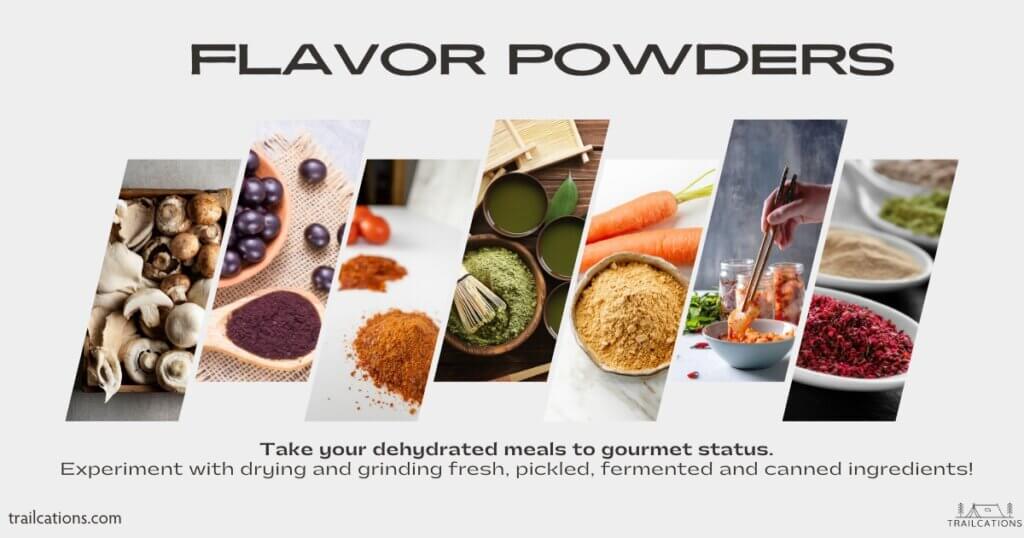
Drying Sauces, Syrups and Flavor Powders
Dehydrating sauces, syrups, and flavor powders is a great way to preserve them for long-term storage. The process involves removing the water content from the sauce, syrup, or raw food, leaving behind a concentrated, shelf-stable product.
First, if the sauce or syrup is very thin and runny, simmer gently on the stove until the consistency is thickened up. Second, you will need to spread the sauce or syrup out in a thin layer on a dehydrator tray. Then, set the temperature to about 125°F (52°C) and let it run for several hours until the product is completely dry. Store in an airtight container or vacuum-sealed bag for later use. Rehydrate sauces, syrups, and jams by simply adding water, which makes them a convenient and versatile addition to your pantry.
Creating a flavor powder is as easy and a great way to elevate your meals to the next level. Take a low-fat raw ingredient such as mushrooms, kimchi, sriracha sauce, homemade tomato sauce, beets, etc. Spread the raw food on the dehydrator tray, dry as normal and then grind the dried food in a blender or coffee grinder. Add the resulting flavor powder to bland rice, noodle and grain dishes to transform something dull and flavorless into a gourmet meal!
Avoid dehydrating anything with chemical preservatives or artificial sweeteners as these will taste pretty gross when dried.
When learning how to dehydrate food, drying flavor powders, syrups and sauces are more advanced than drying fruits and vegetables. However, our favorite sauces, syrups and flavor powders include:
Sauces, Syrups and Flavor Powders: jam, tomato sauce, maple syrup, soy sauce, barbecue sauce, molasses, mushroom powder, sauerkraut, applesauce, kimchi and chutney.
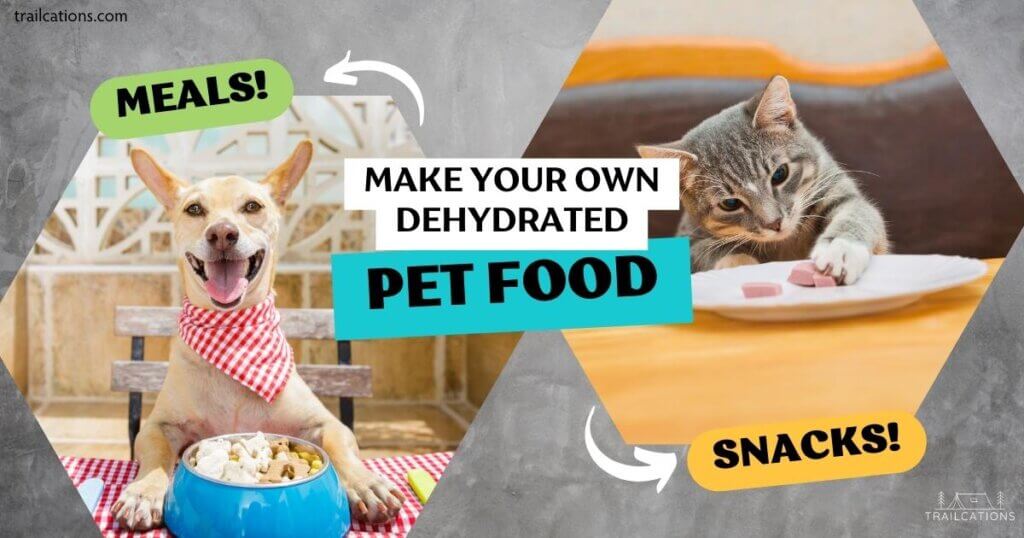
Dehydrating Dog, Cat and Pet Food Treats
Dehydrating dog, cat or pet treats is a great way to make healthy and delicious food for your furry friend. First, choose raw ingredients that are safe for pets, such as sweet potatoes, apples, or chicken, and slice them into thin pieces. Cook any meat or poultry first before dehydrating, in accordance with USDA guidelines. Avoid using spices, sugar and salt which can be very harmful for your pet, especially in high concentrations.
Next, spread the slices out in a single layer on the dehydrator trays and set the temperature to the appropriate level for the type of food. Let the treats dehydrate for several hours until they are completely dry and crunchy. Once they are finished, you can store them in an airtight container for later use. Dehydrated cat and dog treats are a healthy and natural alternative to store-bought treats, and they are also a great way to use up excess ingredients from your kitchen for wholesome, healthy pet food.
Even if you’ve been dehydrating food for years, learning how to dehydrate food for your pets is a great investment. Owner beware: your furry friends may start following you around more after trying these delicious dehydrated pet treats! Some good pet-friendly foods to dehydrate are:
Pet Food: lean beef, chicken, turkey, fish, sweet potato, spinach, pumpkin, banana and blueberries.
Preventing and Handling Issues

Is Dehydrating Food Safe? Preventing Molds and Bacteria
Dehydrating food is a great way to preserve it, but in terms of food safety we need to make sure dehydrated goods are free from mold and bad bacteria. One important step in how to dehydrate food safely is by following basic food safety practices. These include common sense things like washing your hands, cleaning your dehydrator between batches and using clean utensils to minimize the risk of contamination.
Make sure to clean your entire dehydrator between drying projects to avoid moisture and food debris from collecting. To learn more, check out our article on How to Clean Your Dehydrator in a Few Easy Steps!
Another important factor in preventing molds and bacteria is pretreating the food before dehydration. This includes blanching vegetables and using acidic or salty solutions to dip the food in prior to dehydration. Pre-treatment not only helps to combat bacterial growth long term but also aids in maintaining food quality.
Finally, make sure you keep moisture levels low during the dehydration process by ensuring your dehydrator has proper ventilation when running. If the air vents on the appliance are blocked, or the room you’re dehydrating in is too small with inadequate ventilation, moisture can build up on the food and cause bad bacteria to grow.
Handling Sticky or Soft Dehydrated Food
At times, some dehydrated food might become sticky or soft, meaning it has not reached the desired level of dryness. To tackle this issue, line your dehydrating trays with non-stick sheets made from silicone or plastic or parchment paper.
Never use oil or cooking spray to coat your dehydrating trays as it can cause the food to become rancid and spoil quickly in storage. If the food is overly sticky, removing it from the dehydrator and placing it on a fresh non-stick sheet can help. Alternatively, using a spatula to gently lift the food a few hours into drying can help too.
In case the food remains soft even after the expected dehydration time, don’t worry! Sometimes certain foods, especially those high in sugar, may need more time. Typically you cannot overdry a food but you can most definitely under dry it. Extending the dehydration time can help achieve the desired texture. Keep checking on the food and remove it once it reaches your preferred level of dryness.
Effects of Condensation
Condensation can affect the quality of your dehydrated food. How to dehydrate food properly means avoiding condensation at all costs as it increases moisture content, risks mold growth and reduces the food’s shelf life. To avoid this, we recommend using a dehydrator with and adjustable temperature control and a built-in fan.
Ensure that the dehydrator is used in a well-ventilated space with low humidity (ex: not a bathroom, not near water pipes, etc.). We also recommend rotating the trays during the dehydration process, as it promotes even air circulation and keeps the moisture levels in check. Blot away any excess moisture with a towel as needed.
In conclusion, following these guidelines can help you prevent and handle issues that arise during food dehydration. Your efforts will result in delicious, safe-to-eat dehydrated food that can be enjoyed for months to come.
How do you test dehydrated food for doneness?
How to Dehydrate Food: Testing For Dryness
It can be a little overwhelming trying to make sure your dehydrated food is completely dry. When in doubt, remember it is better to “overdry” your food instead of under dry! If you aren’t sure if your food is completely dry, continue dehydrating for another hour or two.
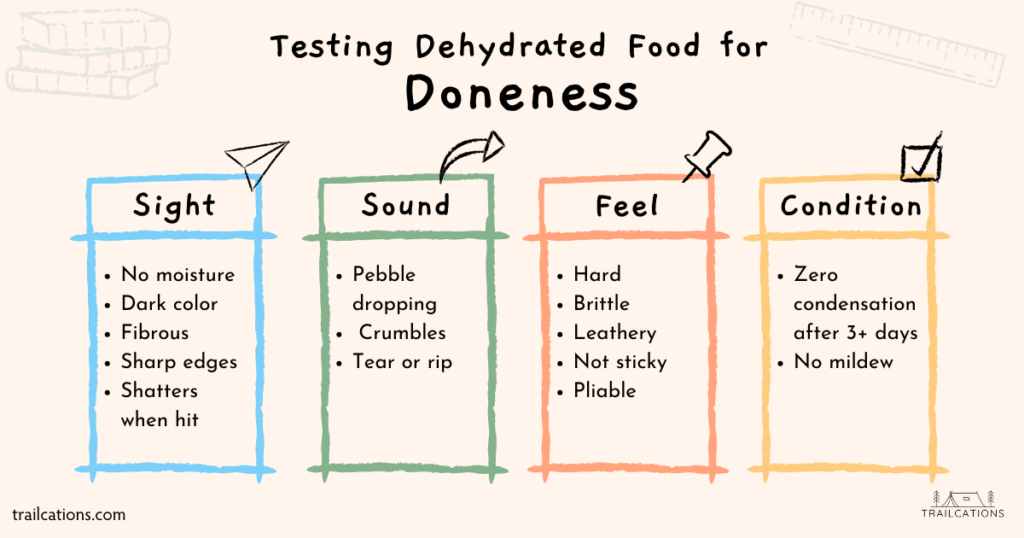
Checking dehydrated food for doneness can be summed up as the sight, sound and feel tests.
- Sight: Does the product look moist or dry?
- Sound: Does the food sound like a hard pebble when dropped?
- Feel: Is the food still sticky or is leathery, brittle or hard?
How to Tell When Vegetables are Dry
Vegetables are dried when they are leathery or brittle. Peas and corn will shatter if hit hard enough and sound like pebbles when dropped. Greens and zucchini will snap and crumble. Leathery veggies will fold up and spring back with sharp edges.
How to Tell When Fruits are Dry
Fruits are completely dried when you see no moisture and tend to be more leathery and pliable than veggies. Rip apart a fruit slice – if it sticks to itself, it isn’t quite dry enough (except in the case of high sugar fruits like dates, raisins and figs). Fruit leathers will likely still be slightly sticky when dried but shouldn’t show any signs of moisture or wetness.
How to Tell When Meat, Fish and Jerky are Dry
Meats and fish should be hard, brittle and tough when dried, especially if they aren’t going to be stored in a fridge or freezer long term. Only extremely dry meats should be stored outside of the freezer long term. When torn, meat should be fibrous, dark colored and forming sharp edges. If you’re looking for tender, chewy jerky, store your creations in the freezer for several months or the fridge for 1-2 weeks an airtight container.
How to Tell When Herbs and Spices are Dry
Herbs and spices are dried when hard and brittle. Leaves will crumble to the touch and seeds will be hard and dry when broken open.
Conditioning Food for Long Term Storage
After drying your food and testing the pieces for doneness, it’s inevitable that the batch may not be uniformly dry. Some pieces will contain more moisture than others and that’s where Conditioning comes in.
Conditioning is a final quality check for all home dried food and involves placing all the food into a clear, airtight container for several days to allow the moisture levels of the individual pieces to equalize. Even if you use a mandolin or are able to cut uniform slices, fan placement, airflow and other factors inevitably cause some pieces of food to dry faster or slower than others. Conditioning evenly distributes the leftover moisture in a food after drying to acceptable levels for long term storage. This final quality check decreases the chances of spoilage, mold and bad bacteria growth.
How to condition dehydrated food:
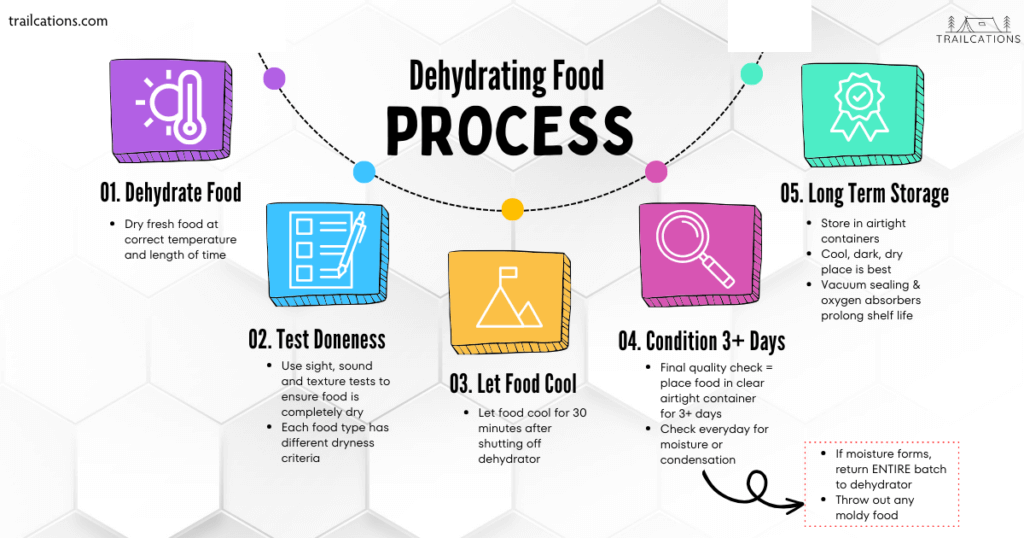
- Test food for doneness. Allow food to cool for up to 30 minutes on the drying trays.
- Pour food into a clear, airtight container about 3/4 full. Cover and place container in a cool, dry, place.
- Check the container daily for signs of moisture or condensation. Shake or stir the contents daily for best results.
- Repeat the process for 3 to 7 days. If condensation appears, immediately return the entire batch of food to the dehydrator. Repeat the conditioning process.
- If the food shows signs of mold, mildew or spoilage, throw the entire batch out. Unfortunately, you cannot recover food that has spoiled in this way and you can become very sick if you consume it.
Storing Dehydrated Food Long Term
Understanding Shelf Life of Homemade Dehydrated Food
When it comes to dehydrated food, it’s essential to understand their shelf life. In general, dehydrated fruits and vegetables can last up to 1 year if properly stored, while dried meats should be consumed within a few months.
According to the United States Department of Agriculture and Colorado State University Extension (a top research authority for home dehydrating in the USA), here are the recommended shelf-life for home dried foods:
- Home dried meats, fish and jerky: 1-2 months if stored in the refrigerator or pantry
- Dried fruit, fruit leathers: 6 to 12 months if stored in the fridge or pantry. 1 month if stored at room temperature after opening.
- Dried vegetables: 6 to 12 months if stored in fridge or pantry.
- Dried herbs: 1-2 years
- Dried mushrooms: 1-2 years if stored in pantry. 3 months if stored in pantry after opening.
- Dried Plant-based meats: 1-2 years if stored in pantry. 3-4 months if stored in pantry after opening.
To achieve a longer shelf life, it’s important to store dehydrated foods in an environment with minimal exposure to air, moisture, and light. Vacuum sealing your dehydrated food and adding an oxygen absorber can significantly extend the shelf life of your dried ingredients.
Editor’s Note: I have stored fruits, vegetables and mushrooms for longer than 1 year with decent success (for meats I follow the USDA guidelines exactly). If you store your food in airtight, vacuum-sealed containers in a cool, dark, dry place away from pests, you may also have good results. However, I try to follow the USDA and Colorado State University recommendations as much as possible.
Choosing Containers for Storing Dehydrated Food
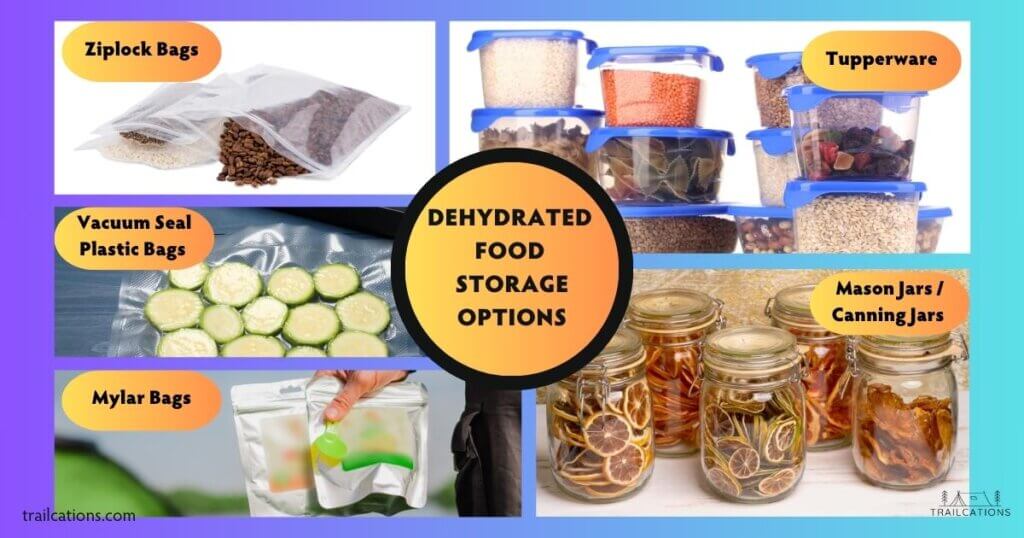
Selecting the right containers is crucial for preserving the quality and shelf life of your dehydrated foods. Airtight containers, such as mason jars, tupperware or mylar bags with oxygen absorbers, are excellent options for storing dehydrated foods2. Make sure to let the food cool completely before storing it in any container, as warm food can cause condensation that may lead to mold growth or spoilage3.
Here are some options for storing dehydrated foods:
- Mason or canning jars: Great for pantry storage and easy access to the food. Clear jars are great to see food.
- Plastic vacuum seal bags: These bags can be sealed with an oxygen absorber, offering an even longer shelf life for dehydrated food.
- Ziplock bags: A good temporary storage solution; however, they may not prevent air from entering the bag over time. Long term these bags can leach plastic into your food which tastes awful (unfortunately we know from experience).
- Vacuum seal Tupperware: Can be expensive to purchase but offers easy access to food.
- Food Grade Mylar bags: These high quality can extend the shelf life of your dried food for many years, especially when vacuum-sealed.

Best Places for Storing Dehydrated Food
Finding the best place to store your dehydrated foods is vital for prolonging their shelf life. Ideally, you should store them in a cool, dry, dark and pest-free environment, such as a pantry or a cupboard away from direct sunlight. Additionally, consider refrigerating or freezing certain dehydrated foods, like meats and nuts, for added protection against spoilage. Whatever location you choose, it’s essential to ensure that the containers remain airtight and protected from various elements that can affect the quality of the food.
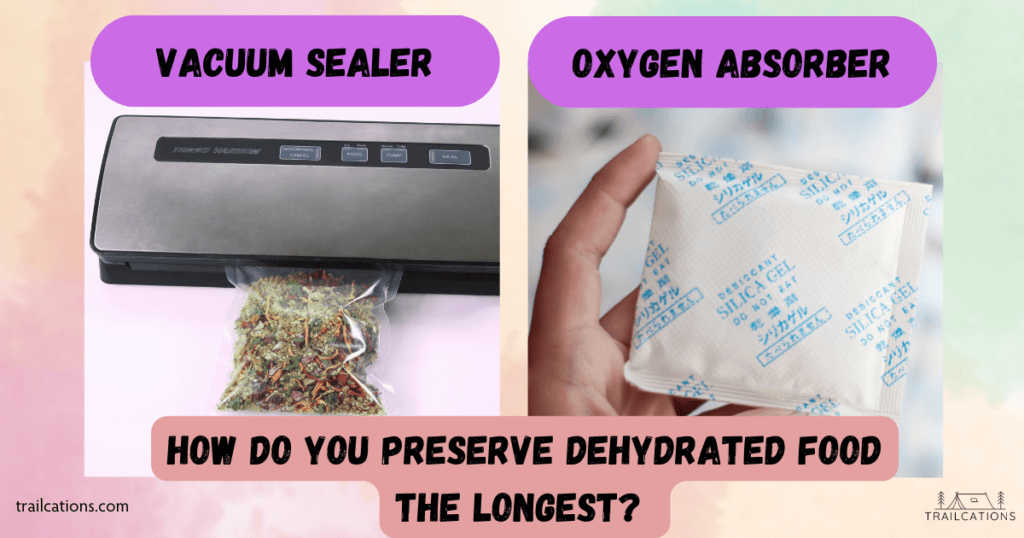
How do you preserve dehydrated food the longest?
The best way to preserve dehydrated food the longest is by using basic food safety practices like washing your hands, using clean utensils, thoroughly cleaning raw ingredients and making sure you clean your dehydrator between drying projects. These little steps ensure that mold and bad bacteria are eliminated.
Research studies have shown that dipping produce in an acidic or salty solution before dehydrating prevents harmful bacteria like E.coli and Salmonella from reproducing far longer than without any pretreatment solution.
Oxygen, moisture and UV rays from the sun will all shorten the shelf life of your dehydrated food. Therefore it’s important to store dehydrated food immediately in an airtight container while it’s conditioning. Place all food in a cool (cooler than 60°F/15°C), dark, dry area free from pests.
For long term storage, it’s best to use a vacuum sealer to store food in special vacuum seal bags or use the mason jar attachment to vacuum seal your canning jars. To increase the shelf life even more, throw in a food grade oxygen absorbing packet.

How do you store vacuum-sealed dehydrated food?
For longest shelf-life, many dehydrating enthusiasts recommend storing vacuum-sealed dehydrated food in food grade storage containers. These are typically 5 gallon (20 liter) plastic food grade buckets. Store food in vacuum-sealed plastic bags and place the bags in the food grade storage buckets, sealing the bucket after placing the food inside.
Alternatively, you can double-bag vacuum sealed plastic bags inside of food grade Mylar bags for extra protection. I like to store my vacuum-sealed plastic or Mylar bags of dried food inside a hard container to make it difficult for a stray mouse or mischievous pet to access the food.
Finally you can store vacuum-sealed glass canning jars or tupperware somewhere where it’s dark to avoid UV rays from the sun to destroy your food’s nutrient content. A pantry, cupboard or closet that is rarely used is a good place to put these jars.
Always store your food in a cool (less than 60°F/15°C), dark, dry place to prolong its shelf-life.

How can you tell if dehydrated food is bad?
There are a couple of obvious signs to easily tell if your dehydrated food has gone bad. If you see moisture in your food that has been sitting for several months or weeks, throw it out. Food showing visible signs of mold, mildew or bacterial growth should also be thrown away. If the food smells off when you open it, toss it. Consequently, if the food has drastically changed color, is slimy or in anyway just seems like it’s rotting, it’s better to be safe than sorry and throw it away.
If you’re still at the conditioning process and it has only been a few days after dehydrating when you see moisture or condensation appear in the food, you may be able to save it. Take the entire batch, run it through the dehydrator again and then recondition it. Any visible signs of mold or bacteria, you should throw the whole batch out.
In summary, understanding the shelf life of dehydrated foods, choosing appropriate airtight containers, and finding the best place for storage are essential steps in making the most out of our dehydrated food supply.
Nutritional Value and Rehydrating Dehydrated Food for Recipes
Understanding Nutrients and Calories
Dehydrating food is an excellent way to preserve fresh ingredients, but it’s worth noting that the process can affect the nutritional content, particularly with water soluble vitamins like vitamin C. Fruits are especially prone to losing vitamin C content but this can be easily remedied by pretreating your ingredients by dipping them in a citrus or citric acid solution before dehydrating.
However, many essential minerals like potassium and magnesium are retained in dehydrated foods. In fact, only 3 to 5% of nutrients are lost in dehydrating compared to 40-60% nutrient loss in freezing and 60-80% in canning.
It is important to keep in mind calories and energy content when consuming dehydrated foods, as the removal of water can result in a higher concentration of calories and nutrients per serving. While this is a benefit for long-lasting energy, it can also lead to over-consumption of calories if not consumed mindfully.
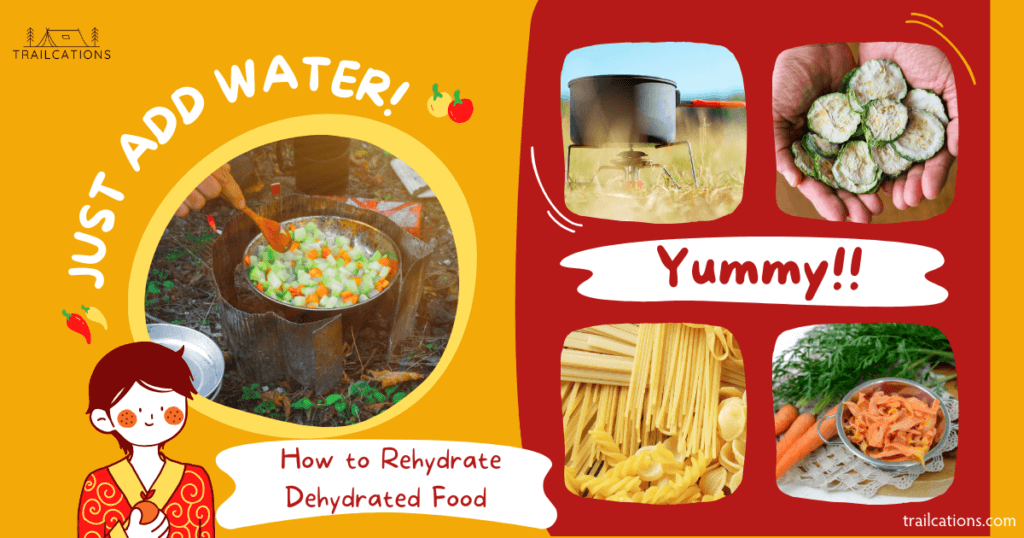
How Do You Rehydrate Dehydrated Food?
When it comes to using dehydrated foods in our daily lives, rehydrating them can bring back some of their original texture and flavor. Unlike freeze drying, dehydrating doesn’t always bring back the original texture of the food but the flavor is preserved really well. In fact, sometimes the best way to use dried ingredients is when they’re used in stews, soups, pastas or rice dishes.
To rehydrate fruits, vegetables, and meats, simply soak them in water or other liquid for a given period. The process might vary depending on the specific food, but generally, it involves covering the dehydrated food in water and letting it sit for some time until it reaches the desired consistency.
Remember that some of the nutrients and textures that were lost during dehydration may not be fully regained in the rehydrating process. However, rehydrated foods can still provide valuable nutrition and convenience for our diets.
For a richer flavor, you can also rehydrate dehydrated food directly into soups, sauces or alcoholic beverages. A braised beef dish can become gourmet when homedried carrots, tomatoes and garlic are rehydrated in drippings. Sangria is taken to the next level when dehydrated tropical fruit is soaked for a few hours.
Dehydrated Food in Recipes
Dehydrated ingredients like fruits, vegetables, meat, spices, and sauces can add versatility and flavor to various recipes. Incorporating them into meals can be as simple as adding dried fruits to cereal or yogurt, using dried veggies in soups and stews, or adding dehydrated meats to casseroles and pasta dishes.
There are many creative possibilities with dehydrated foods, and by using them in recipes, we can extend the shelf life of our food supply, enrich our dishes with concentrated flavors, and ensure we have a diverse and nutritious diet.

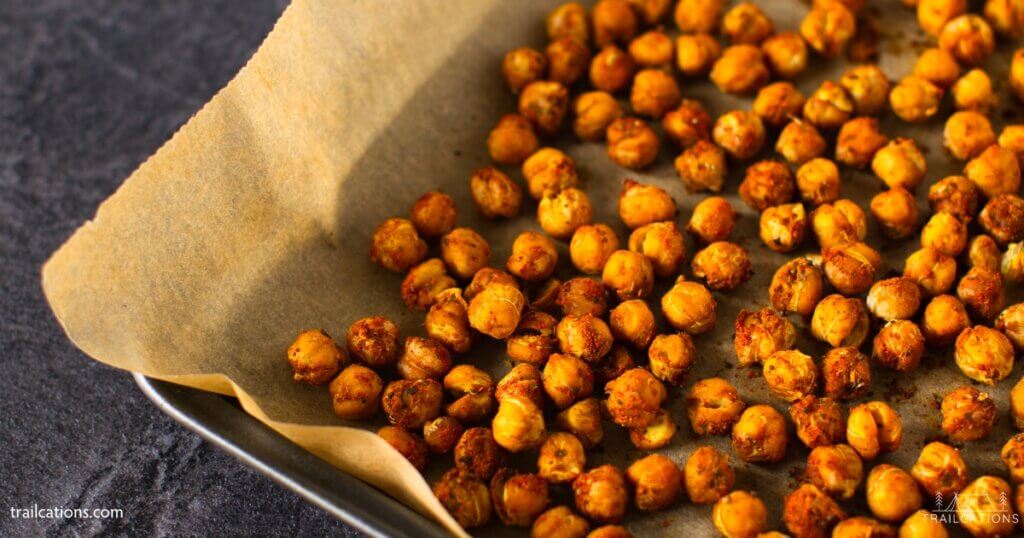
How to Dehydrate Snacks: Recipe Ideas
Many dehydrated foods can be eaten as is for healthy and tasty snacks.
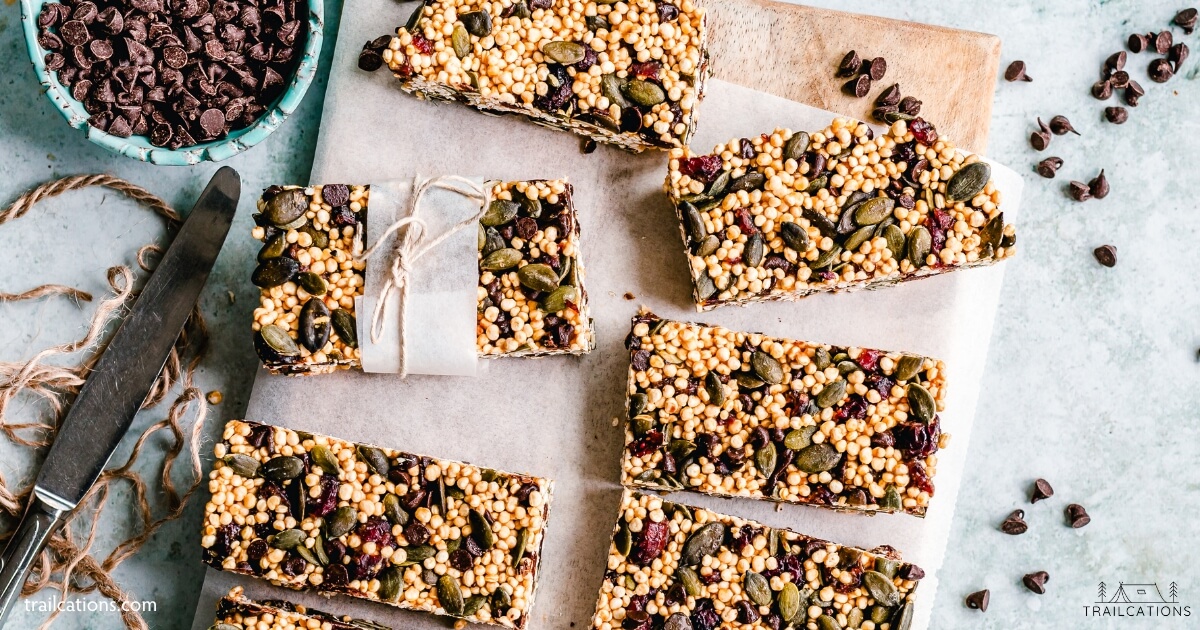
- For instance, combining dried fruits and nuts with oatmeal makes a delicious and nutritious backpacking granola!
- Homemade fruit and veggie leathers are not only healthy but also slightly addictive snacks.
- Sliced and spiced veggie chips made from beets, zucchini and kale are especially delightful.
- Plant-based jerky or marinaded meats make high protein snacks that will keep you satisfied on your camping or hiking trips.
How to Dehydrate Meals: Recipe Ideas
Dehydrated meals are perfect for backpacking trips, busy families looking to eat healthy, preppers and individuals with dietary restrictions or food allergies. Keep in mind that when rehydrated, not all dehydrated foods look exactly like their fresh versions. Dried ingredients work best in dishes like soups, casseroles, stews or deconstructed versions of dishes (ex: deconstructed dried stuffed peppers).
- Homedried vegetables, herbs, meat and plant-based meat are perfect additions to grains like pastas, rice, noodles or spiralized veggie noodles.
- Sauce leathers or flavor powders can take your dehydrated meals to the next level.
- Homemade tomato sauce powder, mushroom powder and hot sauce powder certainly add zest to dehydrated meals.
- Finally, feel free to dehydrate entire meals on your drying trays like chicken “fried” rice, deconstructed lasagna with plant-based meat or tater tot hot dish.
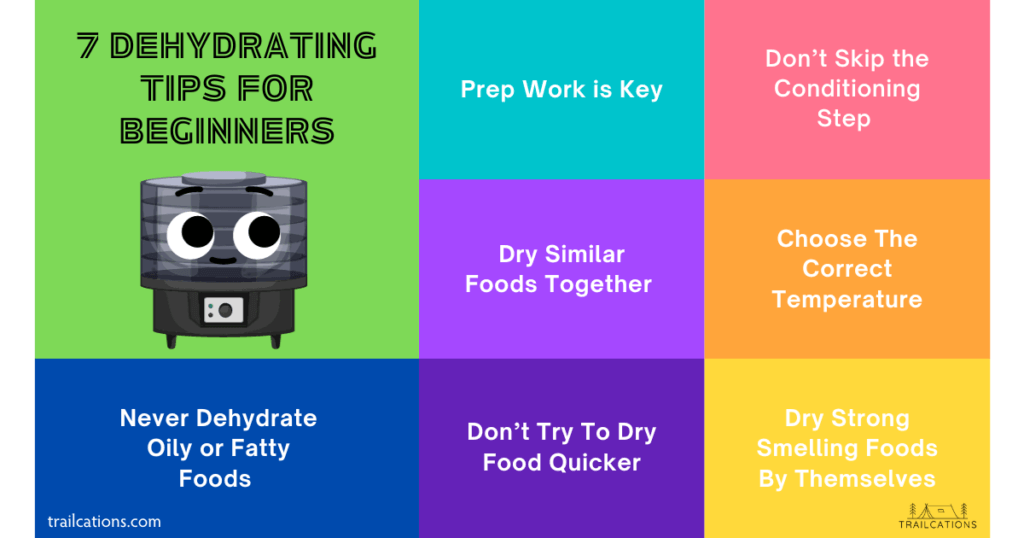
7 Dehydrating Tips for Beginners
1. The Key to Dehydrating is Preparation
Most of the work in dehydrating comes from the prep work. First, wash your hands and clean produce thoroughly before slicing into thin, uniform slices 1/8″ to 1/4″ (3 to 6 mm) thick. Pretreat light colored fruit by dipping in citrus juice solution and blanch tough root vegetables for several minutes prior to dehydrating. Place food slices in a single layer, evenly spaced out in the food dehydrator. Uneven thicknesses of food will dry at different rates and food that is touching other food will not dry completely.
2. Make sure your food is completely dry – don’t skip the conditioning step!
In order to be stored properly, dehydrated food needs to be 80 to 95% dry. Each food type is different but generally if your ingredients feel spongy, sticky or wet, they need to spend some extra time in the dehydrator. Leathery, brittle and hard pieces are signs your food is likely dry. After testing foods for doneness, cool food for 30 minutes and then condition all foods for 3 to 7 days in an airtight container. Check on your food daily for any signs of moisture and return the entire batch to the dehydrator if it’s not dry. Don’t skip the conditioning step before placing your dehydrated food into long term storage!
3. Don’t try to dehydrate food quicker
Don’t turn up the temperature on your dehydrator attempting to dry your foods quicker. This will cause the outside of the food to “case harden” and form an outer seal, leaving moisture inside the food with no way to dry. Unfortunately, case-hardened food will spoil and cannot be fixed – you must throw out the whole batch of food. There’s no need to worry about overdrying your food; in fact, it’s better to overdry your food instead of under drying it.
4. Dry similar types of food together
Always dehydrate similar types of food together – vegetables with other vegetables, fruits with fruits, etc. Since different food items require different temperatures, from a cross-contamination and quality perspective, it is unwise to dry herbs with meat or vegetables with nuts as their optimal drying temperatures vary significantly. Too high of a temperature and you can burn away valuable nutrients and flavoring components. Too low of a temperature and the food will not dry properly. Dry like with like and you’ll always end up with high quality dehydrated goodness!
5. Check to make sure you have the correct temperature
Having burnt pounds of beautiful mangos and dragonfruit to the point where I had to throw away everything from accidentally dehydrating at too high of a temperature, I caution new dehydrating enthusiasts to always double-check your drying temperatures. The temperature and time required to completely dry your food varies based on the type of food you’re drying, the dehydrator model being used, the thickness of your food slices and even outside humidity! Typically temperature guidelines are printed on the dehydrator itself and you can easily check your dehydrator manual for recommended timing.
6. Never, ever, EVER dehydrate oily or fatty foods
Speaking from experience of getting extreme food poisoning from consuming homemade dried meat that was too fatty to dehydrate (but I did anyways), it is never worth the risk of food poisoning. Besides your typical food poisoning microorganisms like E. coli, Listeria and Salmonella, you can have severe permanent side effects or even die from bacteria like Botulism which can thrive in oxygen-deprived environments like those often seen in long term storage of dehydrated food.
Some foods should never be dehydrated at home as the risk of food borne illness is too great. Instead purchase commercially freeze-dried or spray-dried versions of fatty foods like dairy, cheese, nut milks, oily fish, fatty meats, avocados, olives and eggs.
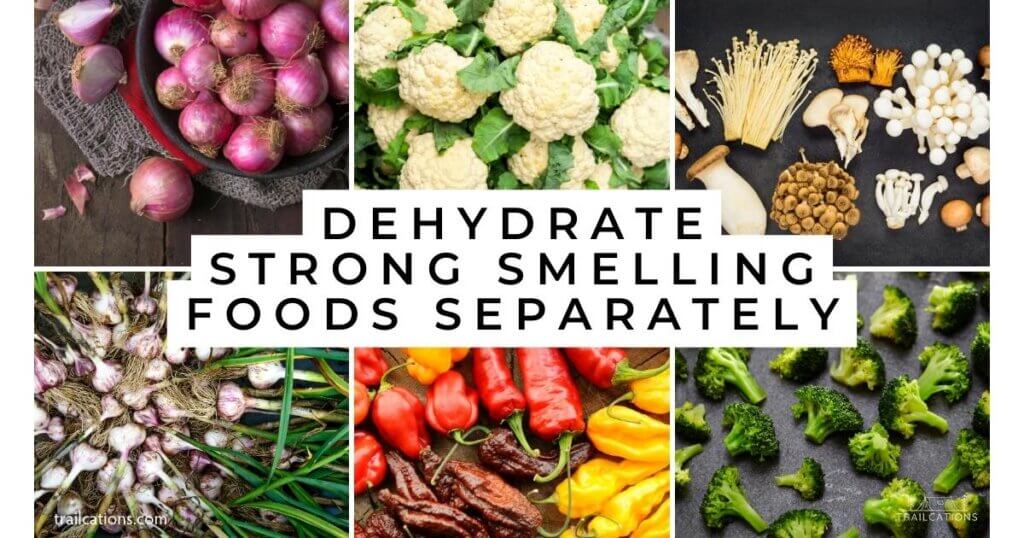
7. Dehydrate strong-smelling foods by themselves
Dehydrating concentrates the flavor and smells of a dehydrated food. When you’re dehydrating strong-smelling foods, it is wise to dry them by themselves to avoid cross-contamination of flavors. Examples of strong-smelling foods are onions, garlic, hot peppers, mushrooms, fish, certain herbs and cruciferous vegetables like broccoli, cauliflower and Brussels sprouts. Let’s be honest – no one wants their bananas to taste like garlic or their beef jerky to taste like squid. Keep the stinky foods separate (and maybe open a window!).
Frequently Asked Questions
What are some effective ways to dry food for preservation?
There are several ways to dehydrate food for preservation. Traditional methods include air drying, sun drying, and oven drying. More modern methods involve using food dehydrators and solar dryers. Each technique has its benefits and limitations, but using a food dehydrator is often the most consistent and efficient method, as it provides better control over the temperature and drying process. Solar drying is another effective, environmentally friendly option that harnesses the power of the sun.
Which foods are best for dehydrating and long-term storage?
A wide variety of foods can be dehydrated and stored for long periods. Some popular options include fruits like apples, bananas, and strawberries, vegetables like carrots, kale, and bell peppers, and even proteins like beef jerky and dried fish. It’s essential to research the appropriate methods and temperatures for dehydrating each specific food to ensure safe storage.
Can you dehydrate food using an air fryer?
Air fryers can be used for dehydrating, but you’ll need to use a low temperature and extended cooking time to achieve the desired results. Some air fryers have a built-in “dehydrate” setting, which makes the process even more straightforward. However, it’s important to note that air fryers may not produce the same consistent results as a dedicated food dehydrator.
How to make homemade dehydrated meals for camping?
Making homemade dehydrated meals for camping is simple and cost-effective. Start by choosing ingredients that dehydrate well and rehydrate easily, such as vegetables, fruits, and cooked grains like rice or quinoa. Dehydrate each ingredient separately, then combine them into meal-sized portions in resealable storage bags. When you’re ready to eat, simply add boiling water to the bag, let it sit for a few minutes to rehydrate, and enjoy your meal.
What are some examples of dehydrated food preservation?
Dehydrated food preservation has been used for thousands of years and remains a popular way to extend the shelf life of various foods. Some common examples include fruit leather, dried herbs, beef jerky, and homemade granola. Dehydration is also used to make backpacking meals, which provide lightweight, non-perishable nutrition for outdoor enthusiasts.
How long can dehydrated food last in storage?
The shelf life of dehydrated food depends on several factors, such as the type of food, the drying method used, and how it’s stored. In general, properly dehydrated and stored food can last anywhere from several months to several years. To optimize the shelf life, it’s important to store dehydrated food in a cool, dry place, away from sunlight and moisture. Vacuum-sealed bags or airtight containers are ideal for preserving the quality and freshness of your dehydrated goods.
What is the fastest way to dehydrate food?
The fastest way to dehydrate food is with a food dehydrator, slicing your ingredients into thin, even slices and pretreating certain foods like root vegetables or thick-skinned fruits by blanching. Spacing your food into a single, even layer with at least 1/4″ (6mm) between slices will allow better airflow and faster dehydrating times. Dehydrate food on a dry day when the weather is clear and there are no signs of a storm to decrease drying times. High humidity can actually double drying times!
Never increase the temperature to dry food faster – always use the appropriate temperature for the type of food you’re dating. If you increase the temperature, you can cook or even case-harden your food which means you have to throw out the entire batch. Cooking food will decrease the nutrient content and shelf life of your food. Case hardening happens when the outside of the food dries faster than the inside. The exterior hardens into a shell and the interior of the food cannot dry, which causes the food to stop dehydrating and eventually spoils.
How do you prevent botulism in dehydrated food?
Botulism is a common bacteria found in water and soil that can cause fatal or long term injury if ingested but it rarely manifests itself in modern day society due to stringent food safety practices. This deadly disease is characterized by weakening of the facial muscles and eventually the muscles involved in breathing.
Botulism is rare today but is infamous in improperly prepared canned foods, thriving in the low oxygen environment. The addition of an acid (like ascorbic or citric acid) or a salt (like sodium nitrite) creates a harsh enough environment to stop the growth of botulism bacteria.
You can easily prevent botulism in dehydrated food by following basic food safety protocols like washing your hands, using clean utensils, avoiding cross-contamination with raw meat and thoroughly washing produce.
Never use oil-based marinades when drying food or dehydrate fatty meats, fish or produce as the anaerobic (without oxygen) environments can cause botulism to grow.
Pretreating food by dipping in an acidic solution (ex: citrus juice, ascorbic acid or citric acid) or salt solution (ex: sodium metabisulfite, curing salts for jerky) can help reduce the risk of botulism in dehydrated food.
How to Dehydrate Food for Backpacking?
Dehydrating food for backpacking is a great way to reduce weight and save space in your backpack while still having nutritious and delicious meals on the trail. There are two approaches to dehydrating meals on the trail: drying individual ingredients to assemble meals or drying entire meals at once. You often get better results from drying individual ingredients, especially when dehydrating risky foods such as meats and fish.
First, choose your ingredients, such as vegetables, fruits, meats, or grains, and prepare them by slicing them into thin pieces. Then, spread the pieces out in a single layer on the dehydrator trays and set the temperature to the appropriate level. For veggie and grain based meals, you can combine spices, vegetables and grains together in a bowl then spread out the entire meal on a drying tray.
Let the food dehydrate for several hours until it is completely dry and brittle. Once it is finished, condition the food for several days to ensure no moisture is left. Portion out the individual meals and store in labeled airtight containers or vacuum-sealed bags for later use.
When you are ready to use the dehydrated food on the trail, simply rehydrate it by adding hot water or cooking it in a pot with water. Some dehydrated meals can be enjoyed stoneless by simply adding cold water and soaking. Dehydrated food for backpacking is a convenient and lightweight option that allows you to enjoy a variety of meals while enjoying the great outdoors.
Footnotes
- https://readynutrition.com/resources/dehydrate-foods-for-long-term-storage_31032010/ ↩
- https://blog.rootsandharvest.com/how-to-store-dehydrated-food-for-long-term-storage/ ↩
- https://www.gettystewart.com/how-to-store-dehydrated-food/ ↩
- https://www.thepurposefulpantry.com/how-to-store-dehydrated-foods/ ↩
- Food DH Bible, https://www.piwine.com/media/home-wine-making-basics/weights_and_measures.pdf
- Markham, Brett L.. The Food Dehydrating Bible: Grow it. Dry it. Enjoy it! (p. 26). Skyhorse. Kindle Edition.